I love a good radio. I used to collect them as a kid, working or not, do them up, get them working and I eventually ended up with, er… lots. I’ve since scaled my collection back a bit these days to around 10 or so, quite frankly more than is healthy really.
So when someone got in touch recently with a broken DAB radio to fix, I got quite excited.
FixItWorkshop, Worthing, February’19, Bauhn DAB Radio.
These Bauhn DAB radios (available from Aldi or Lidl in the UK, I think) were on the market for about £10 and at that price they represent great value when compared to more expensive devices.
However, the one in the workshop appeared to have a problem power connector, which when wobbled, made the radio work intermittently. Suspicious.
Having already repaired a similar radio with a similar fault before, I decided to video the repair to encourage others to check theirs, if something similar happens. I hope you find it useful.
Happy fixing!
Cost of a new radio: £10. Cost of repair: One cuppa and a bit of tinker time.
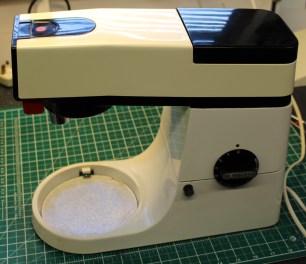
Another Kenwood Chef A901 gets the Workshop treatment…
There’s been a steady flow of poorly Kenwood Chefs through the workshop of late and the new year started off with yet another. A customer got in touch with reports of smoke coming from her Chef A901, a machine which had given years of faithful service to her family. As a result, she was very keen to see what could be done.
FixItWorkshop, Worthing, Jan’19, Kenwood Chef A901.
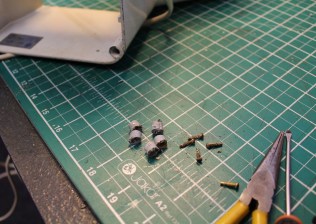
As usual with Chefs of this age, the 5 machine feet had deteriorated and now resembled squashed dry Blu-Tac, so had to be replaced. I replace the feet to most Chefs that come in. Not only do the feet prevent the machine from moving all over the place when in use, they provide a gap for air to be drawn in to the motor for cooling, so it’s essential the feet are in good condition.
FixItWorkshop, Worthing, Jan’19, replacing the feet on a Chef A901 (others similar).
The feet are inexpensive and are easy to fit. If you decide to replace yours, consider coating the existing ones with something like WD-40, a few days before you try to extract the centre pin or you risk snapping it off in the machine base, as it will likely be ceased.
On with the repair. The speed control circuitry had failed, specifically a capacitor and resistor, a common problem on older machines, had gone pop. As usual, the correct repair kit was bought and fitted. With careful soldering and a dab of heat transfer gel on the new triac and the job was complete. Nice.
With any Kenwood Chef, I always check the motor end-float, the allowable spindle movement north and south. The end float in this case was a little lose and required adjustment. A small grub screw with Allen key head allows this adjustment and with a bit of trial and error, the end float was now spot-on. Poor end float on these machines usually makes the speed control ‘wobbly’, especially at lower speeds. With this one adjusted correctly, the motor now ran smoothly through all speeds.
Job done. The owner of the machine was so pleased with my work, she even bought me a new packet of Custard Creams. Fab.
This slideshow requires JavaScript.
Cost of replacement: £400 and up. Cost of repair: £11.24, plus my time and Custard Creams!
This fix was actually carried out during the summer, 2018.
A friend of mine brought over a broken formula making machine for me to look at. It had been stored after their first child had out-grown it and since having another baby, it was now needed again, urgently. Following a couple of years in storage, it was brought out, plugged in and after briefly coming on, it failed. No lights, no hope.
These machines save time and effort by allowing water to be heated rapidly and mixed exactly with the formula powder, to produce consistent results every time, perfect for new exhausted parents in the middle of the night. So it was important that I got this working quickly.
After removing the back, I was presented with an electronic control unit, some solenoid valves and a heater, plus some other environmental sensors such as thermostats. The plug fuse was OK, so it was time to check if power was getting to the machine. It wasn’t.
This machine features a couple of power control devices; two thermal aluminium ‘can-style’ fuses in-line with the heater, plus a thermostat on the output of the heater itself (to regulate heat). After testing for continuity, it appeared that one of the can fuses had failed.
These fuses are common across a wide range of appliances, such as coffee machines, fans etc and are cheap, just a few pounds. It could be that a temporary air-lock in the heater caused a hot-spot and therefore that excess heat caused the 172 degree fuse to pop. It was worth a try to replace it and see what happened.
I replaced the fuse and re-assembled. After filling with water and powering it up, normal service was resumed.
Since I replaced the fuse, the machine has been in continuous service for many months, so I can conclude that it was probable that the over heating was temporary.
I created a short video to help others who may have similar problems with their machine.
Cost of a new machine: £90. Cost of repair: a few quid and a few beers.
Another Kenwood Chef gets the treatment in the Workshop
How about another Kenwood Chef story? I know I’ve covered this machine a few times now, but I’ll try and make it as interesting as I can. I just LOVE Kenwood Chefs.
FixItWorkshop, December’18, Worthing, Kenwood Chef A901E on the bench.
A customer got in touch with me via the FixItWorkshop ‘contact us’ link asking if I could fix his family’s much beloved Chef. While last in-use, it started smoking and smelling terminal. How could I refuse. I’m located in Worthing, but the customer was based in North London, quite a distance for a repair and would have been usually cost prohibitive using the Royal Mail. However, using local drop-off points, carriers such as Hermes and DPD offer (slightly slower) courier services for about £7.00 one way, which starts to make more fiscal sense. This is what we did.
I wish I’d taken a photo of the box the Chef came in, because the customer had clearly gone to a lot of effort to make sure it was well protected!
On with the repair.
The Chef has been in production many years and although they can often appear similar on the outside, they do vary on the inside, depending on the year of manufacture as small tweaks and improvements are made. Evolution, rather than revolution, usually the backbone of any successful design.
The A901E is different from the previous A901 as it features an electronic speed controller, rather than a centrifugal affair. While the later design is an improvement, it wouldn’t deter me from buying an earlier model; the improvement is small.
The A901E still features similar components to previous models which can and do fail, especially with age. The subject here is about 30 years old, give or take.
FixItWorkshop, December’18, Worthing, A901E, motor removed.
The motor on the A901E comes out quite easily; first remove the motor cover, remove the mains cable (disconnect first of course), remove the top cover, belt, then the four screws holding the motor in. The motor then pulls down from inside, out through the gap left by the hinge. Easy.
The motor circuit board showed traces of component catastrophe with dust and dirt left by exploding components. Nasty. Pre-empting the fault, I ordered a repair kit before I’d taken the machine apart, together with replacement feet as the ones on this machine were knackered. The kit includes capacitors, resistor and triac as these are the main components that tend to fail.
These kits are available on eBay and are worth the money as they are often cheaper than buying the components separately and they contain instructions for newbies. Here’s a little slide show showing the process.
This slideshow requires JavaScript.
With the kit fitted, the motor re-installed, mains reconnected, the Chef ran well again, this time without burning or smoking. However, all was not well as the speed control was a bit wobbly at lower speeds, which was just plain wrong. Having worked on a good few Chefs, this problem is usually down to excess end-float on the motor spindle. Working with the motor still in situ, the motor fan, which controls end-float could be adjusted with an Allen key. Sorted.
Just the replacement feet to fit and after a quick clean-up, the Chef was reassembled, ready to go home.
A top tip for you. If you intend to replace the feet on your machine and you probably should if they are old as they go hard or fall apart, then soak the area around the feet recesses with WD-40 or similar a day or so before as this will make getting the remnants of the old feet out, much easier.
Cost of a replacement: £400 up. Cost of repair: £12.65 plus my time and tea.
Christmas wouldn’t be complete without having to fix last years’ tree lights and this year was no exception. It’s a tradition I look forward to and savour.
Gone are the days spending hours trying to find a faulty bulb, now due to the wide availability of cheap LED products, the thing that’s often likely to fail is the wiring, something which was much more unusual, a few years ago. Manufacturers must make savings somewhere and I often wonder how retailers can offer new decorative lights, so cheap. Compromises must be made somewhere I guess.
Being cheap, like a lot of things, makes them more disposable, which is a shame when things fail, often for trivial reasons. This year’s blackout was caused by a couple of broken wires on the control box, which didn’t appear to have any obvious way to get inside.
We don’t like to be beaten in the workshop and sealed units and tamper-proof items are just seen as a challenge, rather than a deterrent.
Like many multi-function sets, the lights are operated via a control box with a switch, mounted in a plastic enclosure which appears sealed. The fault was obvious here, just the main wire from the transformer had broken ‘flush’ with the control box, meaning that there was not enough wire either side of the break to re-join it.
The control box has no screws nor visible clips, holding it together, so it was time to break it open, using a small flat-bladed screwdriver. The small section covering the wires snapped off cleanly, revealing several terminals covered in hot melt glue, annoyingly. This meant that before any repair, the glue must be removed. Several minutes picking this off with the screwdriver, revealed some conventional post terminals. The fix was easy from there, just cut down the wire to make a new connection, remembering which way round they went, clean up the terminals and solder back together. A little bit of fresh hot-melt glue to seal the connection and a bit more on the surface to be stuck together, and the cover was refitted. I also fitted a little heat shrink to repair to reduce the chance of the cable from breaking again.
This slideshow requires JavaScript.
As I had the soldering iron out, I also did a small repair to the control box wire to transformer plug, which had also broken. It was a case of cutting back two sides of the break, soldering, isolating with a small amount of electrical tape and sealing with heat shrink.
Now that’s all done, Christmas can now officially start.
Cost of replacement: £ 5.00 up. Cost of repair: 1 cup of tea, heat shrink, tape and solder.
Who wouldn’t love a new DAB radio for your birthday? Well, that’s what I had this year and I was thrilled to receive this Pure Evoke H2. After choosing a suitable location on my desk, I quickly unpacked it, plugged it in and…nothing. Booooooo!
The display backlight appeared to glow a little, but that was it and I was missing Today on Radio 4.
FixItWorkshop, Worthing, November’18, Pure Evoke H2 DAB radio.
To save a quite frankly dull story, the returns and replacement process offered by the company who supplied the radio was hopeless. But, after 2 months, I ended up with a replacement radio, in addition to the one I already had. The second radio worked, albeit with some fettling required to the speaker to make it sound ok (another story).
Time to dig out the screw drivers as I had nothing to lose.
Just 6 screws hold the back on and with these removed, the radio’s innards were exposed. Now, I’ve made radios from kits in the past using components I can hold with my fingers, but with this radio, the circuitry was teeny-weeny and I would have to have some luck to fix it.
I was in luck. The radio is made up like a sandwich. The front fascia is screwed to the cabinet and the back, that I’d removed, was screwed to the cabinet, from the other side. There are data-style cables between the two halves and one of them appeared to be loose. I carefully pushed the connector ‘home’ and then re-applied the power lead and wouldn’t you know it, the display lit up and it burst in to life. Now we’re talking.
Thinking I’d sussed it out, I screwed the radio back together and had about a week or two of unbroken service, until the screen froze and then nothing. Oh no.
Re-opening the back of the radio, I suspected that the tiny soldered pins on the back of the multi-way connectors on the data-style cables, had been dislodged. I have average sized hands for a bloke, but I needed tweezers to get the connectors on during assembly. I wonder how much it would have cost to add an inch or so to each cable, to make manufacture easy. As a consumer, I would have gladly paid the extra penny. I suspected that this is how the original fault came to be as it wouldn’t have taken much more than a shove in the wrong direction to break the delicate connectors, due to the short length of the internal cables.
This slideshow requires JavaScript.
Since this circuit board is a tiny stamped component affair, I had to be quick and neat with my re-soldering. Each pin to PCB connector re-soldered, cables re-attached, back screwed back on and the radio worked once more.
Pure have a reputation for easy to use, excellent sounding products. It’s just a shame they have seemingly penny-pinched on some of the internal gubbins on this model. If yours develops similar symptoms, don’t give up, take the back off and have a look.
Cost of a new radio: £40-90. Cost of repair: 5 mins tinker time, one cup of tea.
Starting a new job is always fun and when a new colleague of mine mentioned that the office vacuum cleaner had packed up, I rose to the challenge.
I’m quite fond of Dyson products as some of you know, mainly because:
They’re well-engineered, by engineers
They’re designed to be repaired easily with simple tools, which is better for everyone
Parts are readily available at reasonable prices
The DC01 was launched in the early 90’s and was Dyson’s first market clean-up, competing with the established market leaders. Although this machine is over 20 years old and Dyson no longer supports it directly, reasonable quality pattern parts are available on eBay. If you have one, love it and keep it going.
FixItWorkshop, Worthing, November’18, Dyson DC01
This one is actually an ‘Antarctica Solo’ model (grey and light blue instead of yellow), which commemorated Sir Ranulph Fiennes’ solo trek across Antarctica and raised money for Breakthrough Cancer. It had been abandoned and was moments away from the skip. I felt quite sorry for it.
Faults reported included; no suction, excess noise and smell!
The first thing to check on the DC01 is the filters, as like many other Dyson products, people forget to clean or change the filters. Both filters were totally choked and full of all sorts of detritus. A quick shake out and wash with warm soapy water and they were as good as new. Following that, I inspected the seals around the join between the cylinder and the main body. All the seals were dirty, so a clean up and quick spray with silicone spray and they were as good as new. Great.
The noise seemed to be coming from the front beater/ rollers which usually means, noise bearings. The beater on this model uses a two bearing set up. One was fine, but the other was seized. As I didn’t want to spend any more than I needed, I cleaned the bearing, after removing it and the dust cover, re-greased it with LM High-Melt Point grease (general automotive stuff) and it was ready to roll and beat again.
This slideshow requires JavaScript.
Once the filters were dry and re-installed, the Dyson ran like new again. Very satisfying.
Cost of replacement: £15 second hand, £100’s for an equivalent-ish new model.
Cost of repair: Patience, washing up liquid, two cups of tea.
On the back of a previous article about a repair I did on the rather wonderful Elna SP sewing machine, a reader got in touch. She was a genuine sewing aficionado and had several top of the range current machines, but she used the trusty Elna SP for many smaller jobs, where the other machines didn’t quite cut it.
All Elna SP machines are getting on a bit and parts are either re-manufactured, scarce or secondhand, if you can find them. Having said all that, a well-maintained Elna will run for many years and last much longer than new metal on sale now.
FixItWorkshop, Worthing, November’18, Elna SP Special, in action
The foot pedal on this machine had gone pop, bang, finito. It smelled terminal.
Knowing that parts for this machine are rarer than hens teeth and I do like a challenge, I took on the job. I’m based in Worthing, West Sussex and the machine was located in Scotland, so after a short wait, the knackered pedal arrived in the post.
The pedal is held together with four small self-tapping screws and came apart easily. The reason for failure was two-fold. The copper leaf contacts had arced excessively and caused major pitting in the contact strip (see slide show) and the probably ensuing resistance had caused the main resistor to overheat, causing the winding to fail.
This slideshow requires JavaScript.
The contact surfaces were easy-ish to fix, or rather breathe new life into as all they needed was cleaning and re-shaping. The resistor was a bit trickier to mend. Getting hold of a replacement was going to be near impossible, so the only thing to do was to try and repair it. Without that particular style of resistor, of that value, it wouldn’t work again. Luckily, there was some excess resistance wire on the thing and I managed to twist it in to the broken section. Soldering was not an option, since the wire was an alloy that wouldn’t take to solder and in any case, these things get hot in normal service. I twisted both ends of the break to form a new section, while maintaining the same length of windings on the resistor, essential if I was to match or get close to the original specification. Difficult. Luckily, after a few goes, I managed it and the applied a little heat-conducting (and therefore dissipating) paste to the join.
With the pedal reassembled, I was only able to test it with my meter, since the sewing machine was far too heavy to post. The pedal tested as a closed circuit (OK), which was a result. I then had to wait for the pedal to be collected, taken back to Scotland and tested. Fortunately, my fix worked and the machine sprang in to life, without a hitch or missed stitch.
Now, a word of caution with this one. This is NOT the best way of mending something like this and all I’ve probably done is prolong it’s life a little longer. There are generic sewing machine pedals that would work with this machine and will be fine, when this one fails in future, but that’s not the point. The main thing is that something that was broken is now working and even if it’s not the best fix, at least it will run for a bit longer. Happy days.
Cost of replacement: (generic part) £15-30. Cost of repair, my time, a bit of solder and several cups of tea.
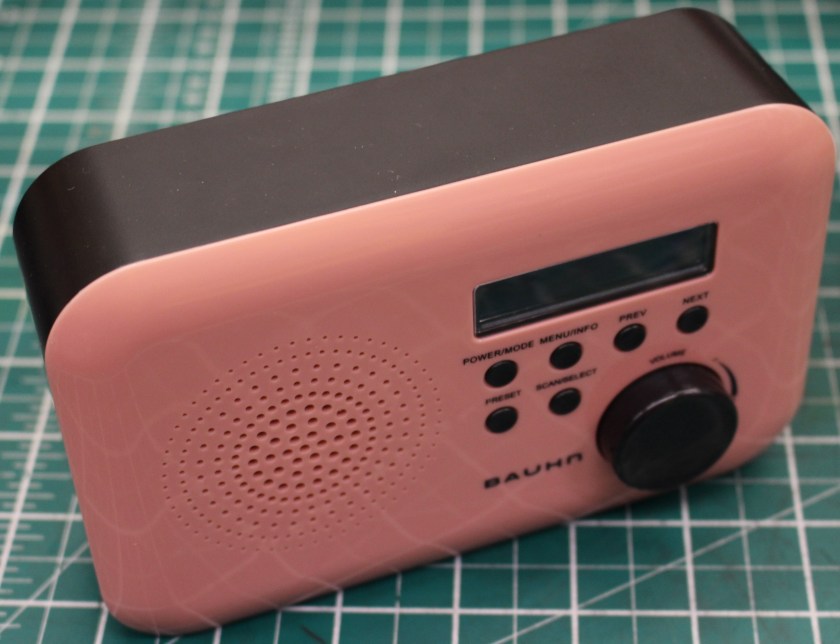
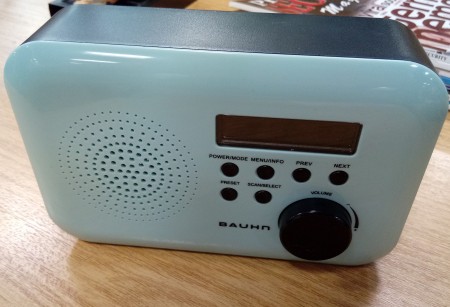
A colleague of mine brought this cool little DAB radio in to the workshop as it’s once crisp DAB tones were now no more and all life from the little device, had seemed to have ceased. It was, very much, a dead radio. When working, it picked up every station available, really clearly and seemed to out-perform the much more expensive devices my colleague also owned. However, after a few months in the hands of his son, the radio would no longer turn on when plugged in.
FixItWorkshop, May’18, Aldi Bauhn Radio, in for repair.
It was brought from Aldi for under £10, which seemed like a bit of a bargain to me. It’s amazing just how much DAB radios have fallen in price in the last 5 years or so.
FixItWorkshop, May’18, Aldi Bauhn Radio, in for repair, back of the radio.
The Bauhn UDABR-0197 (catchy name) is a compact, portable radio and is capable of being used with either a plug-in adaptor (supplied) or 4 x ‘AA’ batteries. When powering this radio using either plug-in adaptor or batteries, the little radio refused to do anything. Very sad.
I always start with the basics, so I checked the power from the plug-in adaptor first, which seemed to be delivering its 5.9VDC, pretty much spot-on. As a side note, I always check the condition of plug-in adaptor leads and plugs as they seem to almost always be made of the thinnest wire available in the Far East and prone to cracking causing poor connections. This one was fine.
Opening up the radio was really easy, just 4 cross-head screws and the two halves of the radio came apart without any major dramas.
The first thing you notice about (cheaper) small appliances like this, is the ‘lack’ of anything inside. The circuit boards in new small devices can sometimes be multi layered affairs, using micro components, making repair with normal workshop tools very difficult or impossible.
Luckily for this little radio, the designers have had the foresight to keep the power distribution board separate from the main ‘radio’ gubbins and this seemed to be of conventional construction.
FixItWorkshop, May’18, Aldi Bauhn Radio, in for repair, PCB repaired.
FixItWorkshop, May’18, Aldi Bauhn Radio, in for repair, PCB back in position after soldering.
FixItWorkshop, May’18, Aldi Bauhn Radio, in for repair, broken pins.
On closer inspection of the power distribution board, it revealed a break in two of the pins from the ‘power-in’ jack socket meaning that power would not get through to the main circuit board. The two pins were also shorting together, causing a local loop connection. This meant than neither mains adaptor supply nor battery would power the radio. Problem realised.
I was then able re-make the connection using a soldering iron on the board, reconnecting the pins to a spare section of copper detail on the power distribution printed circuit board. Very satisfying.
Once the radio was back together, all screws back in place, power supply connected, the radio burst in to life, just in time for me to listen to my favourite station. Happy days.
FixItWorkshop, May’18, Aldi Bauhn Radio, in for repair, all fixed.
Cost of a new radio; £10. Cost of repair; A bit of soldering and a cuppa plus gingernut biscuit.
My in-laws have an ornament on their drive, in the shape of a 2001 MGF roadster. I say ornament because it’s fairly stationery, all of the time. Even so, it’s battery gets topped up once in a while and the engine turned over when the urge presents itself. Because the car isn’t used, the battery’s only means of charge is via a plug-in charger, my father-in-law occasionally hooks up.
The battery charger in question is an Ultimate Speed (Lidl brand) universal battery charger. They’ve been on sale in the UK for a number of years at the £15 (approx.) mark. They’re really good value as they allow ‘smart charging’ of car and motorcycle batteries without the risk of damage at a fraction of the price of the ‘big brands’ or a replacement battery.
However, this charger decided that it wasn’t playing anymore and refused to offer it’s charging services when recently connected to the MG’s flat battery. On it’s way to the great bin in the sky, I managed to divert the charger via the workshop.
Once connected to the mains, the standby light illuminated, indicating something was actually happening, but upon connecting the low voltage side to a battery, making a charge selection via the single push-button switch, nothing changed and the whole unit remained on standby. Pretty annoying.
Luckily, I have the triangular screwdriver required to undo the six screws that hold the (IP) ingress protected casing together. Triangular screw heads are annoying and pointless as they prevent, in my opinion, people with a basic tool set having a go at a repair like this. If you do fancy getting one of these tools, they are easily available on Amazon and eBay.
FixItWorkshop, March’18, Ultimate Speed (Lidl) Battery Charger, all components cleaned before reassembly.
On with the fix. With the casing opened up, my first port of call was with the switch itself. Past experience has taught me to 1; start with the easy stuff and 2; these push to make switches fail all the time. They’re in everything from door bells to cookers at the moment and when faulty, make the most expensive item and expensive paper weight in the blink of an eye.
To test the switch, I connected the charger to the mains and hooked up the low voltage end to a battery and simulated the button push switch by shorting out the switches connections on the circuit board. Hey presto, the charger worked perfectly, every time. The switch either needed repairing or replacing.
Because I’m a skin-flint, I opted to see what could be done with the present switch. With care, these switches can be prised apart, using a sharp knife and the insides cleaned. I took the switch apart which revealed nothing more than slightly corroded switch surfaces. I can only assume that the product’s bold IP rated claim is a little over exaggerated and that some damp had wriggled its way to the switch and mucked it up. With a cotton bud and switch cleaner, the switch surfaces scrubbed up like new and I re-assembled the switch lever and securing plat using a soldering iron to re-melt the plastic nubs holding the switch together. No one would ever know it had been in bits.
With the circuit board returned to the housing, all six screws done up, the charger was back to rude health once more and ready to tend to the stranded MGF.