Keeping a light on the subject

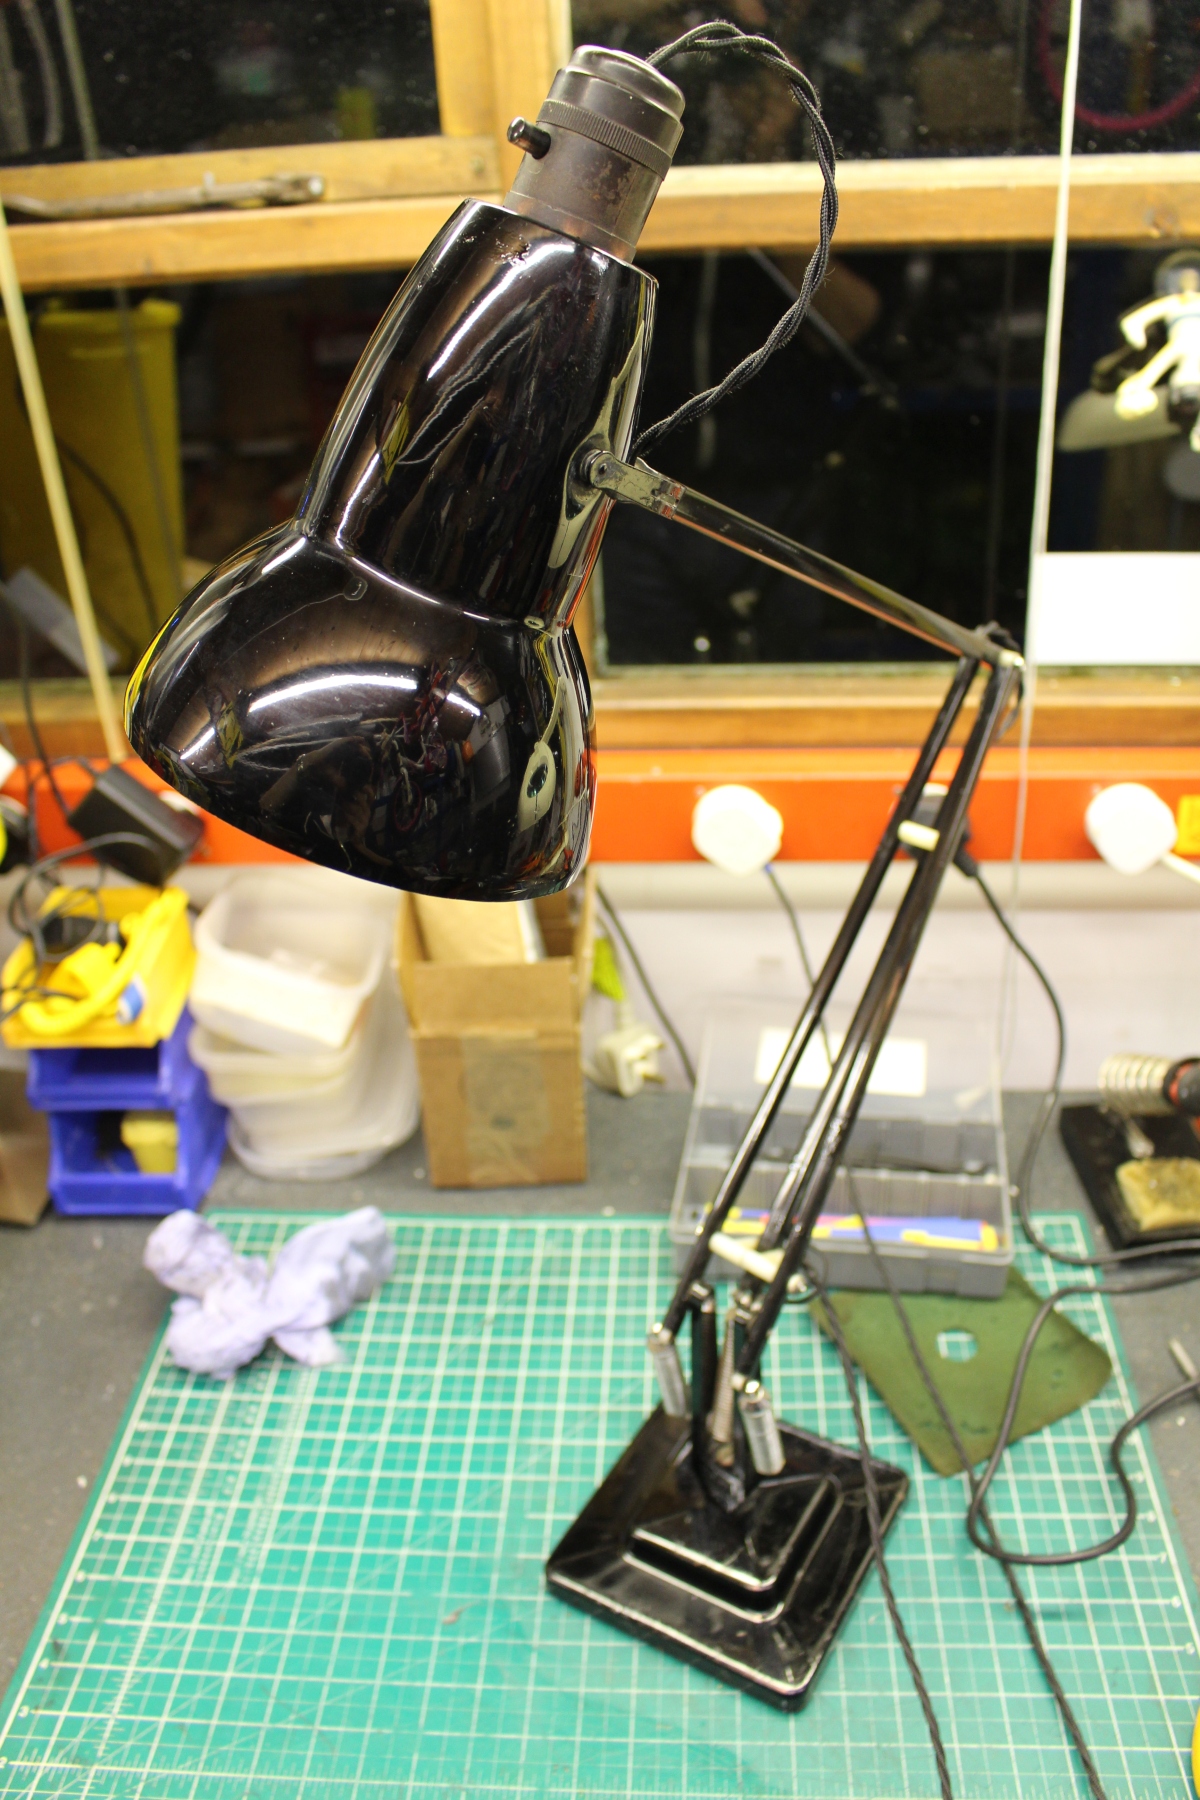
A Herbert Terry 1227 lamp gets a light make over in the workshop.

This lamp needs no introduction.  Herbert Terry Ltd first produced ‘Anglepoise’ lamps in England from 1934 and this 1227 model is instantly recognisable, with its art-deco characteristics and perfect proportions. Some of those early examples have survived to today and are now very collectable.

Make and model: Herbert Terry 1227 ‘Anglepoise’ lamp

Fault reported: Wiring requires replacement

Cost of replacement machine: £80.00 -£300.00 for an equivalent

Manufacturer support (in the UK): 8/10

Cost of parts (for this repair): £20.00

My time spent on the repair: 1.5 hours

Tools needed: Small knife, pliers, small screwdrivers, soldering iron, cutters, scissors

Sundry items: Cable, heat shrink, impact adhesive

Cleaning materials: Silicone spray, contact cleaner, wipes

Repair difficulty: 5/10 (fiddly)

Beverages: 2 teas

Biscuits: 2 chocolate digestives

Bad language: 4/10

My customer contacted me to ask if I could overhaul his family’s Anglepoise lamp and had told me that it was in daily use, but they all felt that the wiring was getting on a bit, and therefore they’d lost confidence in it. In other words, they were worried about a small fire or electrocution.

That’s the trouble with old, well-made stuff like this. Often, on the outside, it all looks fine and sturdy with a quick clean up, and it’s easy to forget that some things are as old as they are. But, one has to bear in mind that after all that time here on earth, things like plastics, rubber grommets and wire insulation break down with age and can be damn right dangerous. 

At 70 years old, this lamp was not in mint condition, but had been well looked after. It was still complete, with its original Bakelite bayonet bulb holder and switch, which is a rarity as they often crack. Over time, they get replaced with ‘B&Q special’ items, which never look right. Sadly, the original lamp holders are no longer available, but there are good alternatives out there, which will do the match well, if you know where to look. No issues with this one as it was all in very good order.

So to the brief; give it clean up, remove some rust, replace the worn-out felt base and re-wire, without over-restoring it. After all, it was wearing its age well, and a total re-spray would have removed all the ‘patina’.

Only a basic tool kit was required with this job, nothing fancy but with things like this, I tend to use a penetrating oil on all metal moving parts as rust and fatigue can make some fixings fragile. After all, I don’t want to add unnecessary cost to the job and while the oil is doing its thing, I can always have another brew, so there’s really no excuse not to do this. Only fools rush in and all that.

After I stripped all the old wire out, paying attention to the correct cable routes, I cleaned up anything previously covered up by the old cable. New modern fabric-covered plastic flex is available at a reasonable price, so that’s what I used and while there, I took the time to earth the frame of the lamp as a ‘Class One’ device. Technically, with a plastic/ Bakelite bulb holder, this isn’t required, but as I had some three cored cable, I decided to earth the metal base as a precaution. It couldn’t do any harm.

Normally I like to preserve as much as I can of the original parts, but in the case of the felt base, it was knackered. I could have just glued it back on, but that wouldn’t have done it justice. So, after a little raid of my daughter’s craft kit (which is full of off-cuts and felt) I had the perfect green felt, ready to be cut to size and glued in place. No one wants a scratchy base and once set, no one would ever know that the thing I’d just made, wasn’t a stock item. I was quite pleased with it.

A new LED bayonet 40W (equivalent), some light polishing, and a PAT (test) and this lamp was ready to be used daily, once again.

Until the next time…

Inside The Real Repair Shop 11: Lego, Radios and Allegros

This time, Matt talks about cars on fire, tinkering and repair education.

Festive greetings from the workshop and well, hasn’t the year flown by?

As some of you know already, repair work is a bit of a side-hustle for me, and it’s something I’ve enjoyed since I was a child. Seriously, I would dismantle my parents’ vacuum cleaners, radios, clocks and later, the family car’s engine. Things sort of got out of control when I set fire to my uncles’ Austin Allegro though by muddling up some dashboard wires. Fortunately, the Allegro was made of stronger stuff and survived my handy work, despite a few scorch marks. Anyway, what were they thinking, letting an 8-year-old work on a car unsupervised!

For me, a long-long time ago now, a Fisher Price handyman set turned into Lego building and craft play using old washing up bottles and loo rolls. This turned into blowing up electronics kits, which then moved on to building bikes and cars.  As a late teenager, I then got an apprenticeship with BT and studied while I learned about telephone exchanges and communications technologies. All of this might explain why I was never picked for the school team. You can’t have it all, I guess.

Playing with Lego and kits from Tandy (remember them?) for me as a kid definitely helped me to have a positive approach to repair and to not be fearful of getting it wrong. We only really learn from mistakes, of course. And I was lucky to have people around me at the time who were (mainly) happy with me dismantling household things with real tools, taking risks with real appliances and building weird inventions in the kitchen. But it wasn’t all good-humoured in our house! I still remember getting a stern telling off for dismantling a Mini carburettor on the draining board, next to the family’s drying crockery. My mum was upset with me for some reason.

Where’s all this going anyway? Well, as an adult who sometimes acts all grown-up, I’ve since had time to reflect on this maybe unusual set of circumstances, which ultimately lead me to where I am now in Worthing, at 44 years of age. I make no apology for being a pushy parent to my two daughters, encouraging them to create and build stuff; from toilet rolls and sticky tape to their increasing collection of Lego sets, or are they really my Lego sets? I want my kids to learn as I did, the joy of building, testing and usually failing to solve problems. It doesn’t always work like that, but you know what I mean.

I get a wide range of repair enquiries in my inbox, from Kenwood Chef restorations to lamp re-wires to kids’ toy repairs, many enquiries with interesting back-stories too. But sometimes I just can’t take on a repair if I feel that it can be done by the person enquiring. For example, fitting a new plug to an appliance, which I feel, if needed, should be attempted by most folk. The main issue affecting many people, and therefore preventing them from tacking the job themselves, is a lack of confidence. I see it all the time, from vacuum cleaners that just need minor adjustments or cleaning, to lamps that only need a new bulb.  When people ask me to do repair work like this, I’ll always give them the option to do the work themselves first, with some guidance – which probably isn’t good for business, but will ultimately help that person to maybe help themselves.

Of course, as adults, there are local repair cafés, DIY college courses and YouTube that can help any budding diy’er, but to be truly repair savvy, I believe that one must start their learning younger and begin through play and the classroom.

In this article, I wanted to share some of my educational thoughts on repair.  Appliance repair and general household maintenance isn’t covered as a subject at school (in the UK) to my knowledge, and as we make it to adulthood, we’re just expected to figure it out for ourselves or ask someone else. The closest we get to repair work in secondary school is in Design Technology, but hoover teardowns and rebuilds are not covered.  Is this because it’s perceived as unglamorous, basic, simple work, I wonder? Perhaps it’s something I’ll take up with the current Education Secretary, although I’ll have to be quick, as it may all change next week! In all seriousness, our education system needs to encourage practical self-reliance, encompassing repair, if our government is truly serious about sustainability and our environment.  In the same way that secondary school mathematics should include topics on mortgages and loan applications, technology subjects should also encompass domestic appliance fault-finding and furniture assembly education, alongside more classical topics so that our children today turn out as adults tomorrow, who can, at least, wire a plug.

Until the next time…

Magimix 4200XL – safety as standard

A little bit of ‘shed magic’ to rescue a Magimix 4200XL

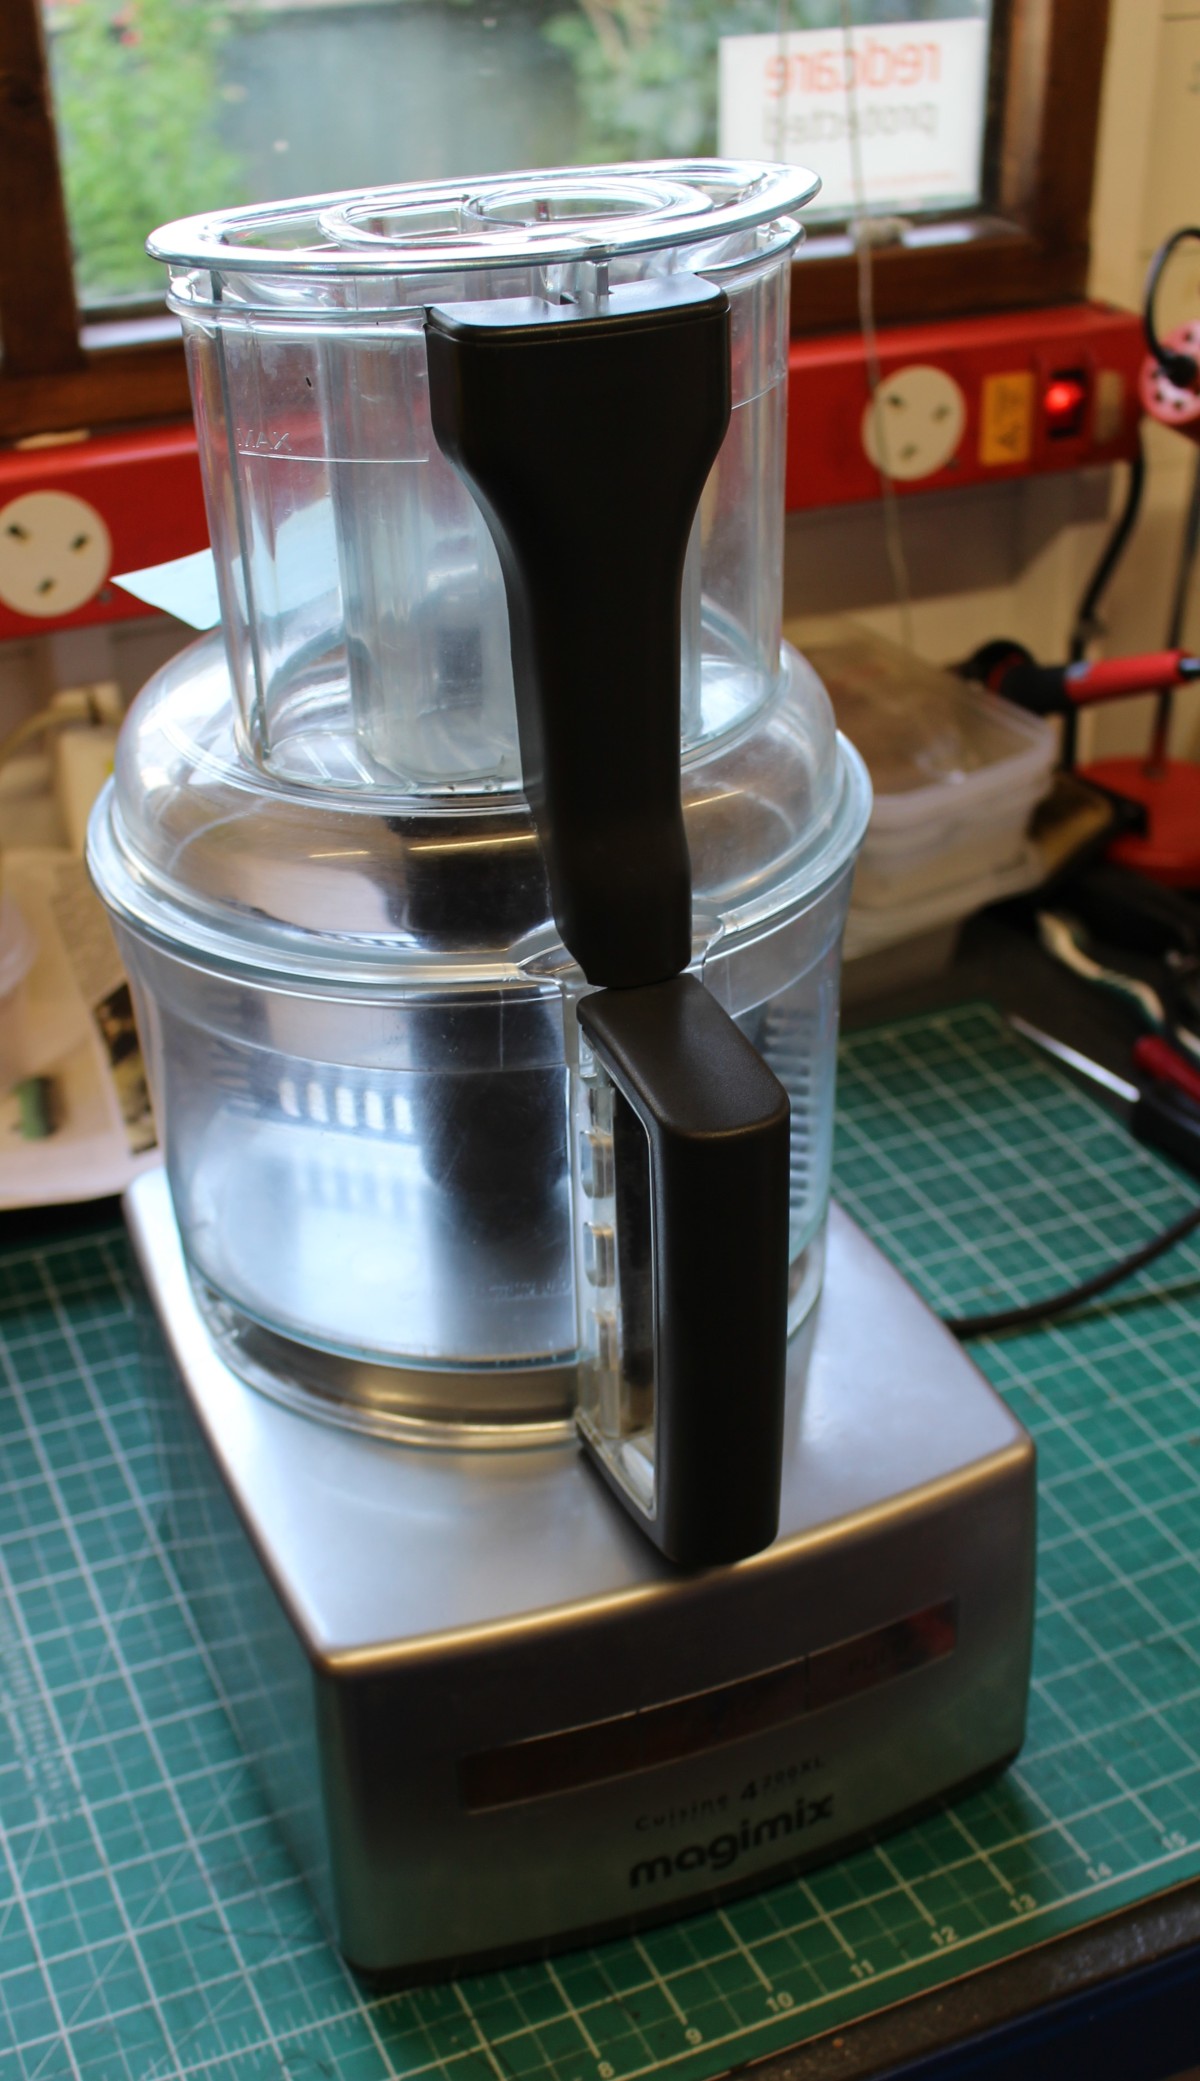
Like everything else, food mixers come in all shapes and sizes and there’s a make and model on the market to suit all applications, tastes and budget. Magimix have been around for a long time and make premium mixers for the wannabe chef. These mixers specialise in chopping and slicing and tend to be more specific in task over, say, a traditional bowl mixer. The Magimix 4200XL is a current model at the time of writing and is all yours for around £300. When whisking something delicious in the kitchen myself, I prefer a traditional Kenwood Chef, but if I was regularly chopping veg with NASA micron-precision, I can see why a mixer like this might appeal. Since I’m a bit of a salad dodger, the need for this has never arisen.

Make and model: Magimix 4200XL

Fault reported: Not running

Cost of replacement: £300

Manufacturer support: 4/10

Cost of parts (for this repair): £0.00

My time spent on the repair: 1 hour

Tools needed: Screw drivers, pliers

Sundry items: None

Cleaning materials: Silicone spray, damp cloth

Repair difficulty: 3/10

Beverages: 1 X tea

Biscuits consumed: 2 X custard creams

The owner of this mixer reported that despite every effort to press buttons and click the safety catch on the lid, the mixer simply wouldn’t comply when switched on. Dead as a dodo.

FixItWorkshop, Worthing, November’20, Magimix 4200XL, inside the mixer’s safety switch.
FixItWorkshop, Worthing, November’20, the 4200XL features a motor with oomph!
FixItWorkshop, Worthing, November’20, Magimix 4200XL, removing the base.
FixItWorkshop, Worthing, November’20, Magimix 4200XL, these little horrors are designed to deter repair- I dislike them immensely.
FixItWorkshop, Worthing, November’20, Magimix 4200XL, the repaired mixer.
FixItWorkshop, Worthing, November’20, Magimix 4200XL, the cheeky little safety switch.

The owner of this machine reported that their beloved Magimix 4200XL was playing up and despite trying to wriggle, jiggle, shake, rattle and roll things, it simply wouldn’t comply and work. They asked if I would take a look at it for them before it was launched out of the window. There’s nothing like a frustrated owner.

The Magimix 4200XL features a really rather elegant, totally passive, safety device to ensure that one isn’t tempted to operate the machine without the lid fitted correctly, risking one’s little pinkies. A simple sprung lever mechanism built into the lid and jug matches a small recessed switch in the machine’s base. The machine will only fire-up once the lid is in place on the jug, which must be correctly aligned on the base. It’s a nice touch that probably keeps Magimix out of the courtrooms.

On first inspection, I decided that this mechanism was a reasonable place to start my investigations. After you’ve checked things like ‘is the power on’ it makes sense to ‘start simple’ and go from there.

Taking the base cover off only involved four Torx screws, the damned anti-tamper kind. Luckily I have the technology to do this.

Taking the base cover off revealed good access to the safety switch mechanism. Thankfully.

The mechanism all seemed correct and present, which was a bit of a guess since I’d never worked on a mixer like this before. However, a lack of loose parts rattling inside is usually a good sign. Phew.

Despite appearing OK, the operating safety switch lever did seem stiff, so a quick spray with silicone lube had things sliding nicely once again. A quick continuity test of the switch proved that it was switching OK. Things were starting to look up for ‘Maggy’.

Since I had the lube out, it made sense to clean up the jug and lid mechanism and give that the same treatment. It all seemed to work better after and testing the lid and jug, refitted to the base with the base cover removed allowed me to visually confirm that the safety switch mechanism was indeed doing its thing correctly once again. A good result.

After carefully reassembling the base cover, taking care not to damage some of the more delicate plastic parts, it was ready for testing. There’s always a little moment of ‘will something go bang’ when I switch things on for the first time, but luck was on my side as the motor spun up as Magimix intended. A good result. All fingers intact.

Check your plug! A simple Miele PowerLine Vacuum Cleaner repair

Mains plugs lead a hard life, make sure yours are safe. If they are damaged, replace!

Before and after…

A quick 15-minute job, with a satisfying result.

Sometimes, it’s not a complicated fault preventing an otherwise good machine from working.  It’s just a case of taking the plunge and getting stuck in as the owner of this vacuum cleaner had proved.

Make and model: Miele PowerLine Vacuum Cleaner

Fault reported: Not running/ occasional sparks(!)

Cost of replacement: About £139.99

Cost of parts: £0.00

Hours spent on repair: ¼

Tools needed: Cutters, screwdriver and soldering iron

Sundry items: Silicone spray, T-Cut

Repair difficulty: 1/10

Cups of tea: 1

Biscuits: 1 Ginger Nut


IMG_0300
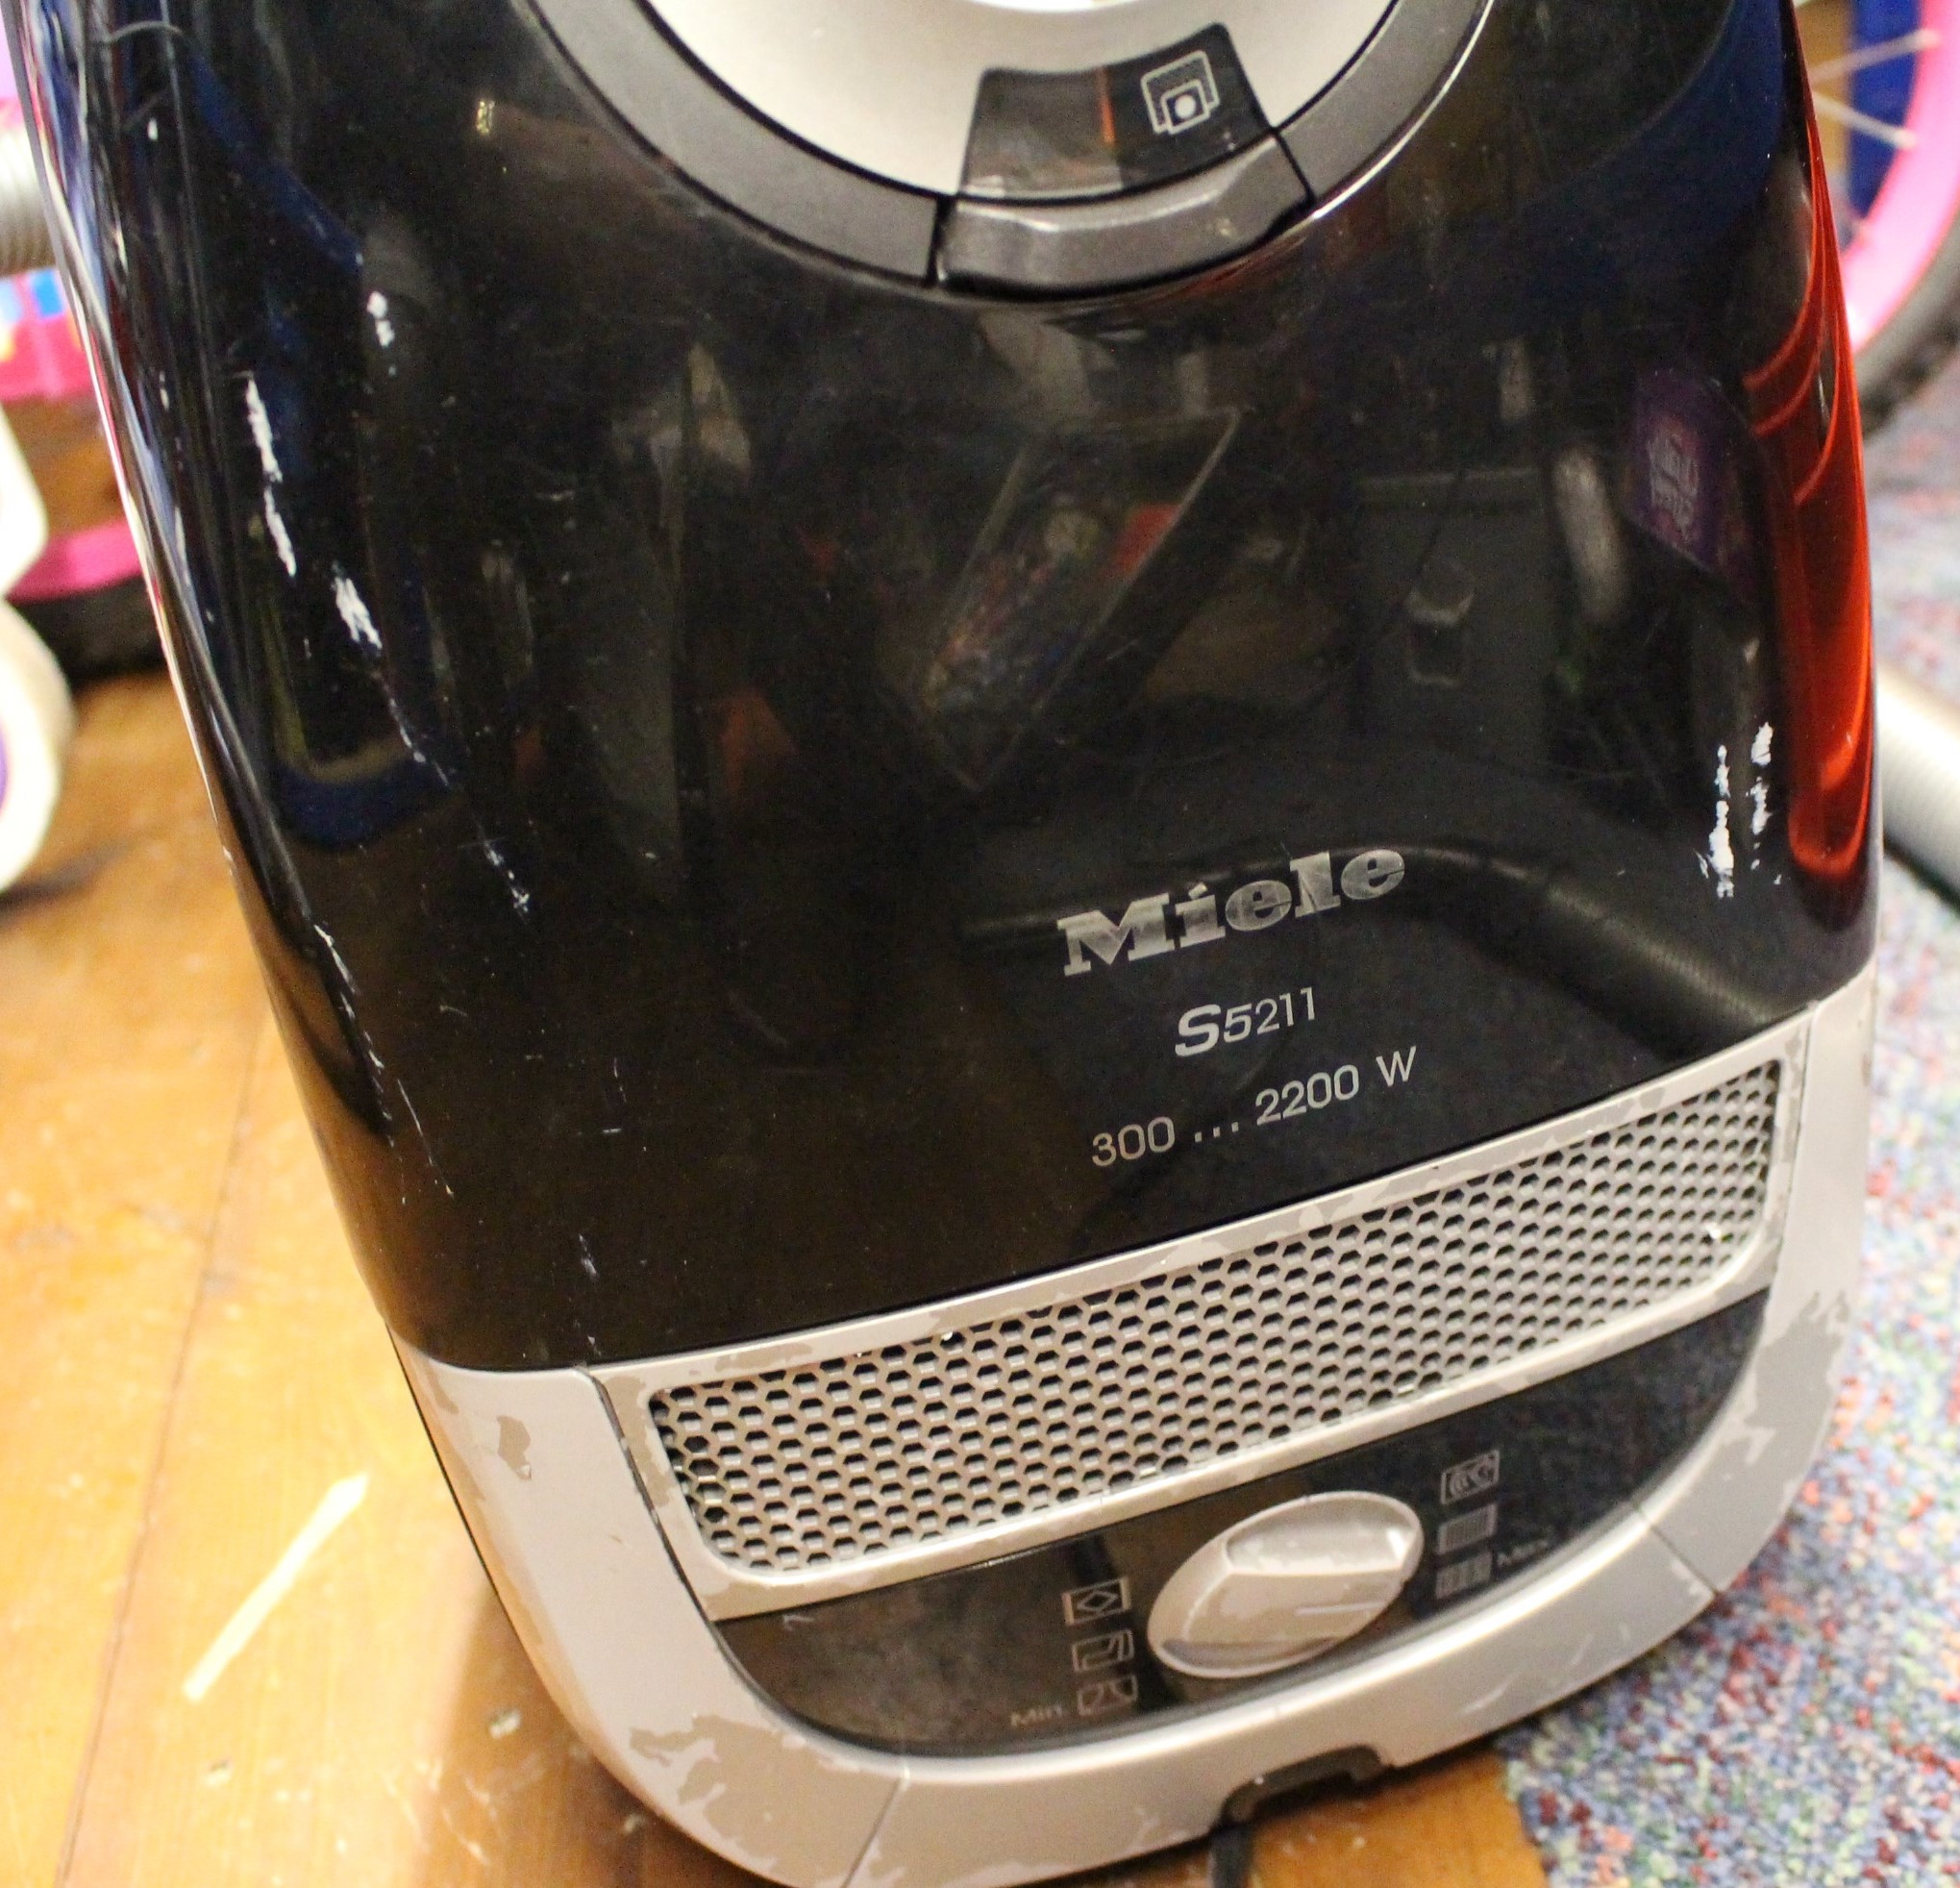
FixItWorkshop, Worthing, November ’19, Miele S5211 Vacuum Cleaner.

Sometimes the simplest things are the best.  This machine had been working well when sparks began coming from the mains plug.  The owner had reacted quickly by turning off the power and then removing the plug from the wall socket.  Good job.

The owner then bought a new plug from a local hardware shop to replace the damaged (cracked) plastic plug fitted.  She then fitted the new plug to the vacuum cleaners’ flex but nothing happened when she switched it back on.  Frustrating!  It’s reassuring to hear that folk still bother to get screwdrivers out and attempt a repair.  It makes it all worthwhile.

When I saw the vacuum cleaner and heard the back story, I immediately inspected the plug wiring and spotted that a bit of insulation was still trapped on the live connecter, preventing the electrical connection.  30 seconds with a pair of cutters and a small flat blade screw driver and the machine was working again.

Me being me, I then decided to give the Miele’s plastic casing a quick polish with T-Cut and wax, to bring it up to the correct standard.

It made me think:  How often do people change plugs these days?  Not often.  So, if you’re wondering what the correct position of the wires should be, it’s this (UK specification).

Capture
FixItWorkshop, November’19, UK plug – not my image.

General hints

  • Make sure all screws are tight
  • Ensure the cable grip clamps the cable insulation
  • Don’t trap wires in between the casing

If in any doubt, consult a friendly shed-dweller or spanner spinner.

Tommee Tippee Perfect Prep Problems

The right formula for a poorly Tommee Tippee Perfect Prep Machine

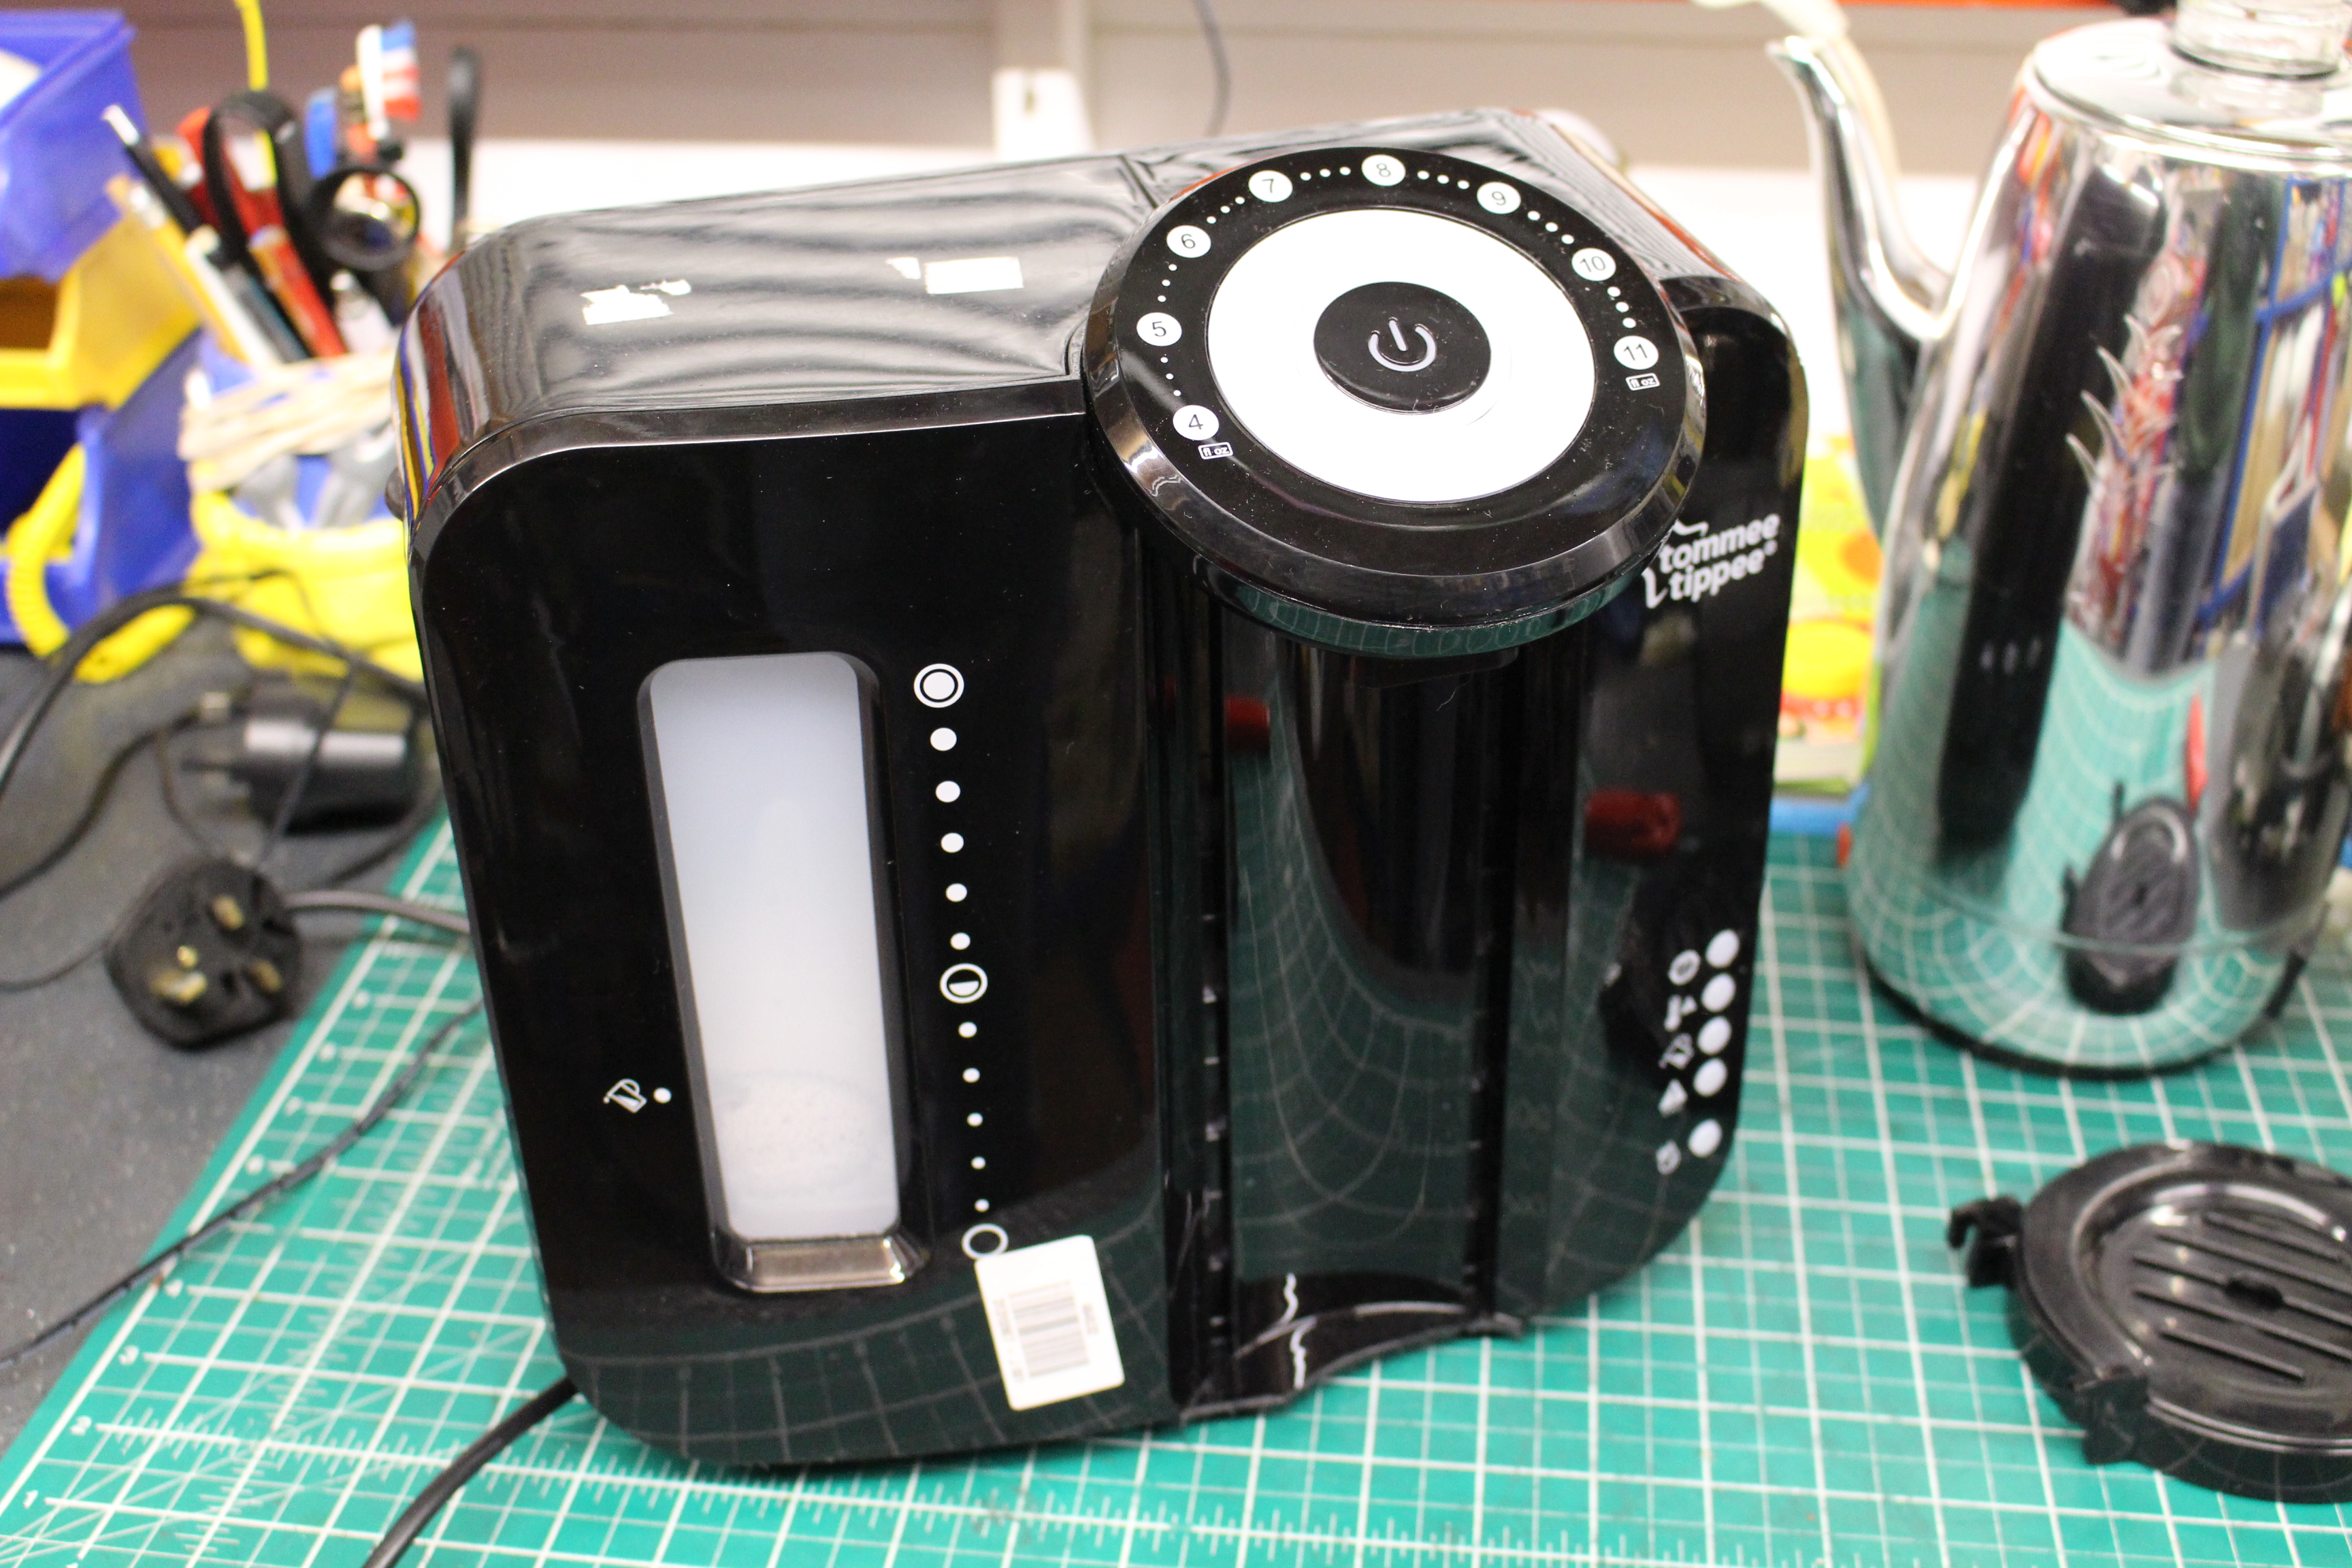
The owner of this Perfect Prep machine had reported that it had not been used for a while, then filled with water, powered up and … nothing.

Make and model:  Tommee Tippee Perfect Prep

Cost of replacement:  £70

Cost of parts:  £3.69 (plus my time)

Hours spent on repair:  1 (plus testing)

Repair difficulty:  6/10

IMG_8972
FixItWorkshop, Worthing, June’18, Tommee Tippee Perfect Prep.

I’ve repaired a machine like this before and I already had a theory about the problem, which went like this:

  • Machine not used for a while; watery scale deposits built-up in machine
  • Machine filled with water, with possible air-lock present
  • Air-lock causes bubble in heater, causing it to temporarily over-heat, safety thermal fuses blow

Dead machine.

At this stage, it was only a theory, so the only thing to do was to start wielding screwdrivers.

A few quick checks revealed that mains power was not getting to the main controller in the machine, which indicated that the safety thermal cut-out fuses had failed.  There are two on this machine.  A quick test with the multi-meter confirmed that both had failed.

After some dismantling, both fuses could be removed from the wiring harness.  Fuses like these are not available from the high street usually, but they are readily available online.  The manufacturer had used crimps to attach the fuses to the wiring, but I decided to solder the new ones back in place.  Care had to be taken as the melting point of solder is very close to the thermal rating of the fuses, so I came up with the idea of using a damp cloth wrapped around the fuse while doing the soldering.  A bit tricky!

Both fuses replaced meant that the unit powered-up and worked.  Great.

However, I wasn’t totally convinced that an air-lock wouldn’t happen again so I looked deeper at the machine’s plumbing.  There appeared to be a kink in one of the boiler tube feed pipes, so I decided to cut some material away, to prevent the pipe restricting water flow in future.

This slideshow requires JavaScript.

All back together, the machine worked well once again.


A bit of 70’s fun: Sona J996 Coffee Percolator

An office find, escapes the scrap yard.

Despite the 1970’s kitsch-ness of the electric percolator, they are very good at making coffee and the delightful coffee smell you get when brewing-up is sublime.  Here’s an advert from the time.

Top tips for keeping your coffee percolator in good order:

  • Descale using a kettle descaling solution as needed
  • Keep the coffee strainer clear of debris
  • Make sure the lid always fits between the strainer and the percolator body

A colleague found this percolator while clearing out an abandoned office cupboard.  I suspect that this one might have been bought as a wedding present way back and had ended up in the office when someone had decided play the role of barista at work.

It was missing its power lead and was headed for the recycle bin, when I intervened.

The power lead needed was an obsolete design used on British appliances of the era and was similar in design to the more modern and current, IEC C13 or ‘kettle lead’.  However, modern kettle leads did not fit this percolator.

More drastic action was needed.  Luckily, I had an old appliance I no longer needed, so I scavenged a board mounted IEC C13 socket from it and replaced the one originally fitted.

After some soldering and a bit of jiggery-pokery, this Sona Percolator now brews coffee using an up-to-date power lead.

This slideshow requires JavaScript.

Cost of replacement:  £40.  Cost of upgrade: £0.

The heat is on…

Dimplex DX300T heater gets repaired in the workshop.

I acquired this Dimplex heater as the previous owner had reported that it had tripped their electrics and smelled of burning, it was perfect material for the workshop.  The owner had given up on it and I felt like I could give it a second chance.  This is the usual way we end up with much of the stuff in our home.

Now, this heater is only a few years old and on the face of it, it looked in reasonable condition, with just a couple of scratches, so it would be a shame if I couldn’t get it working.

With electrical faults like this, I always check the basics; the condition of the flex and mains plug etc.  I then measure for resistance to earth from either live or neutral to see if there has been any electrical shorts, that would have triggered the reported fuse incident.  All clear.

Through the top heat vent, I had a quick look at the inside of the heater to see if any stray paperclips or other metallic item had found its way to the heating element or wiring creating an electrical problem, again, all clear.

Upon checking the mains plug again, something didn’t seem quite right.  It felt a little ‘warped’.  I’d already checked the fuse for continuity via the live and neutral (there was resistance), but it was time to take it out to have a proper look.  The plug on this heater was a ‘moulded-on’ type, with no screws and the fuse carrier was accessible from the outside, should it need replacing.  Upon levering the fuse holder out, the plastic carrier sheared off, revealing burned plastic and signs of melting.  The plug was toast.

I decided to break the plug cover off and see what was going on.  The plug had ‘run hot’ for some time causing the casing to melt and smoulder and the excess heat had probably caused excess resistance, exacerbating the problem, making the previous owners’ electrics to go pop.

This slideshow requires JavaScript.

With the cover ‘broken off’ the plug, I was then able to cut back the internal connections and remove the cable from the mouldings, without sacrificing the cable length, which was a good job as the flex was quite short anyway.

I always keep a few replacement ‘quality’ mains plugs in the workshop for occasions like this, as not all moulded plugs are terribly well made and the melted one I had here was a good example of what can happen when the quality of the plug can’t match the potential current flow required.  The heater is rated at 3K Watts (max), which would mean a current of 12.5 Amps, which is close to the 13 Amps fuse fitted.  Poor quality materials and connectors would generate excess resistance and therefore heat.  The resistance was probably detected by the sophisticated minature circuit breaker in the previous owners’ electrics board, which was a good job as who knows what could have happend if the plug had been next to something flamable.

With a new plug fitted, the old fuse re-fitted, the heater sprung to life and didn’t seem to draw excess current when checked.  A nice cheap fix and I didn’t even have to take the heater apart.

Cost of a replacement heater:  £50 (circa)  Cost of repair:  One cup of tea.

Aldi Bauhn Radio with no power

A cheap radio gets a cheap fix.

I love a good radio.  I used to collect them as a kid, working or not, do them up, get them working and I eventually ended up with, er… lots.  I’ve since scaled my collection back a bit these days to around 10 or so, quite frankly more than is healthy really.

So when someone got in touch recently with a broken DAB radio to fix, I got quite excited.

IMG_8145
FixItWorkshop, Worthing, February’19, Bauhn DAB Radio.

These Bauhn DAB radios (available from Aldi or Lidl in the UK, I think) were on the market for about £10 and at that price they represent great value when compared to more expensive devices.

However, the one in the workshop appeared to have a problem power connector, which when wobbled, made the radio work intermittently.  Suspicious.

Having already repaired a similar radio with a similar fault before, I decided to video the repair to encourage others to check theirs, if something similar happens.  I hope you find it useful.


Happy fixing!

Cost of a new radio:  £10.  Cost of repair:  One cuppa and a bit of tinker time.

Christmas blackout

A Christmas treat for me…

Christmas wouldn’t be complete without having to fix last years’ tree lights and this year was no exception.  It’s a tradition I look forward to and savour.

Gone are the days spending hours trying to find a faulty bulb, now due to the wide availability of cheap LED products, the thing that’s often likely to fail is the wiring, something which was much more unusual, a few years ago.  Manufacturers must make savings somewhere and I often wonder how retailers can offer new decorative lights, so cheap.  Compromises must be made somewhere I guess.

IMG_20181215_112843
FixItWorkshop, December’18, Worthing, Christmas Lights.

Being cheap, like a lot of things, makes them more disposable, which is a shame when things fail, often for trivial reasons.  This year’s blackout was caused by a couple of broken wires on the control box, which didn’t appear to have any obvious way to get inside.

We don’t like to be beaten in the workshop and sealed units and tamper-proof items are just seen as a challenge, rather than a deterrent.

Like many multi-function sets, the lights are operated via a control box with a switch, mounted in a plastic enclosure which appears sealed.  The fault was obvious here, just the main wire from the transformer had broken ‘flush’ with the control box, meaning that there was not enough wire either side of the break to re-join it.

The control box has no screws nor visible clips, holding it together, so it was time to break it open, using a small flat-bladed screwdriver.  The small section covering the wires snapped off cleanly, revealing several terminals covered in hot melt glue, annoyingly.  This meant that before any repair, the glue must be removed.  Several minutes picking this off with the screwdriver, revealed some conventional post terminals.  The fix was easy from there, just cut down the wire to make a new connection, remembering which way round they went, clean up the terminals and solder back together.  A little bit of fresh hot-melt glue to seal the connection and a bit more on the surface to be stuck together, and the cover was refitted.  I also fitted a little heat shrink to repair to reduce the chance of the cable from breaking again.

This slideshow requires JavaScript.

As I had the soldering iron out, I also did a small repair to the control box wire to transformer plug, which had also broken.  It was a case of cutting back two sides of the break, soldering, isolating with a small amount of electrical tape and sealing with heat shrink.

Now that’s all done, Christmas can now officially start.

Cost of replacement: £ 5.00 up.  Cost of repair: 1 cup of tea, heat shrink, tape and solder.