Inside the Real Repair Shop 6

If it looks like it might come in handy, then it probably will…

Rubber bands, toothbrushes and cat food

This time in the workshop, I thought I’d give you a behind the scenes glimpse into just some of my repair world, by sharing some of the shed-tastic-things that I do regularly to save things from the dump.

Before we start and without meaning to sound pompous, repair is sometimes a bit of an art.  When manufacturers no longer make something, or the part you need never existed in the first place, it can sometimes mean getting creative in order to make something function again.  This takes time of course and can even lead nowhere, but it ain’t half-satisfying when it all works out.  Google a problem and there’ll be a link, video or picture explaining an appliances’ issue and maybe a quick-hack repair (if you’re lucky), but it’s often the humble tricks of the trade, which breathe new life back into something. 

Hanging on to ‘useful’ repair nick-nacks also requires almost concerning levels of organisation, which can mean more expense on things like containers and storage. I’m allergic to more cost.  But by using ‘free’ packaging that comes with many everyday consumables, one can save cash by repurposing. Still with me, thought so.

As you might have guessed by now, I dislike waste immensely and will always do my best to avoid it.  So, here is my random, if not weird, top five cash-saving, waste-busting, possibly ingenious ideas even, that might just serve you well too.  And remember, if you don’t use any of the following suggestions for repair, there’s nothing like doing a bit of junk modelling to pass the time on a cold winters’ night.

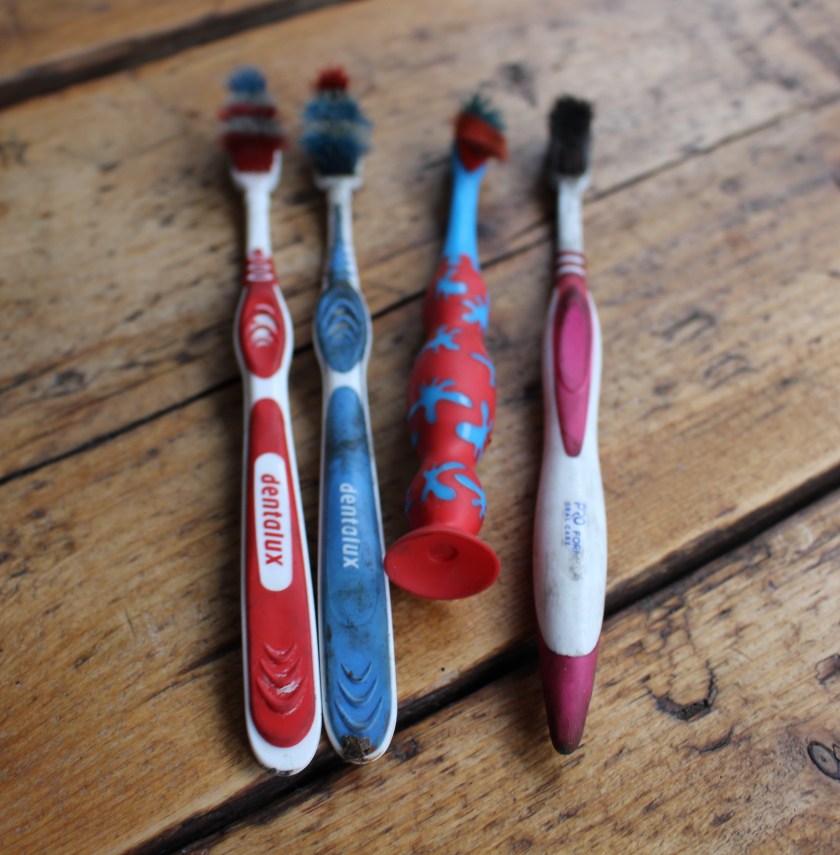
Five – old toothbrushes

We all (hopefully) use them, but I fear that far too many only hang around in bathrooms. So, stop throwing them in the dustbin, when it’s time for replacement.  Why?  Well, where do I start, quite frankly.  Dirt and corrosion are the curse of many a broken lamp, bike and dust sucker. Toothbrushes make excellent cleaning tools by using the brush in small crevices, on bike chains, on electrical switches, or on vacuum cleaners.  I could go on.  Cut the brush bit off, and you have an excellent scraper, again, ideal for cleaning. Toothbrushes are usually made from high-grade plastics and have excellent properties. Many a time have I fashioned a plastic part from an old toothbrush handle.

It’s not just me finding new life in old toothbrushes. My good friends and fixing supremos, Danny and Karen Ellis (aka @menditaussie) in Oz, have also come up with some very useful re-purposing ideas. See video below. Give them a follow.

FixItWorkshop, Worthing, January 2022 – Featuring MendItAussie’s handiwork, with kind permission.
FixItWorkshop, Worthing, January 2022, Don’t forget your toothbrush.

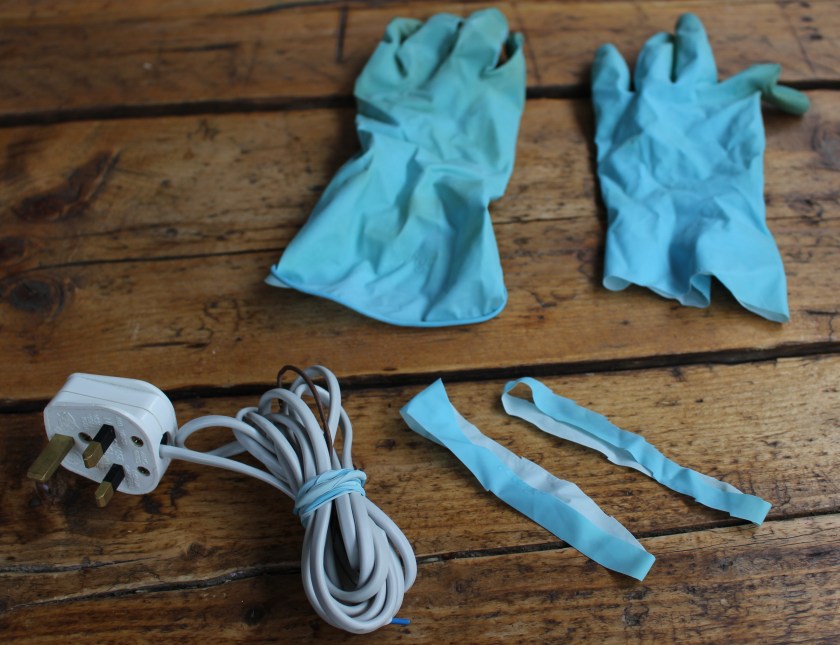
Four – torn washing-up gloves

Stop sniggering at the back, old rubber gloves (the Marigold type) can be re-purposed for many useful things, where elasticity and waterproofness are two qualities needed.  I favour making rubber bands from them.  Yes, you heard correctly. The next time your favourite flowery rubber gloves spring a leak, why not cut the arm bit down into slices, and you have a healthy supply of rubber bands. I use rubber bands to neatly store appliance flexes, before customer hand-over, it’s just more professional. Neat eh?

FixItWorkshop, Worthing, January 2022, making rubber bands from old rubber gloves.

Three – take away pots and lids

Endless possibilities for these!  The plastic ones make excellent batch cooking meal containers for the freezer as many will know, but what you might not have considered is that plastic lids also make a really good base to cut out small plastic templates, brackets and covers for all sorts of small repair jobs.  Low-tech it may seem, but I’ve lost count of the times that I’ve made pretty decent replacement parts from old pots this way.  I’ve even made lamp shade brackets from shampoo bottles and cosmetic pots, which tend to be a bit thicker and can be used when a superior finish or strength is required.

Two – empty coffee tins

We’re all coffee aficionados these days, and manufacturers have responded to the market’s expertise and perhaps snobbiness with some very funky packaging. I love funky packaging and really enjoy the artwork and logos manufacturers have now put on these colourful tins.  They’re far to good to go in your recycling bin and can easily be rinsed out to make a handy storage container for all of those useful shed-trinkets. Many lids from Kenco and some of the supermarket-own coffee tins also fit regular tins of baked beans, tomatoes and cat food too, so save those lids to preserve a half-consumed tin of moggy grub. Waste packaging like this can even be educational! Coffee tins make excellent old-school string telephones for kids, teaching them how sound can be transmitted.  Cool eh?

One – a drinks can

Hopefully you’re not disappointed by the number one slot. I have been known to walk the streets in search of an old beer can if I have non in stock, for a repair, they’re that good! They’re usually made from aluminum, so won’t rust, are strong, abundant and effectively free. 

Using a pair of scissors or sharp knife, spacers (shims) and washers can easily be fabricated on your kitchen table, but do take care as the metal edges are always sharp. I’ve often used a can in this way to make a scooter steer correctly or a lawn mower switch on again. Material is sometimes lost as moving parts wear.  Sounds familiar right?  Sometimes, a small trimming of can metal, in the right spot on a broken item, is all you need to make the difference between bin or box fresh.

FixItWorkshop, Worthing, January 2022, old tins can come on handy when repairing things like scooters.

Just remember: Cutting things out involved knives, scalpels and scissors and any sharp implement that might come to mind. Once the item you need is cut out, that might be sharp too. So, take care and take your time.

The perfect blend…

An Optimum 8200 Blender, escapes the chop!

IMG_2844
FixItWorkshop, Worthing, August’20, Optimum 8200 Blender… in red.

When I agreed to ‘have a look’ at a customer’s beloved broken blender, I had no idea that the market for blenders was so, well, juicy.  One can spend anything from £50-£1800 – a huge price range.  You have to ask yourself a question; is the juice made by a blender costing 36 times more than a cheaper one, any better?  Hmm, the virtues of blender technology, robustness and efficiency could be debated in a future, exhilarating article, maybe. But for now, our attention is on this one, the repair of an Optimum 8200 Blender.

The reason I mention the huge price range is that prices for spare parts also vary wildly too.

Make and model: Optimum 8200 Blender

Fault reported: Leaking, noisy, crunchy, horrible

Cost of replacement: £300.00

Manufacturer support:  5/10

Cost of parts: £18.95

My repair time: 1.5 hours

Tools needed: Screwdrivers, test meter, heat shrink, soldering iron etc

Sundry items:  paint, contact cleaner

Cleaning materials: Bleach, bicarbonate of soda, washing up liquid, car polish

Repair difficulty: 3/10

Cups of tea: 2

Biscuits: 2 X custard creams

I received this blender with a broken drive coupler/ socket (the bit that transfers the power to the blades in the jug) and a rough, leaking blender jug.  This high-mileage kitchen appliance had been used until it would work no more.

Upon taking the blender into the workshop, I suggested to the owner that ‘it must have been sounding rough’ for a while… There then might have been a small admission of guilt.

Now, I realise that I’m unusual.  I regularly service my vacuum cleaners, sandwich toaster and kettle and I know that this isn’t normal, so my views on machine maintenance are a little outside the bell curve.

The owner had done her own research on repairing her blender.  She’d located a spares provider and had identified the parts required, to get the blender back making smoothies, which is more than many folk do.  The trouble was that the total amount for all the new parts required, was more than the price of a reconditioned unit.  This is often the case as some reconditioning agents have access to cheaper parts, not available to regular punters, through economies of scale.  To make this repair financially viable, I was going to have to work smart.

As mentioned earlier, blenders vary widely in price and there are established names out there that command a high price.  However, look beyond the logo and things are a little greyer.  Badge engineering, colour and subtle style changes can literally add hundreds of pounds to the asking price for the same basic machine.  This is nothing new.  Manufacturers have been sharing designs and production since the dawn of time and when it comes to buying spares for an expensive machine, there can often be a cheaper route for good quality alternative spares that are compatible, intended for the cheaper variation.  The skill is knowing where to look.

This slideshow requires JavaScript.

A picture paints a thousand words as they say and the slide show above shows the stages that I went through with this repair.

Using the original parts listed for an Optimum 8200 blender, the best deal the customer and I could find was:

  • Replacement drive socket, £39.95
  • Replacement blade and bearing, £69.00
  • Tool for blade removal, £11.99

Total, £120.94 (more if you want speedier delivery). Source:  froothie.co.uk

Shopping around for alternatives…

  • Replacement blade and bearing, £18.95 for a Vitamix blender (Amazon.co.uk)
  • Repair to existing drive socket (I drilled and tapped a new grub screw), £ my time
  • I used a tool I had already to remove the old blade (a plumbing bracket) so no need to buy one

Total, £18.95, plus my time

I chose a Vitamix blade as I noticed that some Optimum and Vitamix blenders shared the same jug design.  I actually saw the blade assembly for £7.99 on eBay, but decided that the warranty offer on Amazon.co.uk, was a better deal.

Now, I know I haven’t been that scientific here, but one suspects that there is little or no difference in blender blade robustness and all the ones I’ve ever seen to date contain the same bearings you might find in a scooter or skateboard.  I suspect that the blade assemblies are all made in the same factory, somewhere.

My guess here is that the aftermarket parts supplier must charge a comparitively high price for some items to:

  • Cover staff and site overheads
  • Provide a sense of reassuring expense compared to the original purchase price
  • Potentially recover a high charge from the manufacturer

The trouble with this strategy is that many domestic appliances are worth little once unwrapped compared to the original ticket price.  The comparative high prices for aftermarket parts would likely in many cases, put a customer off doing the repair at all.  The customer then weighs up the cost of:

  • Finding someone to do the repair work
  • Doing the repair work themselves
  • The price of parts
  • The price of labour

Often, when added up, it’s cheaper to replace, rather than repair which in my opinion, not the way to go.

As a repairer, the statement I’m always grappling with is:

Value Repair ≤ Replacement Product Purchase or simply: VR ≤ RPP

So, when someone brings me an item to repair, I’m always looking for:

  • An overall repair that costs-in for the customer, encouraging the customer to keep the existing machine for longer, saving it from the dump
  • A repair that’s likely to be reliable in relation to the condition of the machine
  • An upgrade to the original design (where possible) taking advantage of the innovations or modifications to the original design that enhance longevity or performance

It’s a careful balancing act and one that doesn’t always work first time, but that’s the challenge!

I’ve gone a little off subject but it all relates.

Back to the blender, I saved the customer money on the purchase of a new appliance, saved money on a potential repair elsewhere and saved the broken blender from the chop.  The customer was happy.  As with all items I receive for repair, I also cleaned and polished the blender to make it shine like new.


Footnote: The repair was over, or so I thought.  A week or so later, the customer contacted me again to tell me that a new fault had started.  Speed control was now a little erratic and was making the blender hard to use.  I said no problem and agreed to have a look.  Likely to have happened during my repair work, a small lead on the printed circuit board had become loose.  A quick tighten up and normal operation resumed.  Phew!


Jonathan Deer the III

A Christmas novelty toy gets a new lease of life…

IMG_0509
FixItWorkshop, Worthing, December 2019, Jonathan Deer III.

I meet some really interesting people with this hobby of mine with some quirky things to fix, often with personal and meaningful backstories.  This repair is one such item.

Make and model: Jonathan Deer III rubber deer thingy

Fault reported: Not running

Cost of replacement: About £0

Cost of parts: £0.00

Hours spent on repair: 2

Tools needed: Cutters, screwdriver and soldering iron

Sundry items: Contact cleaner

Repair difficulty: 2/10

Cups of tea: 2

Biscuits: 0

Someone got in touch to see if I could repair a festive family favourite Christmas novelty, which was a big hit with the children, back in the day.  Jonathan Deer III has become a family legend and Christmas simply wouldn’t be complete without him.  Intrigued, I agreed to see the injured deer.

A few days later, a parcel arrived and upon opening, I was greeted with a deer’s head made of rubber.  Not one’s average delivery.

This slideshow requires JavaScript.

‘Jonathan Deer’ was available about 20 years ago in the UK and I suspect the US as a novelty singing Christmas toy, designed to hang on the wall, to bring festive joy when anyone walks past the deer’s motion sensor.

Sadly, or maybe fortuitously, depending on your perspective, Jonathan was now silent and despite new batteries, it was dead.

The thing about Christmas decorations is that they get used for about 4 weeks a year and then packed away, usually in a loft or alike where it’s not necessarily that warm or dry for the remaining 48 weeks.  Cold, damp and draughty conditions are not good for small electrical items.  Batteries left leak and metallic contacts corrode and these ailments had affected poor old Jonathan.

Repairs completed:

  • Battery terminals were corroded from battery leakage and therefore cleaned with a small toothbrush and protected with contact cleaner
  • Opening up the casing (several small screws) revealed a broken negative lead.  A Small re-soldering job fixed that

Still no action.

  • Lastly, the on/off switch didn’t seem to be working.  I was able to separate the small tangs holding the switch together and gently clean the switch wiper/ contacts with cleaning agent.  I didn’t replace the switch as it’s a bespoke item and getting a replacement would be difficult.  The repair I made seemed to work OK.

Once the switch was cleaned, Jonathan burst into life.  Upon switching him on in demo mode, he woke up by blaring out James Brown – I Feel Good.  Moving the switch to on mode, he worked as he should via the motion sensor.  Wonderful.

I was then able to return the deer to its owner to enjoy over the festive season.  Result.

Explosive Chef

Another Kenwood Chef A901 gets the Workshop treatment…

There’s been a steady flow of poorly Kenwood Chefs through the workshop of late and the new year started off with yet another.  A customer got in touch with reports of smoke coming from her Chef A901, a machine which had given years of faithful service to her family.  As a result, she was very keen to see what could be done.

img_7876
FixItWorkshop, Worthing, Jan’19, Kenwood Chef A901.

As usual with Chefs of this age, the 5 machine feet had deteriorated and now resembled squashed dry Blu-Tac, so had to be replaced.  I replace the feet to most Chefs that come in.  Not only do the feet prevent the machine from moving all over the place when in use, they provide a gap for air to be drawn in to the motor for cooling, so it’s essential the feet are in good condition.

img_7868
FixItWorkshop, Worthing, Jan’19, replacing the feet on a Chef A901 (others similar).

The feet are inexpensive and are easy to fit.  If you decide to replace yours, consider coating the existing ones with something like WD-40, a few days before you try to extract the centre pin or you risk snapping it off in the machine base, as it will likely be ceased.

On with the repair.  The speed control circuitry had failed, specifically a capacitor and resistor, a common problem on older machines, had gone pop.  As usual, the correct repair kit was bought and fitted. With careful soldering and a dab of heat transfer gel on the new triac and the job was complete.  Nice.

With any Kenwood Chef, I always check the motor end-float, the allowable spindle movement north and south.  The end float in this case was a little lose and required adjustment.  A small grub screw with Allen key head allows this adjustment and with a bit of trial and error, the end float was now spot-on.  Poor end float on these machines usually makes the speed control ‘wobbly’, especially at lower speeds.  With this one adjusted correctly, the motor now ran smoothly through all speeds.

Job done.  The owner of the machine was so pleased with my work, she even bought me a new packet of Custard Creams.  Fab.

This slideshow requires JavaScript.

Cost of replacement: £400 and up.  Cost of repair: £11.24, plus my time and Custard Creams!

Another Smoking Kenwood Chef Excel A902/ A904

I’ve repaired a few Kenwood Chefs recently, but this one seemed worthy of a mention on these pages as it’s slightly different to the ones I’ve repaired so far.

Many Kenwood Chef accessories are usable on Chefs from all eras, due to logical thinking by the designers over the years and this is something to be applauded as it reduces waste.  For example, the beater on a 1970s machine will fit one from today.  An interesting fact for any occasion.

I’ve repaired many A701s and A901s, but this was the first A902/4, so I thought I’d share some of my repair experience in order to help others.

The owner contacted me explaining that she’d been using the family’s cherished Chef to make a cake when a plume of smoke started coming from the mixer.  The smell was bad and she’d quickly disconnected the unit from the mains.  The owner then contacted me to ask ‘was the Chef worth repairing’?  Of course it was!

I suspected the infamous speed control components which tends to fail with age.  However, this model featured extra components all mounted on a neat printed circuit board (PCB) which is fixed near the motor.  A reasonably priced repair kit, with new rubber feet was available online so I ordered one up straightaway.

Opening up the A902/4 is a similar job on many Chefs and after removing a few screws, the motor and gubbins is available for maintenance.

As suspected, two out of the three capacitors on the PCB had blown visibly, due to crystallisation and general fatigue, so these needed to be replaced.

PCB
FixItWorkshop, May’18, Kenwood Chef Excel A902/A904, PCB before work.

PCB renewed
FixItWorkshop, May’18, Kenwood Chef Excel A902/A904, old and new components.

As all the components are PCB mounted, each part must be de-soldered first, contacts cleaned before re-assembly which is time consuming, but satisfying and even though I’ve done this kind of work many times before, I always take a couple of photos and mark wires with a pen or label, as it’s very easy to make mistakes later.

The kit included replacements for the faulty bits, plus some additional parts which should be changed as a matter of course.  I also chose a kit with replacement rubber feet for the machine as the ones fitted had squashed ‘flat’ with age, a very common problem with the Chefs of this vintage.

New components fitted, the motor ran sweetly once again, without smoke, wobble or extra noise.  It’s worth noting that the A902/4 is quieter than earlier Chef models and is probably worth seeking out if you’re in the market for a second-hand unit.

Another ‘happy little Chef’ leaves the workshop.


Cost of new machine: £400 plus.  Cost of new parts:  £15.24 plus my time.

Raucous Kenwood Chef A701a

A noisy Kenwood Chef A701a gets a gearbox rebuild.

This Chef had been sleeping quietly in a kitchen cupboard for some time before being woken up to make cake mixtures once again.  The owner had owned the mixer for many years from new and was sentimentally attached to it.  I fully sympathise, they’re great machines.  It had been used many times in the past and then packed away as new machines came and went.  Having decided that there was still a place for the A701a, it was fired up.

The owner didn’t remember it being quite as noisy and wondered if something was wrong with it.  She got in touch and brought it in to the workshop.   After listening to the mixer at varying speeds, we agreed that perhaps it was a bit noisy and that further investigation was required.

 At this stage I must confess at this repair has been on the bench for a long while..!

I think the A701 is my favourite Kenwood Chef product as it’s very elegant, beautifully proportioned and almost over-engineered.  It comes from a time where built-in obsolescence was a swear word.

White removed
FixItWorkshop, Oct’17, Kenwood Chef, A701a.

On with the problem.  After disconnecting the gearbox by removing the drive belt, I checked the motor for general wear and tear, the brushes and speed control mechanism and I concluded that it all seemed OK and working smoothly.  The gearbox however did seem a bit noisy when turned manually, nothing hideously graunchy, but a little rough.  To be honest, it would have probably survived, but I wanted to open up the gearbox to make sure that it was as it should be.

Whilst removing the Chef’s casing around the gearbox, I’d noticed traces of grease around the joints and various power take-offs.  All models seem to do this to an extent, but this one seemed to be quite bad.  Closer inspection revealed that some of the grease had escaped out of the seal between the two halves of the gearbox casing.  Opening up the casing revealed that the grease that was left had been pushed to the corners of the space within the gearbox and that the gears were a bit dry, this was probably the root cause of the noise.  The planet wheel that drives the beater was also bone dry.

Luckily, there are plenty of suppliers who can supply rebuild kits for Kenwood Chef gearboxes, including new gears and grease.  The gears in this seemed serviceable, but it seemed very sensible to replace the lubricant with the correct 130g of Kenwood gearbox grease, which is food safe.  I used ‘Kenwood Chef Restore’, an eBay seller and the kit was a reasonable £10.99, including P&P.  The kit included the main gearbox grease, white grease for the planet gear and sealant for the gearbox casing.

IMG_4570
FixItWorkshop, Oct’17, Kenwood Chef A701a, repair kit from Kenwood Chef Restore, eBay.

Before replacing anything, the first job was to clean out all traces of the original grease which had gone very sticky and was contaminated with general wear.   The first pass clean involved using paper toweling, followed by water and detergent, before a final clean with brake cleaner, which removed the last few traces of grease and dirt.

With the gearbox refilled and resealed making sure the spacers were re-fitted to the correct parts, the drive belt re-fitted with just enough slack, the gears sounded much sweeter with the final parts of the casing reassembled.  One last point to note is that I used silicone sealant on the blender attachment power take-off plate in replacement to the one fitted, since the original seal was well past it (see below).

As a finishing touch, I replaced the existing machine feet which had turned to mush with replacements from Sussex Spares (eBay shop) for a very reasonable £2.70, delivered.

The Chef was now ready to prepare cake mixtures again.

Cost of new machine: £300 and up.  Cost of replacement parts: £13.69 (plus my time).