Magimix 4200XL – safety as standard

A little bit of ‘shed magic’ to rescue a Magimix 4200XL

Like everything else, food mixers come in all shapes and sizes and there’s a make and model on the market to suit all applications, tastes and budget. Magimix have been around for a long time and make premium mixers for the wannabe chef. These mixers specialise in chopping and slicing and tend to be more specific in task over, say, a traditional bowl mixer. The Magimix 4200XL is a current model at the time of writing and is all yours for around £300. When whisking something delicious in the kitchen myself, I prefer a traditional Kenwood Chef, but if I was regularly chopping veg with NASA micron-precision, I can see why a mixer like this might appeal. Since I’m a bit of a salad dodger, the need for this has never arisen.

Make and model: Magimix 4200XL

Fault reported: Not running

Cost of replacement: £300

Manufacturer support: 4/10

Cost of parts (for this repair): £0.00

My time spent on the repair: 1 hour

Tools needed: Screw drivers, pliers

Sundry items: None

Cleaning materials: Silicone spray, damp cloth

Repair difficulty: 3/10

Beverages: 1 X tea

Biscuits consumed: 2 X custard creams

The owner of this mixer reported that despite every effort to press buttons and click the safety catch on the lid, the mixer simply wouldn’t comply when switched on. Dead as a dodo.

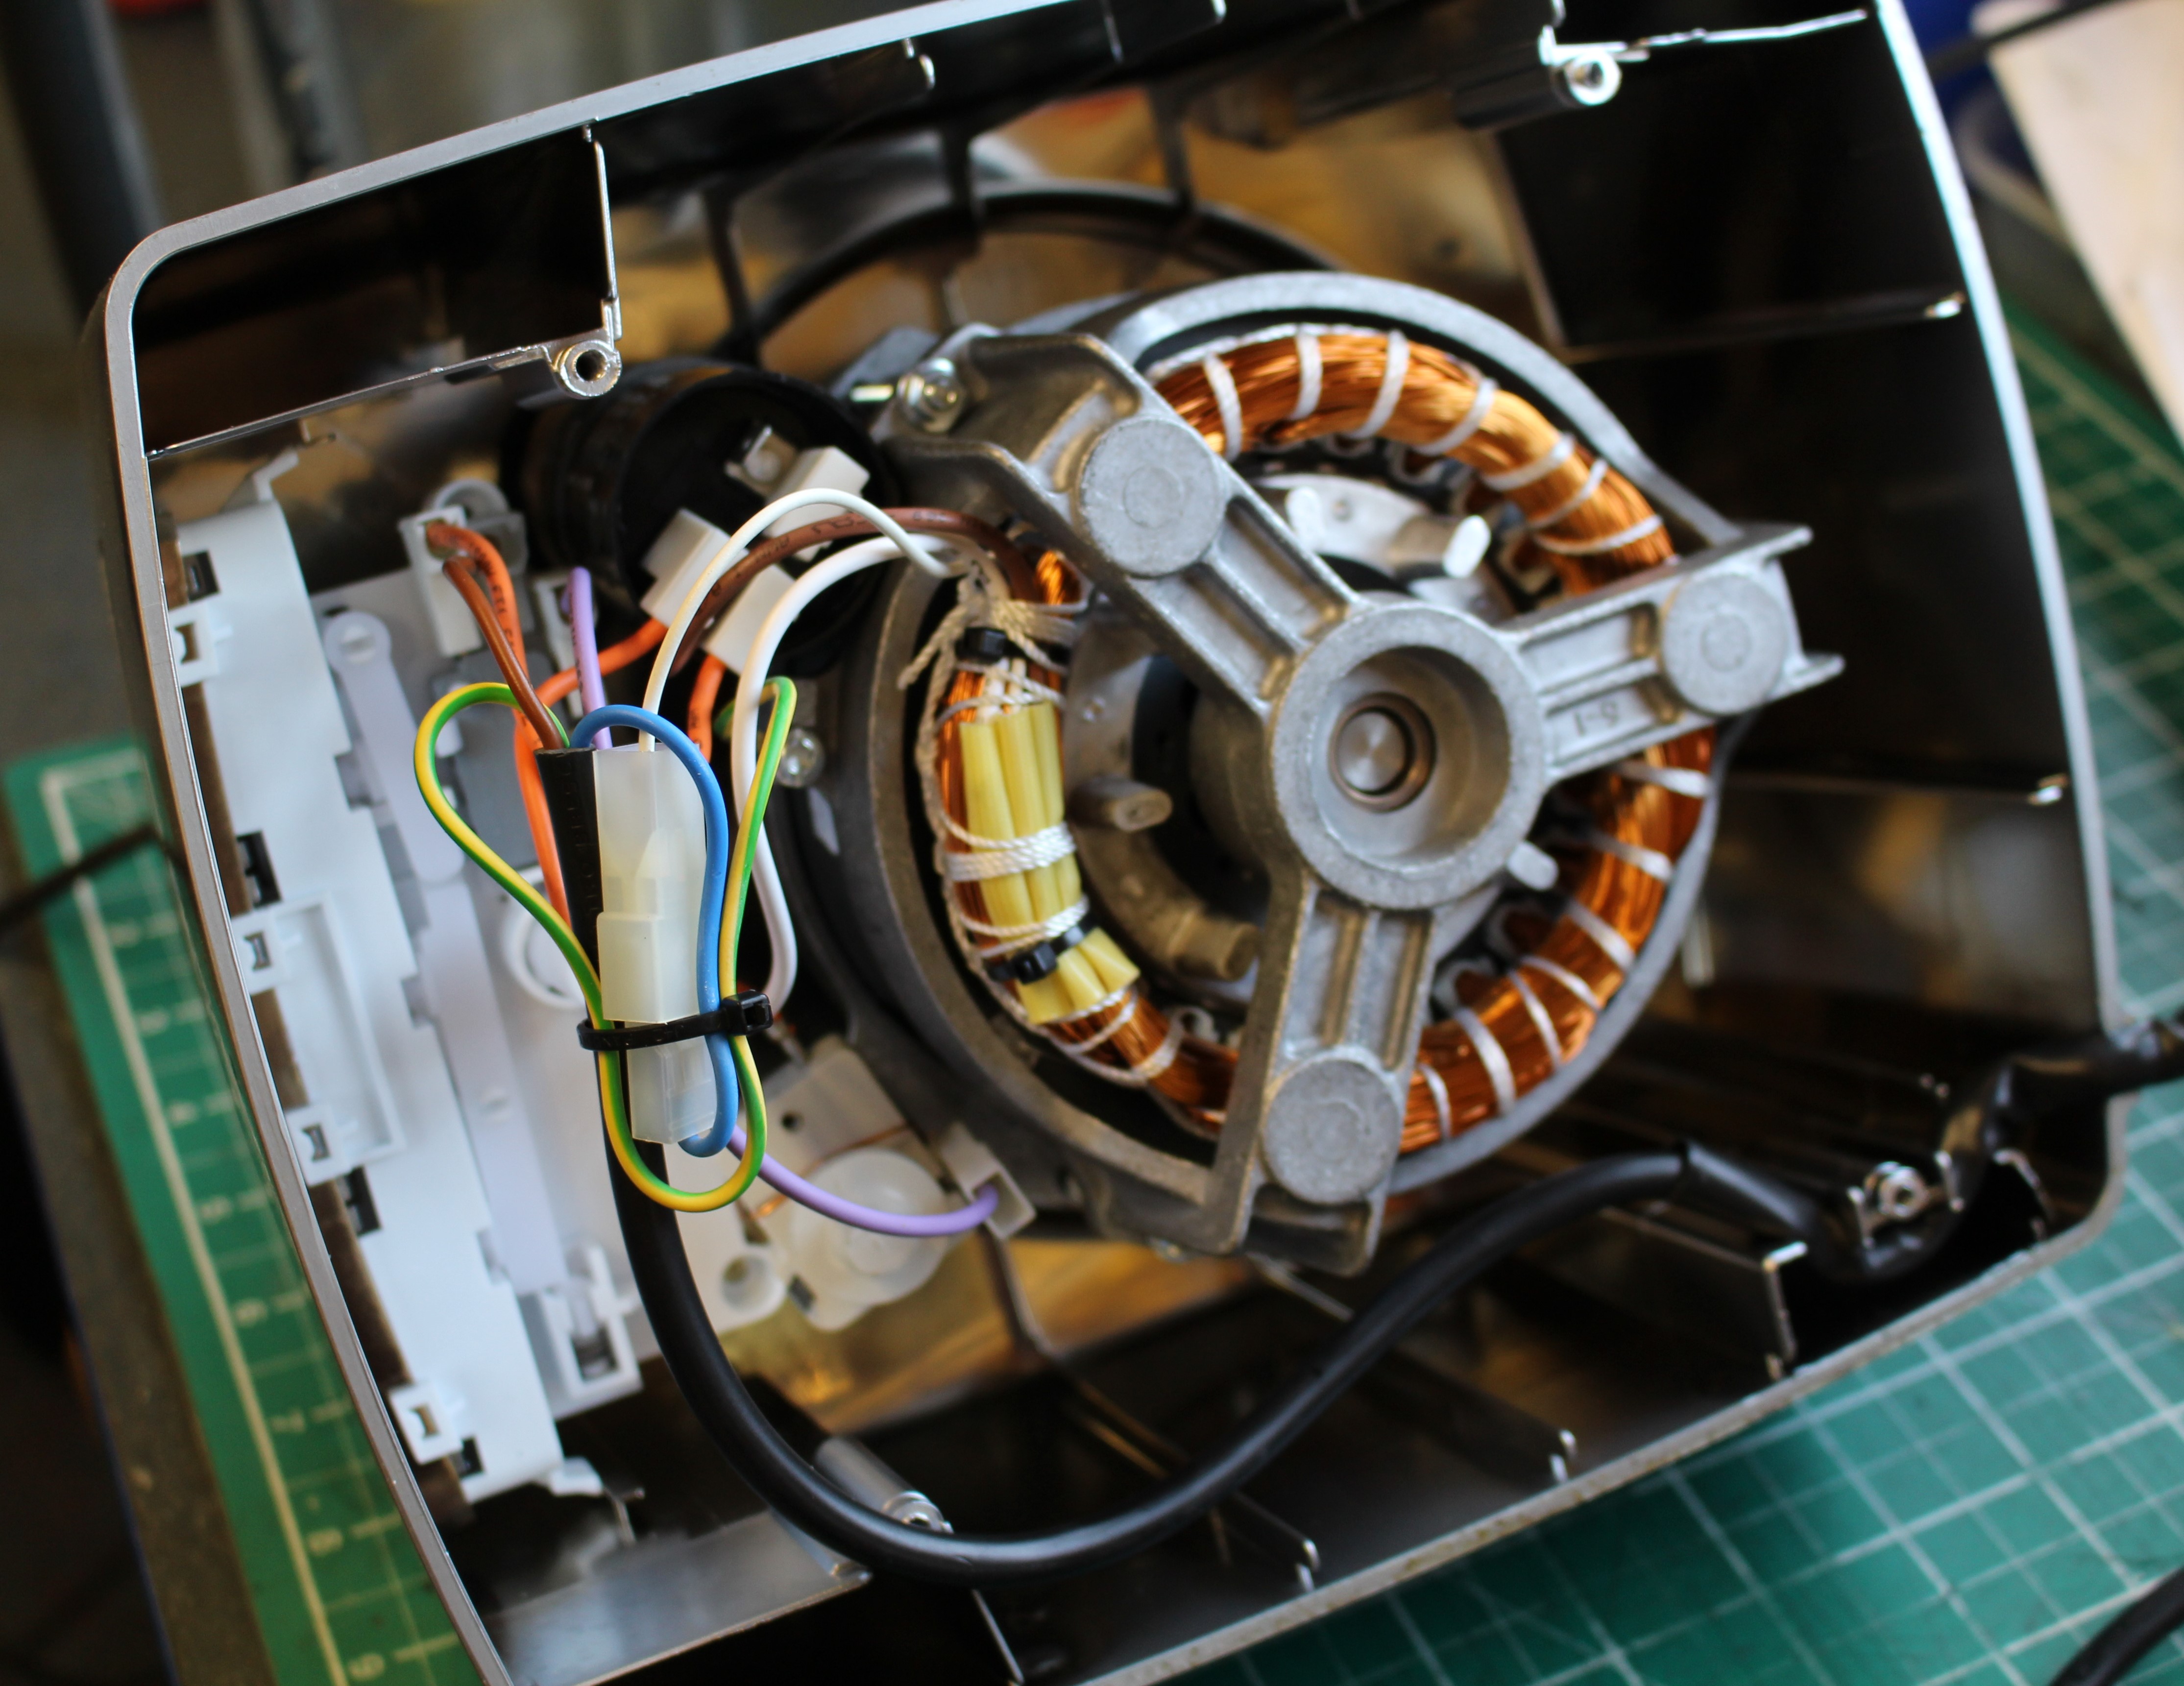
FixItWorkshop, Worthing, November’20, Magimix 4200XL, inside the mixer’s safety switch.
FixItWorkshop, Worthing, November’20, the 4200XL features a motor with oomph!
FixItWorkshop, Worthing, November’20, Magimix 4200XL, removing the base.
FixItWorkshop, Worthing, November’20, Magimix 4200XL, these little horrors are designed to deter repair- I dislike them immensely.
FixItWorkshop, Worthing, November’20, Magimix 4200XL, the repaired mixer.
FixItWorkshop, Worthing, November’20, Magimix 4200XL, the cheeky little safety switch.

The owner of this machine reported that their beloved Magimix 4200XL was playing up and despite trying to wriggle, jiggle, shake, rattle and roll things, it simply wouldn’t comply and work. They asked if I would take a look at it for them before it was launched out of the window. There’s nothing like a frustrated owner.

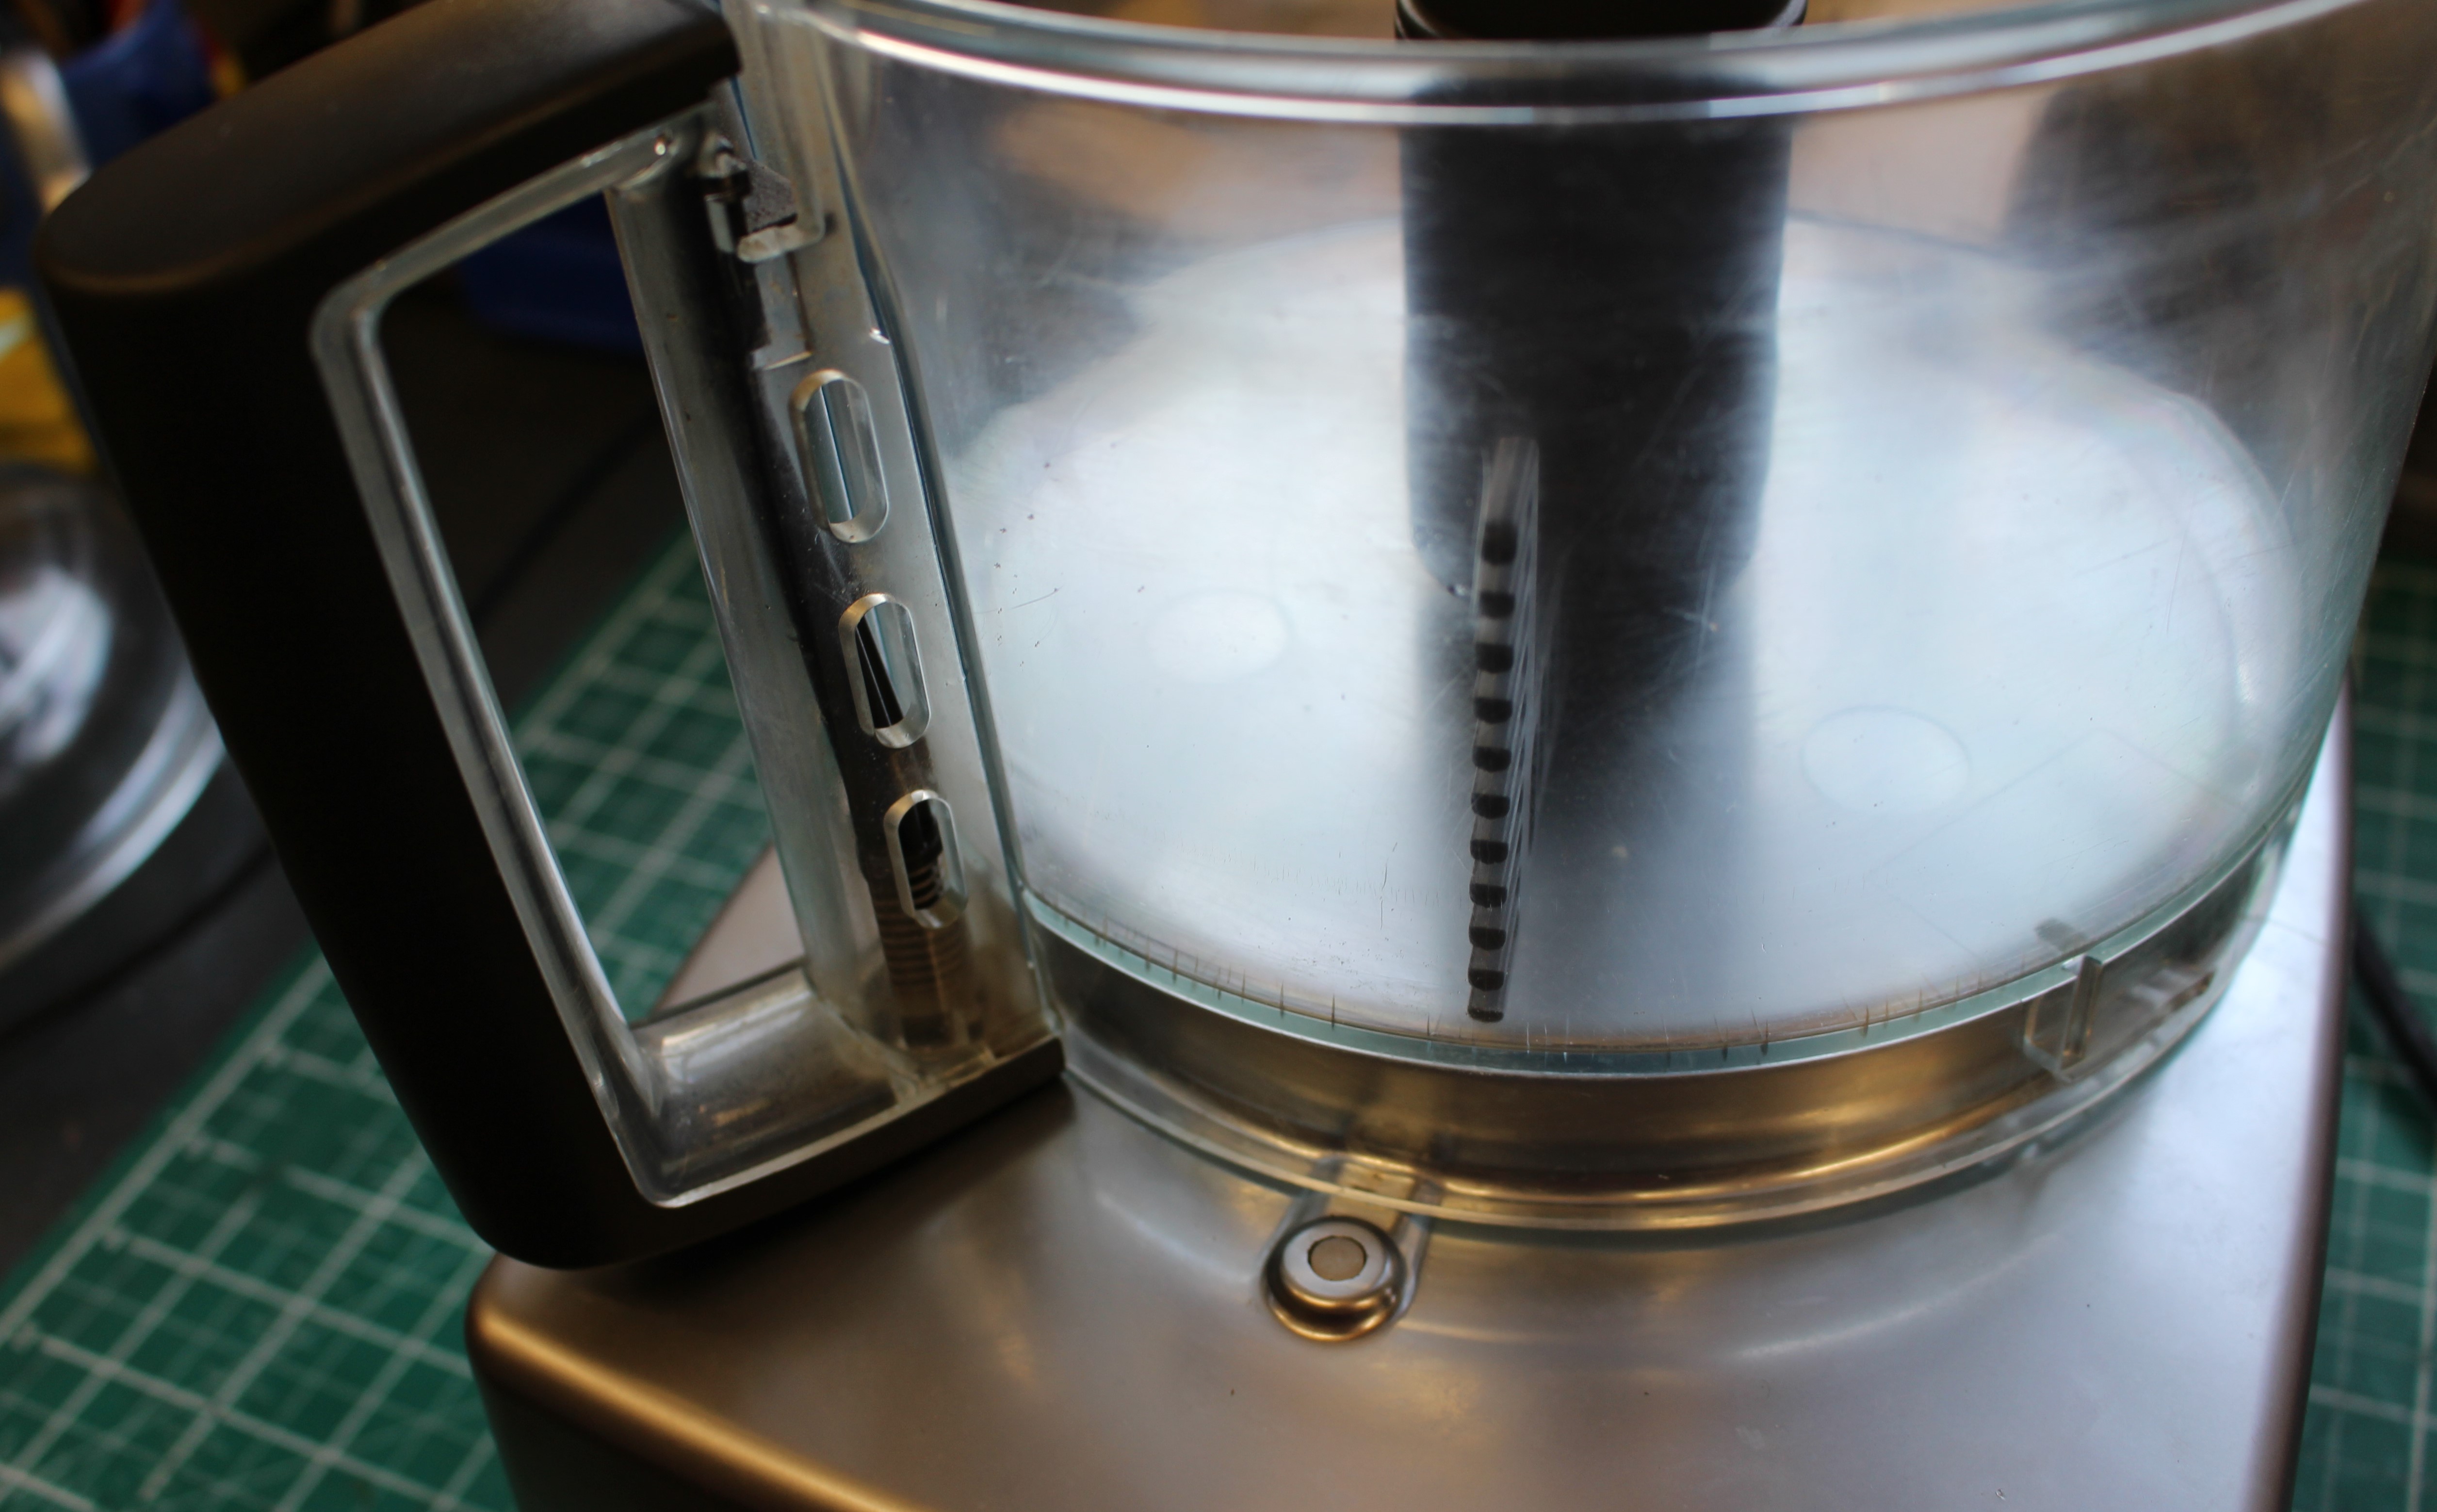
The Magimix 4200XL features a really rather elegant, totally passive, safety device to ensure that one isn’t tempted to operate the machine without the lid fitted correctly, risking one’s little pinkies. A simple sprung lever mechanism built into the lid and jug matches a small recessed switch in the machine’s base. The machine will only fire-up once the lid is in place on the jug, which must be correctly aligned on the base. It’s a nice touch that probably keeps Magimix out of the courtrooms.

On first inspection, I decided that this mechanism was a reasonable place to start my investigations. After you’ve checked things like ‘is the power on’ it makes sense to ‘start simple’ and go from there.

Taking the base cover off only involved four Torx screws, the damned anti-tamper kind. Luckily I have the technology to do this.

Taking the base cover off revealed good access to the safety switch mechanism. Thankfully.

The mechanism all seemed correct and present, which was a bit of a guess since I’d never worked on a mixer like this before. However, a lack of loose parts rattling inside is usually a good sign. Phew.

Despite appearing OK, the operating safety switch lever did seem stiff, so a quick spray with silicone lube had things sliding nicely once again. A quick continuity test of the switch proved that it was switching OK. Things were starting to look up for ‘Maggy’.

Since I had the lube out, it made sense to clean up the jug and lid mechanism and give that the same treatment. It all seemed to work better after and testing the lid and jug, refitted to the base with the base cover removed allowed me to visually confirm that the safety switch mechanism was indeed doing its thing correctly once again. A good result.

After carefully reassembling the base cover, taking care not to damage some of the more delicate plastic parts, it was ready for testing. There’s always a little moment of ‘will something go bang’ when I switch things on for the first time, but luck was on my side as the motor spun up as Magimix intended. A good result. All fingers intact.

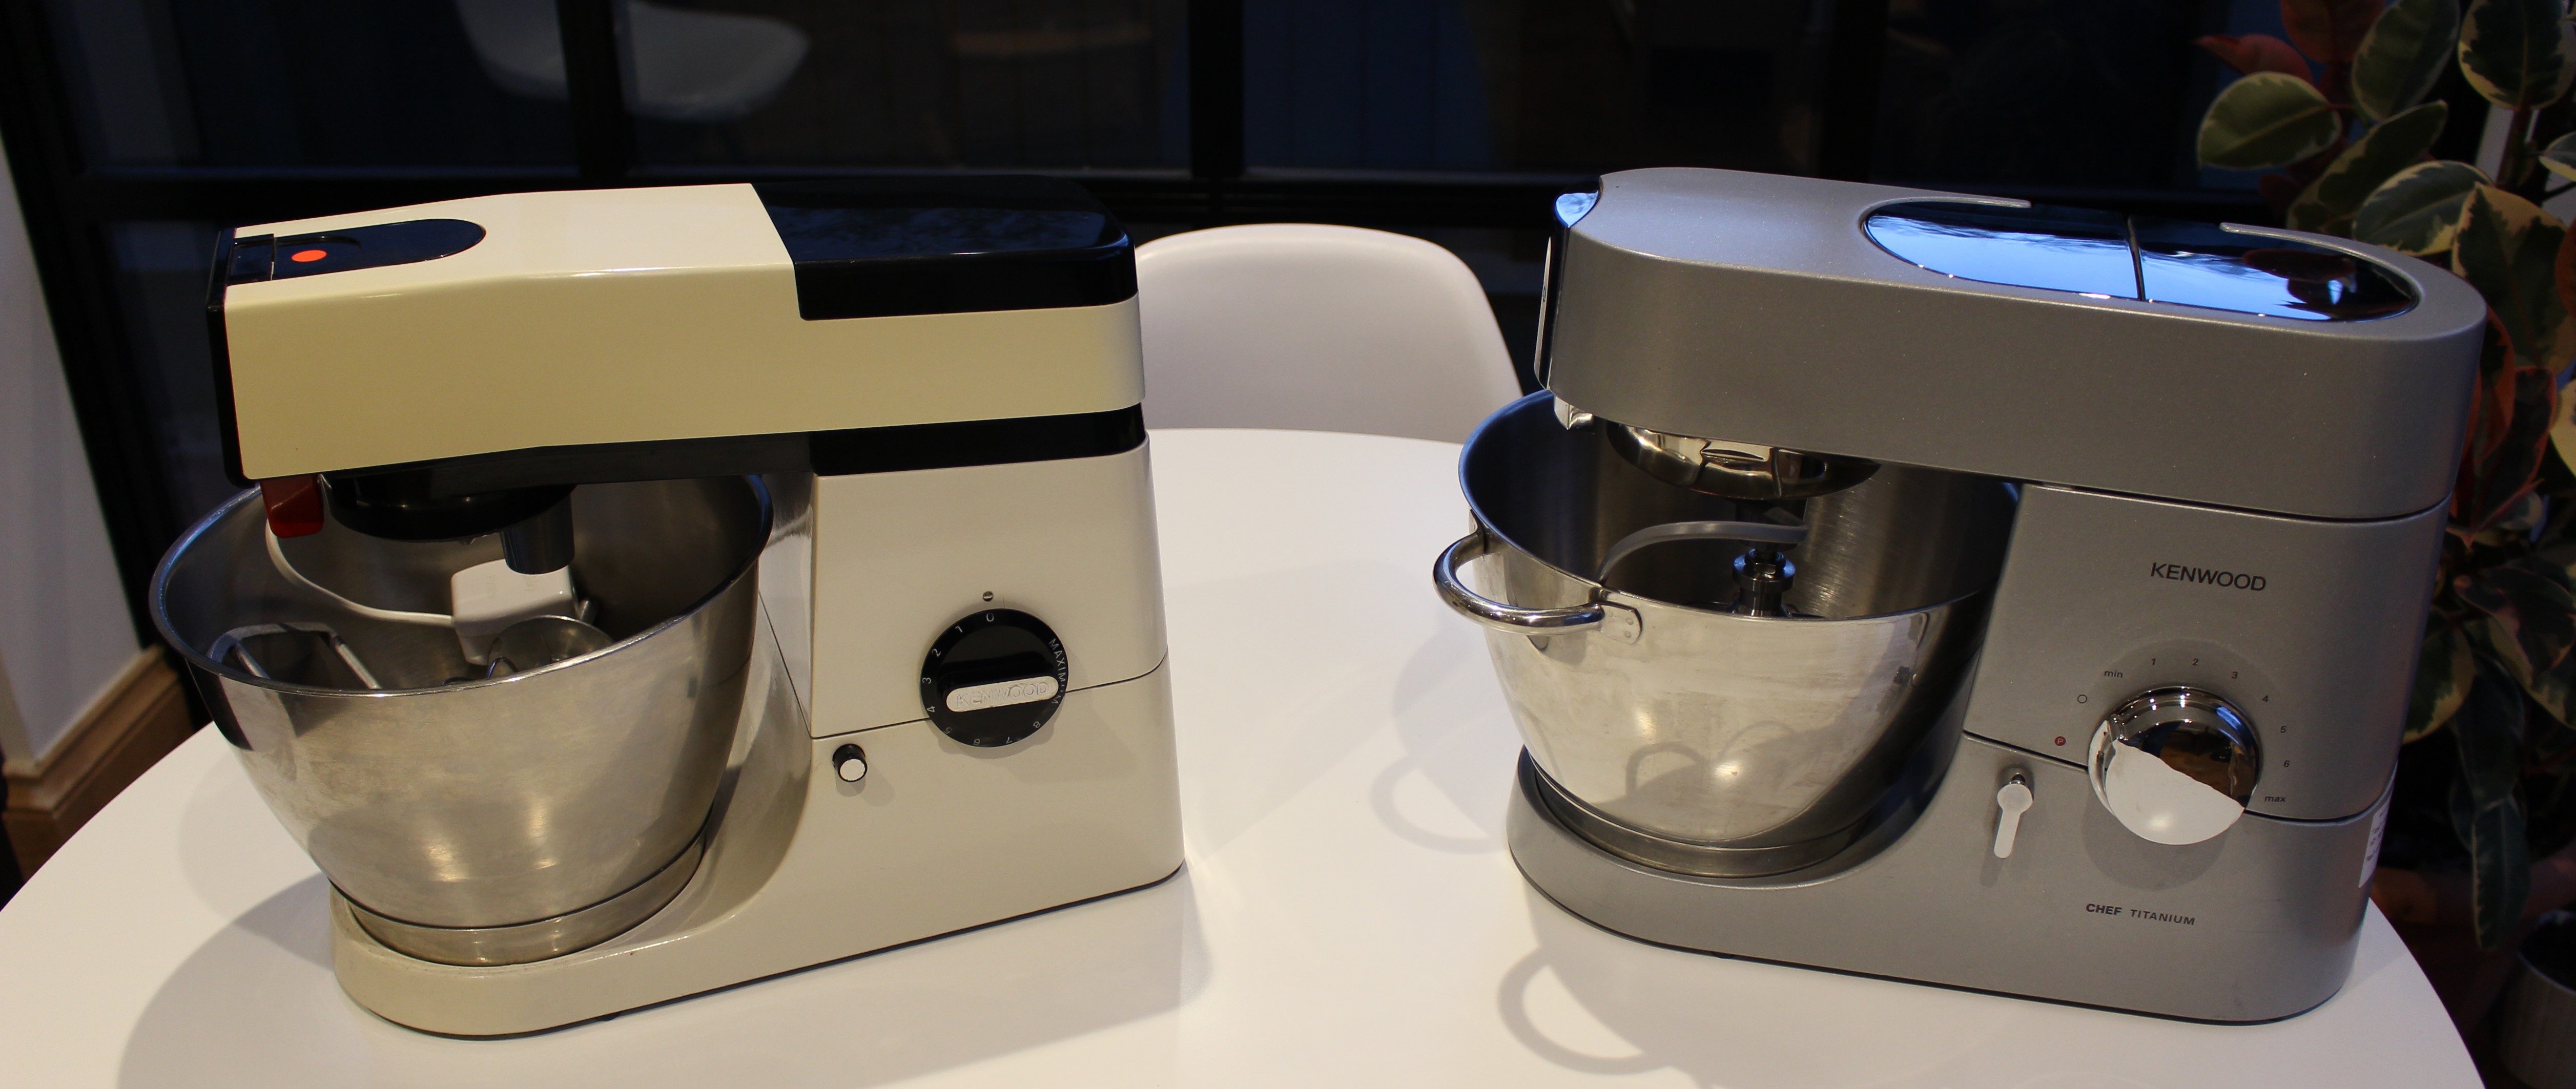
Old vs new, which is best?

Having repaired more than 100 Kenwood Chefs, I compare newish and older machines. Which is best?

IMG_2724

Believe it or not, people do ask me which is best: New or old machines?

There is of course, no right or wrong answer and the answer will vary, depending on the product and application.

But since the question comes up from time-to-time, I thought I’d give my opinion on the matter and have a bit of fun with the subject, a kind of shoot-out if you will.

My illustration focuses on an old favourite of mine; the Kenwood Chef. My chosen opponents are a model from the early 1980s, the ubiquitous A901 Chef, made in England, and the much later 2000s KMC010 Chef, made in China.

The Chef is a good example for the shoot-out as the machine’s purpose hasn’t changed since it’s introduction to kitchens in the 1950s. Many Chef accessories produced over the years are interchangeable, owning to the foresight of good design.

Some people think that new machines are best and more capable while other people think older machines are best as they were built to last. Since I’ve dismantled, used and admired 100s of these machines, here’s my take.

Round 1 – Performance

Older Chefs are less powerful than newer machines. For example, the A901 has a 450W motor, whereas the later KMC010 has a much more powerful 1400W motor. This means than the newer machine will be more capable to mix more stodgy mixtures for longer. Counter intuitively, the more powerful machine may be more efficient for some loads, compared to the lower power one, although I’ve never measured this.

A901 – 0 KMC010 – 1

Round 2 – Noise (from the machine)

Kenwood has tended to favour evolution rather than revolution with their product progression. Many models available over the years appeared not to change much on the surface, but under the skin, small tweaks and improvements were taking place. So, in general, the newer the machine, the quieter they tend to be. There are some model variant exceptions to this, but the KMC010 is much quieter than my own good condition A901.

A901 – 0 KMC010 – 2

Oh dear, new things might be better after all..?

Round 3 – Durability

Now this is where things get interesting. Many of the machines I receive in my workshop for repair are getting on a bit. Some of them are over 40 years old. The machines have served their families well with faithful service.

Faulty older machines can often be turned around within a few hours in the workshop, to be back with the customer, to make more cakes. The A901 Chef is a tough old beast. The materials and finish rarely give any problems and major components rarely fail it seems.

KMC010 Chefs (and all newer models) that I see in the workshop are obviously much younger than the A901s. While very capable and powerful, sadly, they seem to have failed, often only with occasional light use.

Seemingly, it’s true what they say, the older machines were built to last and I base that purely on customer enquiries and items I see to repair every week. The newer machines often have features and buttons that don’t serve any real advantage, but have associated circuits which can and do go wrong, rendering the whole machine useless, if they fail.

A901 – 1 KMC010 – 2

Round 4 – Repairability

Now obviously, I am ‘repairability-biased’, this is a blog about repair after all. However, the facts speak for themselves. Older Chefs can be repaired with basic tools, reasonably priced components and a little know-how.

Newer Chefs, like the KMC010 are more complicated and have less user-serviceable parts. This makes otherwise serviceable machines far more likely to end up in the scrapyard with seemingly minor faults, that were too hard to diagnose and repair. The A901 wins hands down in the repairability stakes.

A901 – 2 KMC010 – 2

The feeling is tense and there’s an air of excitement as I get to call the decider on this slightly odd dual.

Round 5 – Value for money (the decider)

A new KMC010 Titanium costs over £600 today and it should be said that all Chefs are great machines and a worthy addition to any kitchen. However, a decent second-hand Chef from the 1960s to the early 1990s is a worthy contender for a tenth of the cost.

Have a look on eBay and you’ll see A701s, A701a, A901, A901E, KM200 model Chefs, starting at £40, often with many accessories. They’re just as useful and capable to serve most home needs. Indeed, I have a customer who uses her standard A901 in an industrial kitchen, every day, with no problems.

A901 – 3 KMC010 -2

The non-scientific conclusion…

  • Buy an older machine and take satisfaction that it will last generations, can be easily repaired and work with most accessories available now. Buying an older machine is probably less environmentally damaging than the manufacture of a new machine.
  • Buy a new machine and take satisfaction with additional performance and a manufacturers’ guarantee for the first year…

You know which machine I would buy…

This slideshow requires JavaScript.

Time to put the kettle on.

Swan tea urn off the boil

A cheap fix gets this essential tea making machine back in business…

I admit it. I do get some satisfaction when I divert an appliance, on a journey to the bin, to my workshop for repair.  I have been known to collect the odd item from skips or just dumped on the pavement while supposed to be doing something more productive. I think I just feel sorry for things. Weird, but true.

Make and model: Swan Hot Water Tea 20L Urn

Fault reported: Not staying hot

Cost of replacement: £80ish

Manufacturer support:  3/10

Cost of parts: £1.70

Hours spent on repair: 45 minutes

Tools needed: Screwdrivers, test meter etc

Sundry items: Cleaning materials, heat transfer solution

Repair difficulty: 2/10

Cups of tea: X1

Biscuits: Malted Milk X1

This Swan hot water tea urn was one of those items.  Spotted during an office reorganisation in the ‘scrap pile’, it had been put there as it wasn’t working properly and a new one had now been ordered.

IMG_20200621_214203
FixItWorkshop, Worthing, July’20, Swan Hot Water Urn… shiny!


Being fairly light-fingered, I spirited the urn away to the workshop for some tinker time.  Not strictly staff policy, but you know, seek forgiveness after etc.

An urn is really just a big kettle.  This one has an all metal 20 litre tank with bar-style tap to brew up, when needed.  There are no real controls as such; just an on/off switch with neon light and two tell-tail lights to indicate boil and keep warm.  Keep warm is usually on all the time when switched on.

The fault seemed to be that the urn reached boiling temperature when switched on, but then switched off totally, allowing the water to cool again excessively.  Timing the switching intervals of the thermostat, 20 minutes or so, and a 15-200 hysteresis confirmed a fault. There was also no ‘keep warm’ green light on, when in use.  To push the thermostat further, I poured cold water into the urn to see if that sped up switching between hot and cold, it didn’t.

Opening up the urn’s base involved just three screws, allowing access to all components.  Such a nice change to not have layers of covers and things to move out of the way first!

Checking the wiring out for logic revealed that someone had been here before! The wiring was incorrect and the ‘keep hot’ element was not wired up correctly and effectively not in circuit with the power source. A small wiring change corrected this and meant that the ‘keep warm’ element was now working again.

The thermal reset fuse/ button seemed to be working OK- proved with a test meter and the thermostat did seem to switch on and off, albeit with excessive hysteresis.  Time to fit another one! Luckily, these thermostats are very common and I managed to get one from eBay, rated at 1000 (a couple of degrees over the one fitted) for less than £2. Fitting a new thermostat only involved a couple of screws, a light smear of heat transfer solution and reconnecting back into the wiring harness.

This slideshow requires JavaScript.

With all wiring back in place and the cover refitted, it was time to test and brew up.  This time, the urn boiled, switched off and then stayed warm on the secondary ‘keep warm’ circuit.  To prove that the new thermostat was an improvement, I then topped up the urn with cold water and within 5 seconds, the thermostat clicked in and the boiling process started again.

Time for a brew.

(PS, the urn has now returned to its normal place of work)

Repair, kettles and er, the Citroen 2CV

Less is usually more. Simpler devices can mean repair is more likely in the event of failure.

I keep a model of a Citroen 2CV car on my desk at work.  It’s about 30-odd years old and it’s a bit battered due to an incident involving a shelf, my old cat and an 8ft drop, but that’s another story.

IMG_20200704_122535
FixItWorkshop, Worthing, July’20, The 2CV (AZ series)

The 2CV is there to remind me to keep things simple, to the point.

To me (and many others) the 2CV represents pure function over form.  Nothing on the car is superfluous to its function as a capable load lugging, robust, ever-repairable and frugal vehicle. I have a soft spot for these cars. They encapsulate the phrase ‘less is more’.

Not every story from the workshop is rosy and my heart usually sinks when I receive something to fix that has tiny printed circuit boards fitted inside that do ‘something’ and nothing at the same time.

What the Tin Snail do I mean by that? Many appliances and machines manufactured in the last 20 years or so often contain ‘mini’ circuits that control ‘something’.

Take an electric kettle, something that most people have in their homes. Kettles generally are a water holding vessel, a heating system, and an on/off switch with a boiling water state detecting negative feedback loop (it switches off by itself when the water boils).  There’s also some wire and stuff.

Electric kettles haven’t really changed that much over the years, after all the basic need hasn’t changed:  You put water in, you switch it on, you get hot water to make a drink. Nothing has changed. However, many offered these days are fitted with things like filters, LED lighting and other electronic temperature control systems with bells on.

Trouble is, all these (kettle) gadgets tend to be controlled by a small circuit board which isn’t repairable or even replaceable. It only takes an accidental water spill, some static electricity or bump mishap and that tiny circuitry is toast.  Not even a professional circuit repair agent, let along home spanner wielder would have a chance of repairing the broken circuit. When failure occurs, many will just discard the appliance and go and buy another one, quickly. Who wants to be without tea or coffee?!

The tragedy is that the rest of the (kettle in this case) appliance is, nine times out of ten, OK and if it was made with more traditional components that one could see with the naked eye, the appliance would stand far more chance of being repaired easily and economically. Something to think about, next time you’re considering a new purchase.


The tale of Hetty & Henry

A small mix up nearly resulted in some body modification…

IMG_2026
FixItWorkshop, Worthing, May’20, Henry & Hetty bathing in the sunshine

Make and model: Hetty Vacuum Cleaner (HET200-22)

Fault reported: Not working

Cost of replacement: £100-£140

Manufacturer support:  10/10

Cost of parts: £21.59, inc. carriage

Hours spent on repair: 1 hour with service

Tools needed: Screwdrivers, test meter etc

Sundry items: Silicone spray, cleaning materials

Repair difficulty: 4/10

Cups of tea: 1

Biscuits: Ginger Nut X2

If only everything was as well made and built to last as a Henry (or Hetty!) hoover.  Simple as a knife and fork, with tried and tested technology, it’s a machine created by an engineer, for everyone to own, use and repair themselves, when needed.

A neighbour got in touch to say that their broken Hetty was about to be scrapped and asked if I could do anything with it.  Of course, I said.  To be honest with you all, I’m not that confident with all repairs, but I knew that in the case of this one, I should be fine as Numatic products are pretty well supported by the manufacturer. And this is the thing:

How many purchases do we make that consider; “will I be able to get parts for that one day”?

We all do it, but as a tinkerer I try and consider the longevity and likely need for replacement components when I’m considering handing over my hard earned wedge, at point of purchase.

The Hetty had been working fine, but had then conked out, mid clean.  No drama, no noise, no smoke, it had just stopped.  The owner had already checked the fuse, but that was fine (as they often are).

When things just stop and won’t restart, that symptom is often trying to tell you something and if you’re listening, capturing the way something fails and acting on the information can save you time and often money.  It’s a trick I’m always trying to perfect, although one can be caught out anytime- but that’s half the fun.

  • The machine stopped suddenly…
    • Maybe the cable broke?
    • Maybe the plug is damaged
    • Maybe a component failed quickly

Expensive things like motors tend to start making noises, run slower than usual or smell bad before failing.  They can ‘just stop’ of course, but it’s likely that there will be a build-up, so I proceeded with some confidence that the motor was probably fine.  I always check motor bearings and brushes anyway, when servicing this type of thing.

Since the mains cable and plug were fine, it was time to delve inside.  The Hetty top is simply held together with a few screws (normal cross head) which then frees the cable winder and motor assembly, when undone.

I suspected the two-speed control PCB as these can fail suddenly without warning and since I have no Numatic PCB tester (if there is such a thing), all I could do is prove the component as faulty, beyond reasonable doubt.  A quick check with my multi-meter revealed that there was no output, when connected to the mains.  Suspicious.

It is also possible to by-pass the speed control PCB on these machines, which I did.  I connected the motor up without it’s 600W/1200W control circuit in the loop and the motor spun up just fine.

This slideshow requires JavaScript.

Often, I like to go direct to the manufacturer (where possible) for spare parts as you often get the truth about an appliance as well as the latest version of a part.  Often, manufacturers continue to iron out bugs and develop upgrades for spare parts as these will be fitted to the latest models.  A company such as Numatic seem to apply those upgrades retrospectively to older models too, so that all customers new and old, can enjoy the benefits.  For information; UK spec speed controller part 208436 (red) replaces part 206735 (orange) for model HET200-22.

As I couldn’t find the part I needed on any website, a quick call to Numatic UK, gave me the information I needed.  Even during Covid-19 lockdown here in the UK, the lady in Numatic’s spares department, working from her kitchen, was able to advise me on the upgraded part I now needed and arrange for it to be with me for the next working day.  If that’s not good service, I don’t know what is.  http://www.numatic.co.uk

With the new part installed, the motor spun once more, at the correct two speeds.  Happy days.

All fine then.  Not quite. 

Hetty had been supplied with a red base, not the original pink one that Hetty should have.

As we all know… no?  Just me then, Henry is red and Hetty is pink and there is a range of names and colours to choose from in the range.

When I tried to fit the Hetty top to the supplied red base, it didn’t fit.  Quite a head-scratching moment, if I’m being frank with you.  Had it never fitted? Had the owner simply just put up with it the way it was?  Had there been some kind of strange swapping incident that I wasn’t aware of?  Time to get some answers!

It turns out that my neighbour have both Henry and Hetty models and had given me the wrong base.  They had assumed they are all the same.  They’re not actually, see below.

The latest Henry and Hetty tops have a cut-out for the tool storage bracket moudling as shown on the red base above.  The earlier Hetty I had in the workshop had no such bracket in the plastic.  I did offer to modify the Hetty top I had with my Dremel saw, but this offer was declined!

With the right top and base paired up once more, I was happy, the neighbours were happy and another vacuum cleaner had been saved from being scrapped needlessly.

Time for another brew.


Hooray for Henry!

A Numatic Henry vacuum cleaner gets the kiss of life…

IMG_1545
FixItWorkshop, Worthing, March’20, Numatic ‘Henry’ vacuum cleaner HVA200a (to be exact).

There are times when only no-nonsense suck will do.  Other vacuum cleaners offer the moon on a stick, but rarely live up to the repeated abuse of everyday life.  Henry on the other hand is tough, no-nonsense and above all, reliable.

Reviewers of this kind of thing, seem to agree.

Make and model: Numatic International ‘Henry’ vacuum cleaner HVA200a

Fault reported: Dead/ not running

Cost of replacement: About £130, give or take

Cost of parts: £17.25

Hours spent on repair: 1

Tools needed: Cleaning tools/ cross-head screwdriver

Sundry items: Silicone spray/ cleaning rags

Repair difficulty: 2/10

Cups of tea: 1

Biscuits: 1 bourbon, I think

I have friends in trades who will only buy and use Henry ‘hoovers’ as they last, always work and are easy to use. And above all, who doesn’t like an appliance with a smiley face?

The example in the picture above had been used by a local Worthing taxi driver everyday for the last 15 years without any problems and was in pretty good nick.  The filter was clean and apart from some wear and tear scratches, still looked like the current model.

One day, Henry failed to switch on and after the owner had checked the fuse in the plug, he decided to get in touch with the workshop.

IMG_1546
FixItWorkshop, Worthing, March’20, Henry’s on switch.

The HVA200a has two speed settings, one at 600 Watts power and one at 1200 Watts power, selectable by a red switch and indicated in a red tell-tail lamp.  When plugged in, nothing was happening.

Time to perform surgery.

Opening up Henry’s casing was straightforward and top marks to the designers for creating sensible parts that fit together logically.  Henry is designed to last and be repaired.  All very pleasing.

This slideshow requires JavaScript.

With the lid removed, all electrical checks were made from the plug to the end of the flex, down to the motor.  The flex was in good condition with no snags, shorts or earth faults.  The cable winder on this model is a simple handle operating spindle and was a bit sticky.  The contacts inside the gubbins were also tarnished, so while it was all in pieces, I decided to clean all of the electrical contacts with cleaner and make sure all the sliding parts of the cable winder were clean and had a small dab of silicone spray for smoothness.

Testing for current around the circuit revealed that the speed control board was where things stopped.  The speed control board was dead and required replacing.

To prove this fact, I was able to temporarily by-pass the controller and connect the mains switch to the motor, which revealed that the motor was strong.

A quick bit of shopping with my favourite parts suppliers yielded a replacement (updated) speed control PCB for under £20, which seemed like good value to me.  After making a note of the wiring (see slideshow), the new PCB was connected up, the casing back together and Henry was ready to run, once more.

I also decided to give Henry a little polish too, just because.


Jonathan Deer the III

A Christmas novelty toy gets a new lease of life…

IMG_0509
FixItWorkshop, Worthing, December 2019, Jonathan Deer III.

I meet some really interesting people with this hobby of mine with some quirky things to fix, often with personal and meaningful backstories.  This repair is one such item.

Make and model: Jonathan Deer III rubber deer thingy

Fault reported: Not running

Cost of replacement: About £0

Cost of parts: £0.00

Hours spent on repair: 2

Tools needed: Cutters, screwdriver and soldering iron

Sundry items: Contact cleaner

Repair difficulty: 2/10

Cups of tea: 2

Biscuits: 0

Someone got in touch to see if I could repair a festive family favourite Christmas novelty, which was a big hit with the children, back in the day.  Jonathan Deer III has become a family legend and Christmas simply wouldn’t be complete without him.  Intrigued, I agreed to see the injured deer.

A few days later, a parcel arrived and upon opening, I was greeted with a deer’s head made of rubber.  Not one’s average delivery.

This slideshow requires JavaScript.

‘Jonathan Deer’ was available about 20 years ago in the UK and I suspect the US as a novelty singing Christmas toy, designed to hang on the wall, to bring festive joy when anyone walks past the deer’s motion sensor.

Sadly, or maybe fortuitously, depending on your perspective, Jonathan was now silent and despite new batteries, it was dead.

The thing about Christmas decorations is that they get used for about 4 weeks a year and then packed away, usually in a loft or alike where it’s not necessarily that warm or dry for the remaining 48 weeks.  Cold, damp and draughty conditions are not good for small electrical items.  Batteries left leak and metallic contacts corrode and these ailments had affected poor old Jonathan.

Repairs completed:

  • Battery terminals were corroded from battery leakage and therefore cleaned with a small toothbrush and protected with contact cleaner
  • Opening up the casing (several small screws) revealed a broken negative lead.  A Small re-soldering job fixed that

Still no action.

  • Lastly, the on/off switch didn’t seem to be working.  I was able to separate the small tangs holding the switch together and gently clean the switch wiper/ contacts with cleaning agent.  I didn’t replace the switch as it’s a bespoke item and getting a replacement would be difficult.  The repair I made seemed to work OK.

Once the switch was cleaned, Jonathan burst into life.  Upon switching him on in demo mode, he woke up by blaring out James Brown – I Feel Good.  Moving the switch to on mode, he worked as he should via the motion sensor.  Wonderful.

I was then able to return the deer to its owner to enjoy over the festive season.  Result.

Is 12 years too long to keep a toothbrush?

A Braun Oral-B electric toothbrush gets a new lease of life.

Let’s just clarify one thing straightaway; I’m talking about an electric toothbrush with changeable brush heads.

I was given an Oral-B/ Braun electric toothbrush as a birthday present years ago, which when you think about it, is a bit of a strange thing to receive as a gift.  Maybe the gift contained a hint?  Back then, these toothbrushes were not cheap, starting at about £60.00 if I remember correctly.  Today, a new equivalent is quite a bit cheaper.

In the time I’ve owned it, it’s had about 40 new brush heads and it’s just about to start it’s third non-replaceable battery.

Make and model:  Oral-B/ Braun 3756 931 41306

Fault reported: Battery won’t hold charge

Cost of replacement:  About £20.00

Cost of parts:  £6.60

Hours spent on repair:  1

Tools needed:  Small flat-bladed screwdriver, soldering iron

Sundry items: None

Repair difficulty:  5/10

Cups of tea:  2

Biscuits:  2 Gingernuts

Electrical items with non-replaceable batteries are so annoying.

A message to manufacturers:  There’s simply no excuse for it as all batteries are replaceable.

In my experience, items with ‘non-replaceable batteries’ contain entirely replaceable items.  The batteries might not be standard ‘AA’ items, but there’s a host of online suppliers that are ready to supply just about any power cell for any application, you name it, usually for a reasonable price that costs-in for the repair process.

This slideshow requires JavaScript.

Now, I don’t know how long one of these toothbrushes is meant to last, but as a long-term test, I thought it would be interesting to find out.  After the first battery died, I decided to take the toothbrush apart, to see what was going on inside.

As you can see from the photos, there’s more within than one might think.  There’s a switch, charging circuit, timer circuit, over-pressure circuit, gearbox, motor, mini crankshafts and a battery.  Not to mention all of the tiny connecting parts all neatly engineered to work together, reliably.  It’s a small work of art really.

It makes me very sad that most of these toothbrushes will end up in landfill, after a few years.

The designers had clearly designed this toothbrush as a disposable item as the battery, despite being readily available from spares suppliers, was hidden, out of sight, under all of the gubbins.

To extract the battery (a simple nickel cadmium item) a full dismantle was required, in this order.

  • Prise off the top collar
  • Prise off the bottom cap
  • Pull out the main mechanism
  • De-solder the main pressure switch, charging coil, LED, and some other joints,
  • Take PCB off of battery carrier,
  • Split battery barrier from the main motor area
  • Remember the polarity of the battery, negative near the coil (a misleading ‘+’ there)
  • Reassembly, with the new battery is the same in reverse.  See pictures for hints.

Twelve years down the line and now on its third battery cell, the toothbrush is still going strong which proves that with a little tinkering, disposable items can be repaired and made to last longer.

It’s just a shame that Braun, the manufacturer, decided to ignore any notion of consumer maintenance.


Why are some spare parts more expensive than a complete product?!

I struggle to buy a replacement part for a reasonable price.

I’ve been meaning to do a little article on this problem for a while and I apologise in advance if (you’re still reading) this seems like a rant.

Why-o-why-o-why are manufacturers still allowed to price spare parts dearer than a complete product?

IMG_20190810_102348
FixItWorkshop, Worthing, Aug’19, Triton Cara and Enrich Showers.

Recently our electric wall shower gave up the ghost and tripped the electrical breaker in the fuse cupboard.  Not great when it happens mid-wash.

The shower was a few years old and registered with the manufacturer for support for things like recalls and so on.  I had fitted the shower myself and it it had been a reliable product until this point.

Out with the screwdrivers and multimeter.

The 8.5kW heating element is split into two circuits, one for half-power and one for full.  Most people would use full power, but you might be able to get away with using it on half or economy mode in summer, when the water feed is generally warmer.

All micro switches seemed to be working OK, which was a bit of a shame actually as it meant that the heater can was probably faulty.  It was.  Half the heater can tested OK, the other half was dead.  Oh dear.

IMG_20190810_102404
FixItWorkshop, Worthing, Aug’19, Triton Cara heater can.

After visiting some shower spares suppliers and the manufacturers’ own website, I discovered that the spare part I needed wasn’t cheap at over £50 delivered.  I saw some advertised for £70 on some third-party sites.

Price of part
FixItWorkshop, Worthing, Aug’19, Triton Cara replacement heater can spare part.  Price sourced from triton.co.uk, correct 10/08/19.

I was fuming.  Why so expensive?  I mean, you’d have to be out of your mind to part with your hard-earned cash on a spare part like this when you can buy the whole unit for less.  See below.

price new
FixItWorkshop, Worthing, Aug’19, Triton Enrich/ Cara – new price listing.  Price sourced from Screwfix.com, correct 10/08/19.

The Cara shower has been replaced by the Enrich and is basically the same product, by another name.  Therefore, the high price of the spare part in this instance cannot be blamed on low manufacturing volumes as the showers are still made, are widely available and have been in production for a long time.   Something is ethically wrong with Triton’s spare parts pricing policies.

Now, I don’t want to beat-up Triton, they’re not alone and many manufacturers do the same, but there are now many forward-thinking companies out there getting it right.  Maybe Triton will revisit their spares listings.

Despite my natural leaning to repair and recondition, I had to admit that simple logic won the day and I bought a whole new unit from Screwfix.  The Enrich shower fitted exactly where the Cara had been and worked perfectly.

I thought about this situation long and hard and decided that for this type of appliance, a spare part should not cost more than 30% of the current retail price.  In this instance, I would have been prepared to pay about £15.00 for a spare part. 

In a world where we need to encourage people to repair appliances (and anything else) manufacturers need to facilitate a reasonable and proportionate spares back up service.  It’s as simple as that.

Still, there is a bright side to this tale.  The old shower’s solenoid, mixer, control knobs and switches all work fine and I’ll keep those as spares to be used again in a shower or something else that comes along.

Blinking GHDs!

A pair of GHD 3.1B hair straighteners gets fixed

GHD hair straighteners are not something I’ve ever had the need to use, but they are seemingly very popular among the long-haired kind, none the less.  There are cheaper alternatives out there, but devotes tell me that the ceramic plates seem to have a better finish and run hotter for longer, all essential features for taming unruly curls.  So they tell me.

IMG_9909
FixItWorkshop, Worthing, August’19, GHD 3.1b hair straighteners.

Make and model:  GHD hair straighteners 3.1b

Fault reported: Buzzing noise, not warming up

Cost of replacement:  £97.00

Cost of parts:  £0.00

Hours spent on repair:  About an hour (ish)

Tools needed:  Cleaning cloths, small fine file

Sundry items: Contact cleaner

Repair difficulty:  4/10

Cups of tea:  2

Biscuits:  1 (Ginger Nut)

Someone got in touch to ask if I could fix their GHDs and to be frank, I’ve had mixed success with these repairs in the past as in general, the newer the model, the harder it is to fault-find and subsequently order parts for, something I find very frustrating.  However, the 3.1bs discussed here are pleasingly old-school.

Dismantling these GHDs involves just one small cross-head screwdriver and one small flat blade screw driver, none of your fancy Torx heads here, thank you very much.

Strangely, the GHDs made a disconcerting buzzing noise when switched on, which to my fairly trained ear sounded distinctly 50Hz-like.  That means that the mains electricity feed was causing some component to ‘arc’ or resonate- the buzzing noise, in plain English.

Fearing imminent catastrophe, I unplugged the GHDs and went to work.  The main PCB is pretty simple on the 3.1b.  Most of the solder joints were OK, but some of the joints around the switch had discoloured, showing that heat had built up, indicating a problem.  To be on the safe side, I re-soldered all the joints to avoid a dry-joint situation.

The buzzing noise still prevailed.  The switch seemed to be the next logical place to look and being of quality, the designers had provided easy access to the switch mechanism via a small metal cover with sprung tangs.  A quick bit of jiggery-pokery and the switch was in bits.

The problem was revealed in an instant.  Both switch contacts and corresponding wipers were burned and needed re-finishing and cleaning.  A quick whizz with a fine file and clean with special electrical contact cleaner and the switch was as good as new.  Since the GHDs were already in pieces, I gave the same clean up treatment to the 3600 flex mechanism, as a precaution.

This slideshow requires JavaScript.

So, this set of GHDs were saved from the bin, ready to straighten locks once more, thanks to a few basic tools and cleaning.  Very satisfying.