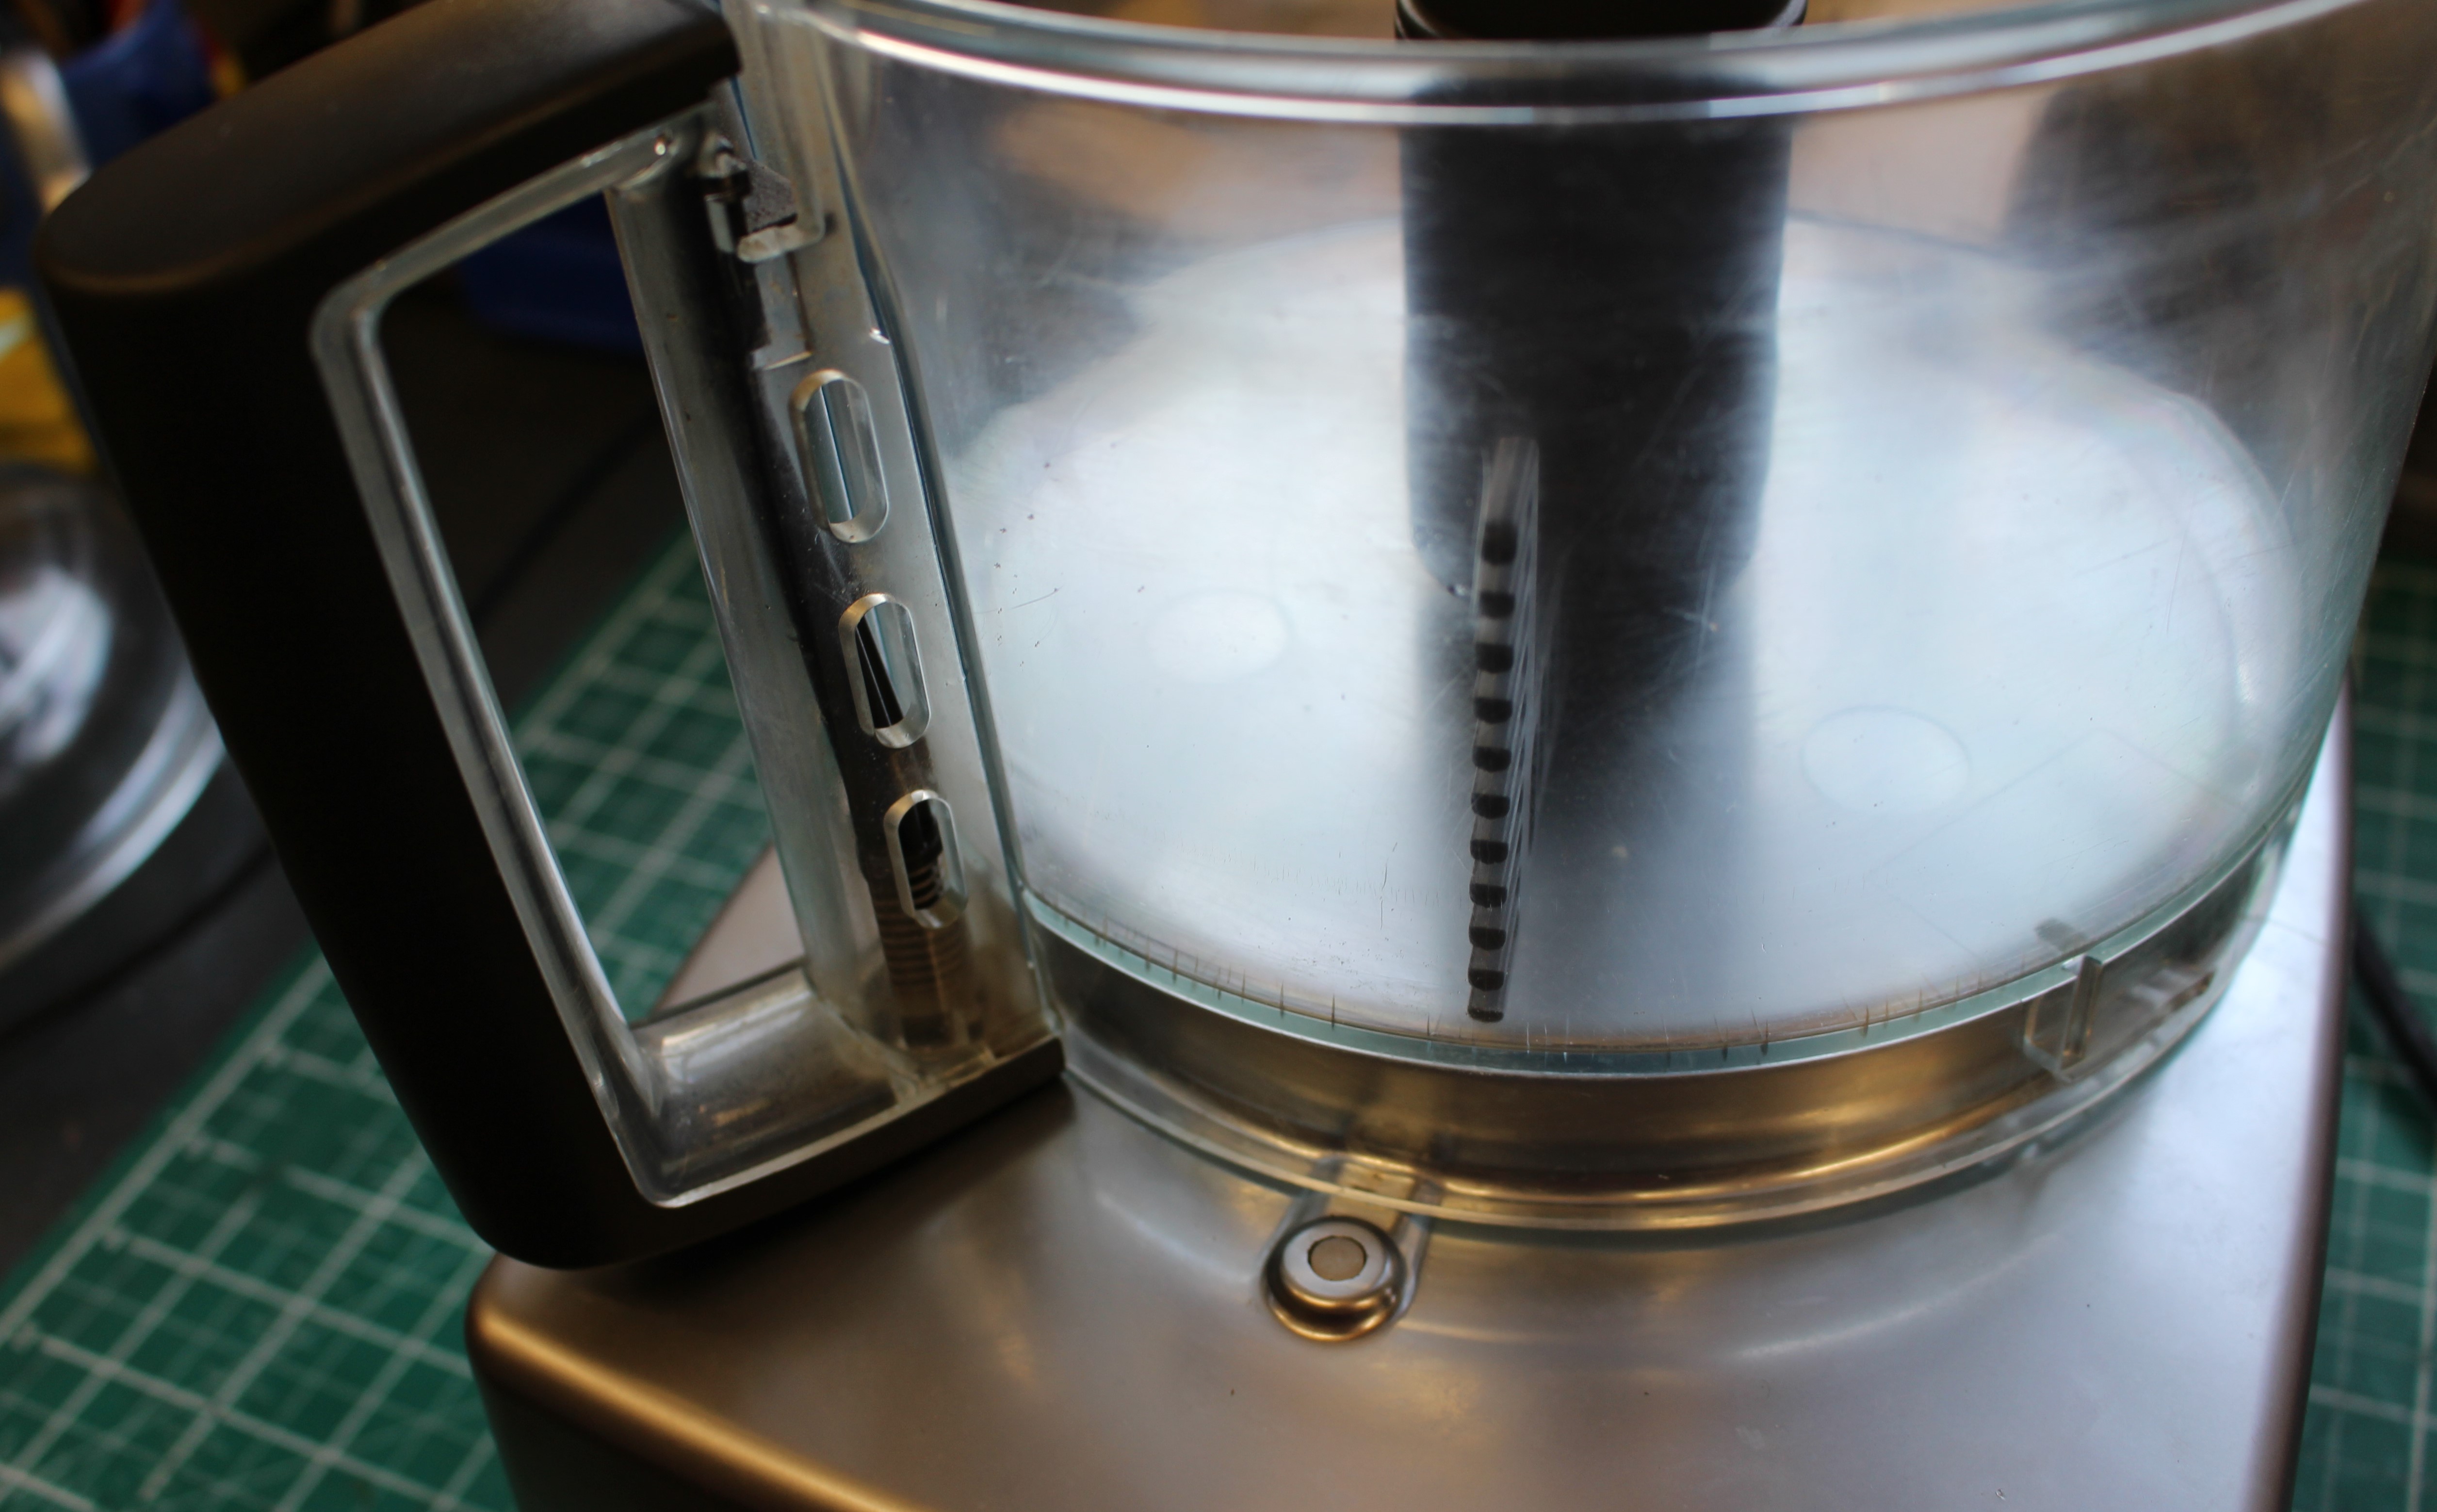
Magimix 4200XL – safety as standard

A little bit of ‘shed magic’ to rescue a Magimix 4200XL

Like everything else, food mixers come in all shapes and sizes and there’s a make and model on the market to suit all applications, tastes and budget. Magimix have been around for a long time and make premium mixers for the wannabe chef. These mixers specialise in chopping and slicing and tend to be more specific in task over, say, a traditional bowl mixer. The Magimix 4200XL is a current model at the time of writing and is all yours for around £300. When whisking something delicious in the kitchen myself, I prefer a traditional Kenwood Chef, but if I was regularly chopping veg with NASA micron-precision, I can see why a mixer like this might appeal. Since I’m a bit of a salad dodger, the need for this has never arisen.

Make and model: Magimix 4200XL

Fault reported: Not running

Cost of replacement: £300

Manufacturer support: 4/10

Cost of parts (for this repair): £0.00

My time spent on the repair: 1 hour

Tools needed: Screw drivers, pliers

Sundry items: None

Cleaning materials: Silicone spray, damp cloth

Repair difficulty: 3/10

Beverages: 1 X tea

Biscuits consumed: 2 X custard creams

The owner of this mixer reported that despite every effort to press buttons and click the safety catch on the lid, the mixer simply wouldn’t comply when switched on. Dead as a dodo.

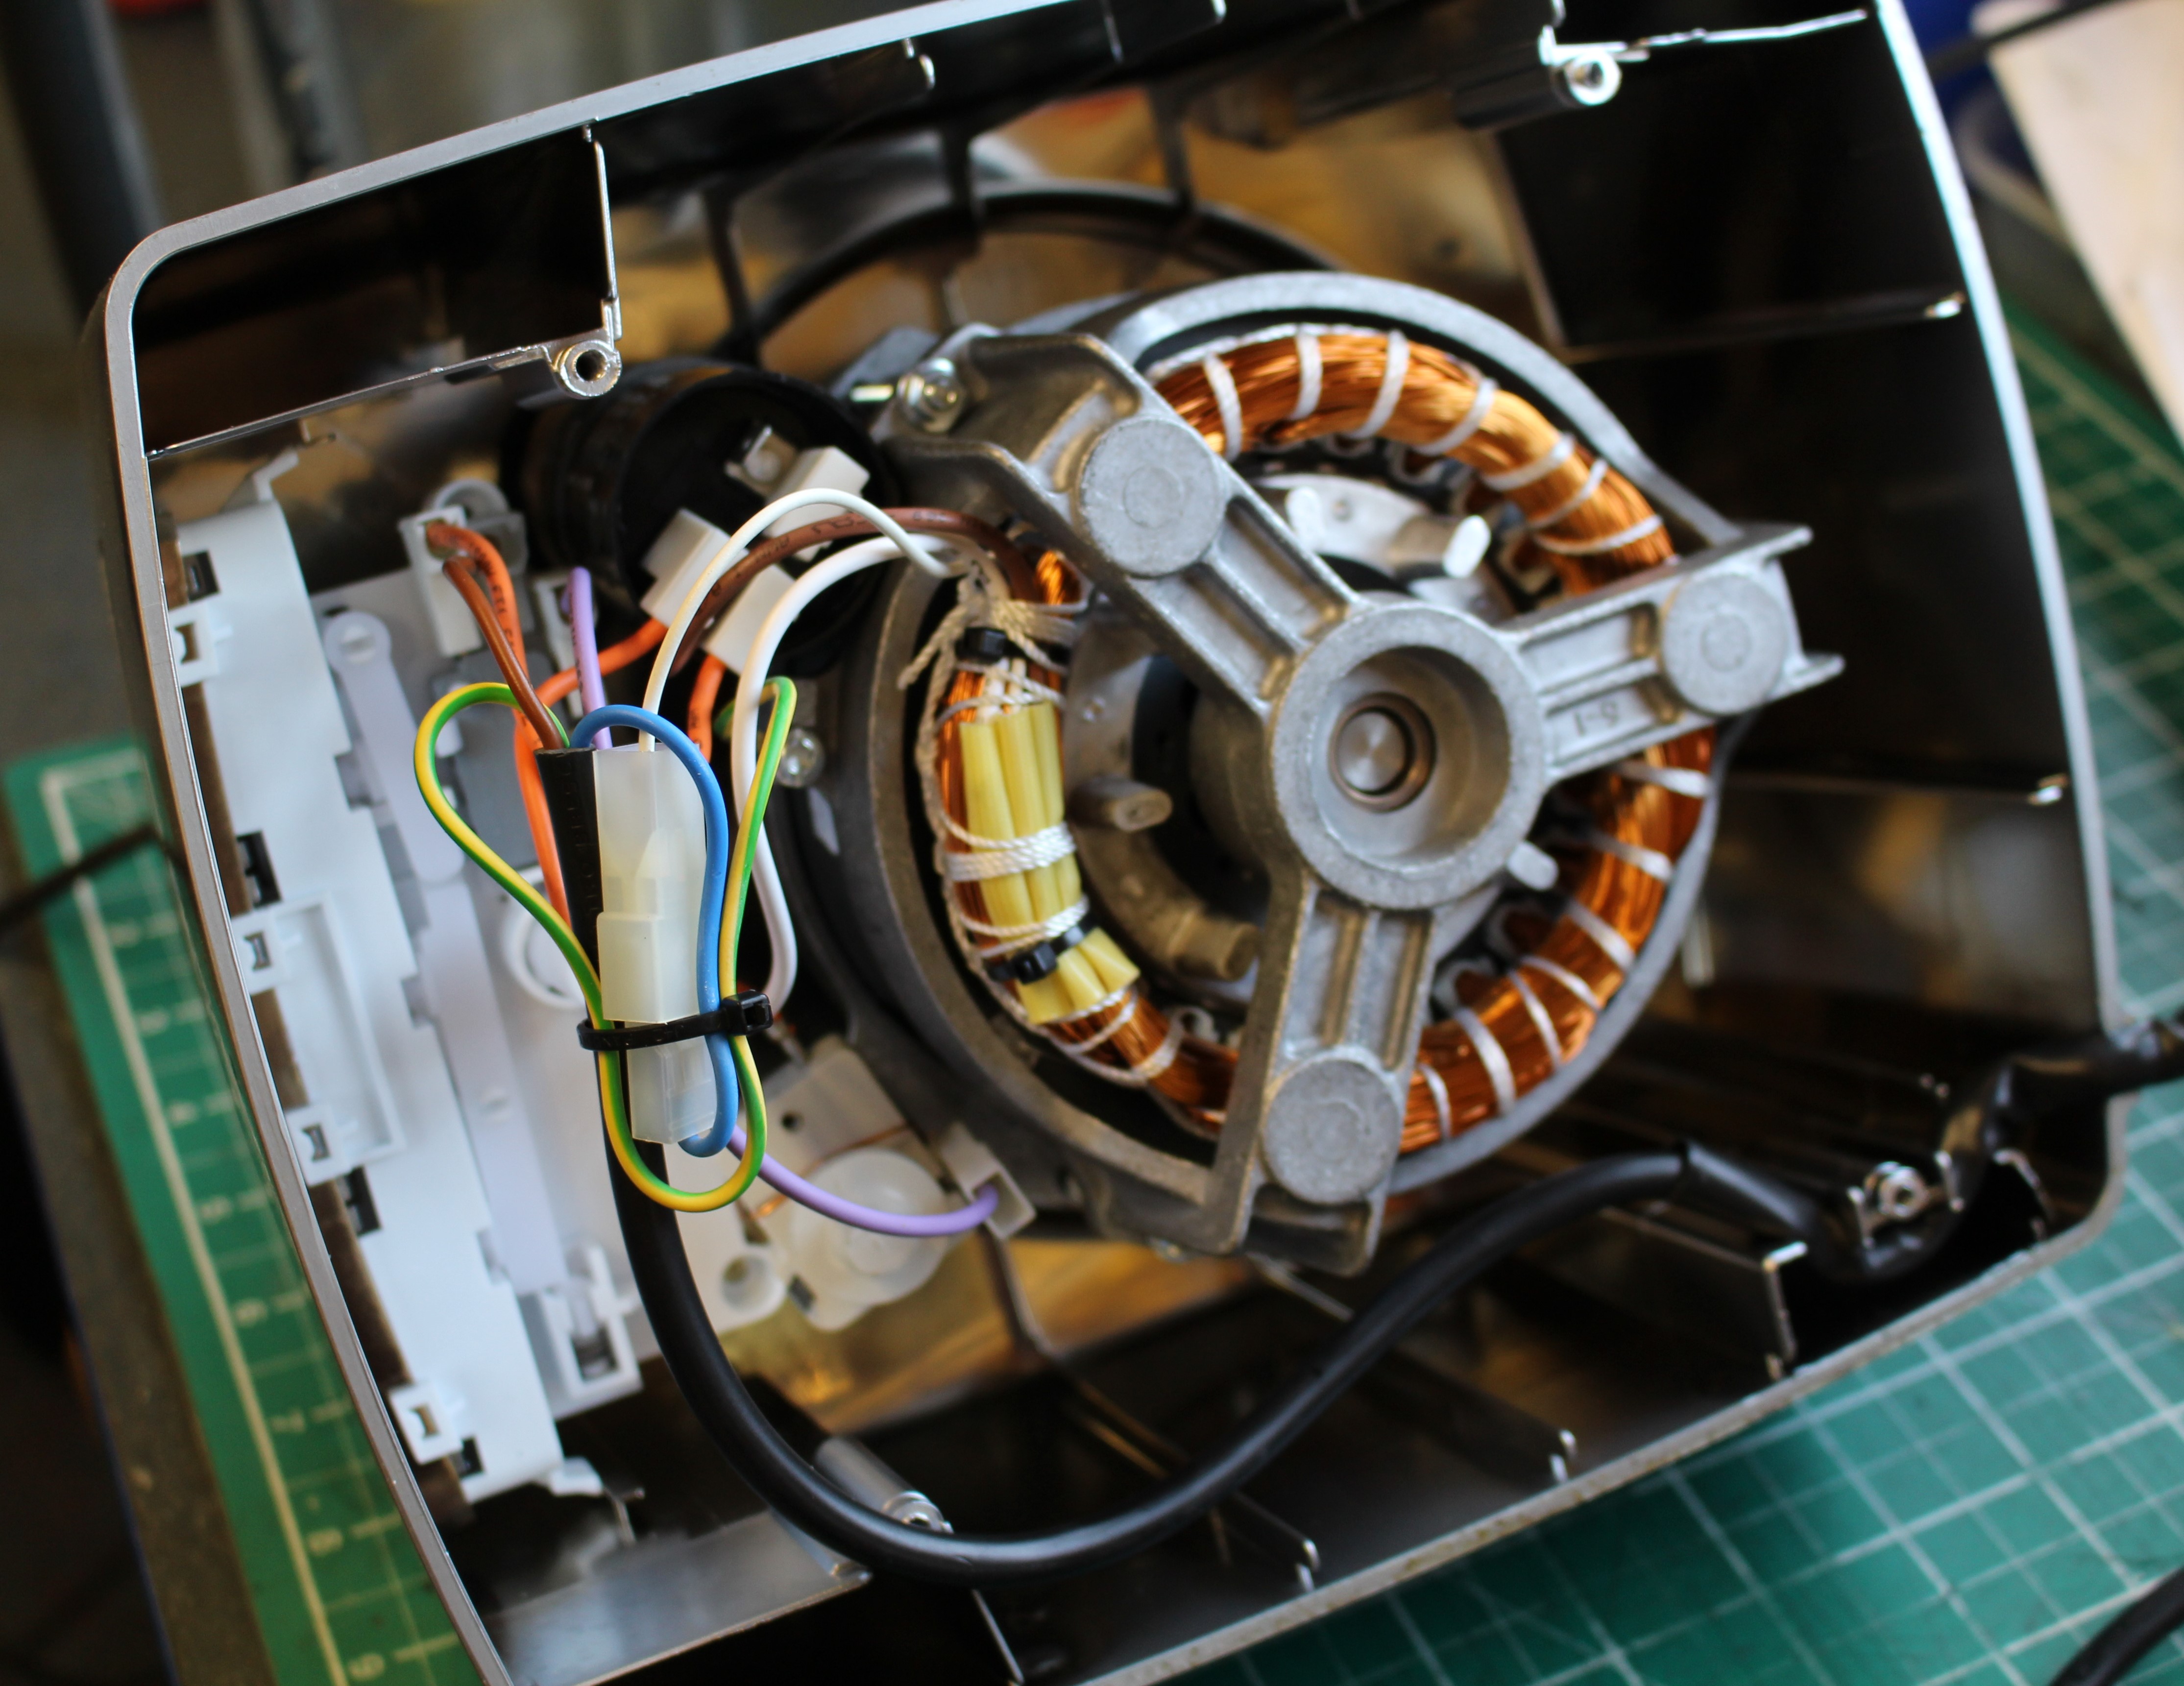
FixItWorkshop, Worthing, November’20, Magimix 4200XL, inside the mixer’s safety switch.
FixItWorkshop, Worthing, November’20, the 4200XL features a motor with oomph!
FixItWorkshop, Worthing, November’20, Magimix 4200XL, removing the base.
FixItWorkshop, Worthing, November’20, Magimix 4200XL, these little horrors are designed to deter repair- I dislike them immensely.
FixItWorkshop, Worthing, November’20, Magimix 4200XL, the repaired mixer.
FixItWorkshop, Worthing, November’20, Magimix 4200XL, the cheeky little safety switch.

The owner of this machine reported that their beloved Magimix 4200XL was playing up and despite trying to wriggle, jiggle, shake, rattle and roll things, it simply wouldn’t comply and work. They asked if I would take a look at it for them before it was launched out of the window. There’s nothing like a frustrated owner.

The Magimix 4200XL features a really rather elegant, totally passive, safety device to ensure that one isn’t tempted to operate the machine without the lid fitted correctly, risking one’s little pinkies. A simple sprung lever mechanism built into the lid and jug matches a small recessed switch in the machine’s base. The machine will only fire-up once the lid is in place on the jug, which must be correctly aligned on the base. It’s a nice touch that probably keeps Magimix out of the courtrooms.

On first inspection, I decided that this mechanism was a reasonable place to start my investigations. After you’ve checked things like ‘is the power on’ it makes sense to ‘start simple’ and go from there.

Taking the base cover off only involved four Torx screws, the damned anti-tamper kind. Luckily I have the technology to do this.

Taking the base cover off revealed good access to the safety switch mechanism. Thankfully.

The mechanism all seemed correct and present, which was a bit of a guess since I’d never worked on a mixer like this before. However, a lack of loose parts rattling inside is usually a good sign. Phew.

Despite appearing OK, the operating safety switch lever did seem stiff, so a quick spray with silicone lube had things sliding nicely once again. A quick continuity test of the switch proved that it was switching OK. Things were starting to look up for ‘Maggy’.

Since I had the lube out, it made sense to clean up the jug and lid mechanism and give that the same treatment. It all seemed to work better after and testing the lid and jug, refitted to the base with the base cover removed allowed me to visually confirm that the safety switch mechanism was indeed doing its thing correctly once again. A good result.

After carefully reassembling the base cover, taking care not to damage some of the more delicate plastic parts, it was ready for testing. There’s always a little moment of ‘will something go bang’ when I switch things on for the first time, but luck was on my side as the motor spun up as Magimix intended. A good result. All fingers intact.

The tale of Hetty & Henry

A small mix up nearly resulted in some body modification…

IMG_2026
FixItWorkshop, Worthing, May’20, Henry & Hetty bathing in the sunshine

Make and model: Hetty Vacuum Cleaner (HET200-22)

Fault reported: Not working

Cost of replacement: £100-£140

Manufacturer support:  10/10

Cost of parts: £21.59, inc. carriage

Hours spent on repair: 1 hour with service

Tools needed: Screwdrivers, test meter etc

Sundry items: Silicone spray, cleaning materials

Repair difficulty: 4/10

Cups of tea: 1

Biscuits: Ginger Nut X2

If only everything was as well made and built to last as a Henry (or Hetty!) hoover.  Simple as a knife and fork, with tried and tested technology, it’s a machine created by an engineer, for everyone to own, use and repair themselves, when needed.

A neighbour got in touch to say that their broken Hetty was about to be scrapped and asked if I could do anything with it.  Of course, I said.  To be honest with you all, I’m not that confident with all repairs, but I knew that in the case of this one, I should be fine as Numatic products are pretty well supported by the manufacturer. And this is the thing:

How many purchases do we make that consider; “will I be able to get parts for that one day”?

We all do it, but as a tinkerer I try and consider the longevity and likely need for replacement components when I’m considering handing over my hard earned wedge, at point of purchase.

The Hetty had been working fine, but had then conked out, mid clean.  No drama, no noise, no smoke, it had just stopped.  The owner had already checked the fuse, but that was fine (as they often are).

When things just stop and won’t restart, that symptom is often trying to tell you something and if you’re listening, capturing the way something fails and acting on the information can save you time and often money.  It’s a trick I’m always trying to perfect, although one can be caught out anytime- but that’s half the fun.

  • The machine stopped suddenly…
    • Maybe the cable broke?
    • Maybe the plug is damaged
    • Maybe a component failed quickly

Expensive things like motors tend to start making noises, run slower than usual or smell bad before failing.  They can ‘just stop’ of course, but it’s likely that there will be a build-up, so I proceeded with some confidence that the motor was probably fine.  I always check motor bearings and brushes anyway, when servicing this type of thing.

Since the mains cable and plug were fine, it was time to delve inside.  The Hetty top is simply held together with a few screws (normal cross head) which then frees the cable winder and motor assembly, when undone.

I suspected the two-speed control PCB as these can fail suddenly without warning and since I have no Numatic PCB tester (if there is such a thing), all I could do is prove the component as faulty, beyond reasonable doubt.  A quick check with my multi-meter revealed that there was no output, when connected to the mains.  Suspicious.

It is also possible to by-pass the speed control PCB on these machines, which I did.  I connected the motor up without it’s 600W/1200W control circuit in the loop and the motor spun up just fine.

This slideshow requires JavaScript.

Often, I like to go direct to the manufacturer (where possible) for spare parts as you often get the truth about an appliance as well as the latest version of a part.  Often, manufacturers continue to iron out bugs and develop upgrades for spare parts as these will be fitted to the latest models.  A company such as Numatic seem to apply those upgrades retrospectively to older models too, so that all customers new and old, can enjoy the benefits.  For information; UK spec speed controller part 208436 (red) replaces part 206735 (orange) for model HET200-22.

As I couldn’t find the part I needed on any website, a quick call to Numatic UK, gave me the information I needed.  Even during Covid-19 lockdown here in the UK, the lady in Numatic’s spares department, working from her kitchen, was able to advise me on the upgraded part I now needed and arrange for it to be with me for the next working day.  If that’s not good service, I don’t know what is.  http://www.numatic.co.uk

With the new part installed, the motor spun once more, at the correct two speeds.  Happy days.

All fine then.  Not quite. 

Hetty had been supplied with a red base, not the original pink one that Hetty should have.

As we all know… no?  Just me then, Henry is red and Hetty is pink and there is a range of names and colours to choose from in the range.

When I tried to fit the Hetty top to the supplied red base, it didn’t fit.  Quite a head-scratching moment, if I’m being frank with you.  Had it never fitted? Had the owner simply just put up with it the way it was?  Had there been some kind of strange swapping incident that I wasn’t aware of?  Time to get some answers!

It turns out that my neighbour have both Henry and Hetty models and had given me the wrong base.  They had assumed they are all the same.  They’re not actually, see below.

The latest Henry and Hetty tops have a cut-out for the tool storage bracket moudling as shown on the red base above.  The earlier Hetty I had in the workshop had no such bracket in the plastic.  I did offer to modify the Hetty top I had with my Dremel saw, but this offer was declined!

With the right top and base paired up once more, I was happy, the neighbours were happy and another vacuum cleaner had been saved from being scrapped needlessly.

Time for another brew.


More power please

Does your toy have enough energy?

IMG_20200304_211145
FixItWorkshop, Worthing, March’20, testing a battery (featuring my retro BT multimeter).

I’m not a fan of batteries. They run out and always when you least expect it.

You know that anything with a battery, will need attention at some point.

Batteries either need to be replaced or better, recharged.

But often, replacement batteries are the only option for toys, which can mean high running costs. Especially when the toy is played with continually by an enthusiastic child owner!

Trouble is, a mixture of built-in obsolescence and poor design means that it’s just not obvious how one replaces duff batteries meaning that, I suspect, lots of toys get thrown away needlessly, but it’s not the owners fault necessarily.

Sadly, some replacement batteries cost more than the toy itself, which is just mad.

Make and model: toy radio control car (no brand or model)

Fault reported: Not working

Cost of replacement: £10ish

Manufacturer support:  0/10

Cost of parts: £5 (batteries)

Hours spent on repair: 30 minutes

Tools needed: Screwdrivers, test meter etc

Sundry items: None

Repair difficulty: 0/10

Cups of tea: 1/2 cup

Biscuits: None

This slideshow requires JavaScript.

The owner of this toy had played with it non-stop wearing the batteries out.  Mum and dad had replaced some of the batteries in the car part of this toy, but still the toy didn’t work.  It wasn’t clear to the parents, which batteries in what part of the toy needed to be replaced, which meant that an email asking for help, popped in to my inbox.

At first glance, the car part of the toy had no battery cover or compartment, but on closer inspection, the car separated in to two halves, allowing access to the 4 X AA (1.5V) batteries.  Not a straightforward task for everyone.  Testing each battery revealed that they were all worn with an average of 1.3 volts (much lower under load) each.  I replaced these with fresh ones and put the car back together.  The car’s casing was simply held together with a clip and a couple of small screws.

However, the toy still wasn’t working, time to test the radio controller.  Again, a screwdriver was needed to open the battery compartment to access the battery.  Not all households have screwdrivers (even though I believe they should!).

Testing the 9V PP3/ 6LR61 battery revealed around 3 volts, 6 volts too low.  Again, a new battery got the radio controller working once more.

Doing this ‘repair’ got me thinking.  Batteries can be tricky things to manage.  New ones can go flat when not in use and old ones that have been kicking around in a drawer for a while can be fine to use.  One can replace batteries with ‘new’ ones which are no better than the ones fitted, leading a user to believe that the ‘thing’ must be faulty.  A false positive.

With a little basic training on multimeter use, hours and cash can be saved by testing pesky batteries.  At under £5 for a basic multimeter, it could be money well saved for any household.  Just a thought.

With both car and radio controller switched on, the toy sprung to life.  Of course, I had to test the car thoroughly before handing it back(!).


Hooray for Henry!

A Numatic Henry vacuum cleaner gets the kiss of life…

IMG_1545
FixItWorkshop, Worthing, March’20, Numatic ‘Henry’ vacuum cleaner HVA200a (to be exact).

There are times when only no-nonsense suck will do.  Other vacuum cleaners offer the moon on a stick, but rarely live up to the repeated abuse of everyday life.  Henry on the other hand is tough, no-nonsense and above all, reliable.

Reviewers of this kind of thing, seem to agree.

Make and model: Numatic International ‘Henry’ vacuum cleaner HVA200a

Fault reported: Dead/ not running

Cost of replacement: About £130, give or take

Cost of parts: £17.25

Hours spent on repair: 1

Tools needed: Cleaning tools/ cross-head screwdriver

Sundry items: Silicone spray/ cleaning rags

Repair difficulty: 2/10

Cups of tea: 1

Biscuits: 1 bourbon, I think

I have friends in trades who will only buy and use Henry ‘hoovers’ as they last, always work and are easy to use. And above all, who doesn’t like an appliance with a smiley face?

The example in the picture above had been used by a local Worthing taxi driver everyday for the last 15 years without any problems and was in pretty good nick.  The filter was clean and apart from some wear and tear scratches, still looked like the current model.

One day, Henry failed to switch on and after the owner had checked the fuse in the plug, he decided to get in touch with the workshop.

IMG_1546
FixItWorkshop, Worthing, March’20, Henry’s on switch.

The HVA200a has two speed settings, one at 600 Watts power and one at 1200 Watts power, selectable by a red switch and indicated in a red tell-tail lamp.  When plugged in, nothing was happening.

Time to perform surgery.

Opening up Henry’s casing was straightforward and top marks to the designers for creating sensible parts that fit together logically.  Henry is designed to last and be repaired.  All very pleasing.

This slideshow requires JavaScript.

With the lid removed, all electrical checks were made from the plug to the end of the flex, down to the motor.  The flex was in good condition with no snags, shorts or earth faults.  The cable winder on this model is a simple handle operating spindle and was a bit sticky.  The contacts inside the gubbins were also tarnished, so while it was all in pieces, I decided to clean all of the electrical contacts with cleaner and make sure all the sliding parts of the cable winder were clean and had a small dab of silicone spray for smoothness.

Testing for current around the circuit revealed that the speed control board was where things stopped.  The speed control board was dead and required replacing.

To prove this fact, I was able to temporarily by-pass the controller and connect the mains switch to the motor, which revealed that the motor was strong.

A quick bit of shopping with my favourite parts suppliers yielded a replacement (updated) speed control PCB for under £20, which seemed like good value to me.  After making a note of the wiring (see slideshow), the new PCB was connected up, the casing back together and Henry was ready to run, once more.

I also decided to give Henry a little polish too, just because.


Kenwood Chef repair: Real time video

A Chef repair gets it’s own video!

I carry out a few Kenwood Chef repairs a year and usually, they can be brought back to full health with simple tools and repair components.  I’ve not had a faulty Chef brought in to the workshop which hasn’t left ready for service.  Yet.

img_7876
Fixitworkshop, March’19, Kenwood Chef A901 with a repaired motor.

One common theme with all older machines is that the motor speed control circuitry can fail which either manifests itself with symptoms including, but not restricted to; electrical burning smells and smoke, the motor not running smoothly or not running at all.  While the failure of a Kenwood Chef may look spectacular when it happens, the repair is fairly straightforward, if you have some basic skills, tools and some patience.

This particular A901 came in with four faults; poor feet condition, cracked cowling, the speed control knob was loose and once I opened up the motor unit to look further, burned-out capacitors.

To some, this list of faults might seem a bit daunting, but it’s standard fare on a Chef of this age and to be expected after thirty plus years service.  Due to the excellent design of the product, the faults are all repairable with commonly available parts.

After about an hours’ work, the feet were replaced, the motor circuitry repaired and the replacement cowling refitted.  The speed control knob had come away from the motor body and only required the pin that held it in place ‘pressing’ back in to the housing, resulting in one happy mixer.

One of my aims on this website is to share my experience and best practice so for the first time, I made a video of the complete motor repair in real-time.  So, if you have a Chef to repair and twenty minutes, grab yourself some popcorn, a notepad and pen and enjoy.

Cost of replacement:  £150.00 and up.  Cost of repair: £30 plus my time and tea.

Silent Singer Sewing Machine Pedal

A classic Singer foot pedal gets repaired.

My mum’s got an old electric Singer sewing machine which is about 40 odd years old.  Singer sewing machines are well supported generally and parts are readily available, but I find it’s sometimes fun to try and find the cheapest way to fix something myself.

IMG_6870
FixItWorkshop, Worthing, November’18, Singer Sewing Machine Foot Control Pedal

The foot pedal on this machine went pop and smelled horrible after.  The machine then stopped working, oh dear.

The pedal is of high quality construction and easily better than any generic replacement on the market, so it was definately worth saving.

Opening up the pedal was just a few screws, which then exposed the whole mechanism.  The mains resistor was in tact and seemed to test with resistance.  A good start.  The contacts were in good condition as was the rest of all the components, except for the mains input capacitor, which has spectactularly failed and split open, a common problem on older mains capacitors.

Repair kits are readily available for about £5, but that seemed expensive to me!  Using the existing capacitor as a guide, I found a suitable component on eBay for £2.09 delivered.  That’s more like it.

The capacitor I used was:  Film Capacitor, 0.1 µF, 250 V, PET (Polyester), ± 5%, R60 Series (from eBay).

Here’s a little slide show that I hope will help others fix their pedal, should it fail.

This slideshow requires JavaScript.

With the old capacitor cut out and the new one soldered in, the pedal was ready to run again.  Sorted.

Cost of a replacement:  £15-30 for a generic part.  Cost of repair, £2.09, 1 cup of tea.

Elna SP foot pedal went bang

Elna SP foot pedal to the metal

On the back of a previous article about a repair I did on the rather wonderful Elna SP sewing machine, a reader got in touch.  She was a genuine sewing aficionado and had several top of the range current machines, but she used the trusty Elna SP for many smaller jobs, where the other machines didn’t quite cut it.

All Elna SP machines are getting on a bit and parts are either re-manufactured, scarce or secondhand, if you can find them.  Having said all that, a well-maintained Elna will run for many years and last much longer than new metal on sale now.

IMG-1971
FixItWorkshop, Worthing, November’18, Elna SP Special, in action

The foot pedal on this machine had gone pop, bang, finito.  It smelled terminal.

Knowing that parts for this machine are rarer than hens teeth and I do like a challenge, I took on the job.  I’m based in Worthing, West Sussex and the machine was located in Scotland, so after a short wait, the knackered pedal arrived in the post.

The pedal is held together with four small self-tapping screws and came apart easily.  The reason for failure was two-fold.  The copper leaf contacts had arced excessively and caused major pitting in the contact strip (see slide show) and the probably ensuing resistance had caused the main resistor to overheat, causing the winding to fail.

This slideshow requires JavaScript.

The contact surfaces were easy-ish to fix, or rather breathe new life into as all they needed was cleaning and re-shaping.  The resistor was a bit trickier to mend.  Getting hold of a replacement was going to be near impossible, so the only thing to do was to try and repair it.  Without that particular style of resistor, of that value, it wouldn’t work again.  Luckily, there was some excess resistance wire on the thing and I managed to twist it in to the broken section.  Soldering was not an option, since the wire was an alloy that wouldn’t take to solder and in any case, these things get hot in normal service.  I twisted both ends of the break to form a new section, while maintaining the same length of windings on the resistor, essential if I was to match or get close to the original specification.  Difficult.  Luckily, after a few goes, I managed it and the applied a little heat-conducting (and therefore dissipating) paste to the join.

With the pedal reassembled, I was only able to test it with my meter, since the sewing machine was far too heavy to post.  The pedal tested as a closed circuit (OK), which was a result.  I then had to wait for the pedal to be collected, taken back to Scotland and tested.  Fortunately, my fix worked and the machine sprang in to life, without a hitch or missed stitch.

Now, a word of caution with this one.  This is NOT the best way of mending something like this and all I’ve probably done is prolong it’s life a little longer.  There are generic sewing machine pedals that would work with this machine and will be fine, when this one fails in future, but that’s not the point.  The main thing is that something that was broken is now working and even if it’s not the best fix, at least it will run for a bit longer.  Happy days.

Cost of replacement: (generic part) £15-30.  Cost of repair, my time, a bit of solder and several cups of tea.

Runaway Hillbilly Golf Trolley…

Golf trolley heads for the hills…

Readers of this blog (I know there are millions of you) will recognise this golf trolley and I’m pleased to report that my first repair, the one to the motor, is still working perfectly.  However, the owner of the trolley contacted me with a (funny) problem.  Whilst recently enjoying a round of golf on the local fairway, the trolley decided to, by itself, begin to edge away from the second tee and then with some speed, head off in to the distance, without any operation of the dial switch, situated on the handle.  Whilst this seemed funny at first, I remembered that the motor on this trolley had the kind of torque that, coupled to small gearbox and wheels on a heavy frame, could do some serious damage, left unchecked.

Original photo taken in Aug’17, below.

WP_20170803_14_08_27_Pro
FixItWorkshop, Worthing, Aug’17 Hillbilly Compact Golf Trolley

Unlike many modern electric golf trolleys, it doesn’t feature GPS guidance, remote control or amazingly, a dead-man’s switch, which seems like a major safety oversight to me.  I’d have expected either a kill switch or dead-man’s switch* fitted to the handle on a trolley like this as the runaway scenario could never occur due to fail-safe nature of the switch being operated.  With one, the trolley would only run when the operators’ hand was on the handle or cut out when the kill switch is activated, as with the saftety cord mechanism, on a jet ski for example.  Perhaps the Mk2 Hillbilly Compact featured this.

*For example, a dead-man’s switch is usually fitted to something like an electric saw where the operator must old a handle-type switch to make it run.  Once the operator lets go of the handle, the motor automatically fails-safe and cuts-out.

On with the repair.  The trolley features some exposed connectors and cabling and it seemed sensible to check the continuity of the cables running up and down the handle shaft, as repeated trolley folding might have caused a problem with the wiring.  Fortunately, the cabling was OK.

The owner had mentioned that the handle, where the speed control switch is located, had got wet in the past, which made my alarm bells ring.

Opening up the handle, which only required a basic tool kit, revealed evidence of water damage and corrosion to the speed control terminals.  Luckily the owner of the trolley had stocked up on spare switches!

Removing the existing switch revealed intermittent continuity and varying amounts of resistance, which was not good.  A fault most likely to have been caused by water ingress or excessive shock.  The owner had supplied two ‘new old stock’ (NOS) switches.  Which one to fit?

From time to time, it’s downright sensible to either fit NOS or second-parts as they’re usually cost-effective and are more likely to fit over pattern parts.  But time can also affect apparently shiny parts.  This was a case in point.  I knew that the switch should vary resistance from open circuit to 10KOhms in either direction from COMM.  The old one didn’t and one of the ‘new’ parts only went to 2KOhms, so was not in specification.  Luckily, the remaining NOS switch worked fine and once refitted, and the handle reassembled, the golf trolley was ready to make the job of carrying clubs easier, once again.

IMG_20180131_135745
FixItWorkshop, Feb’18, Hillbilly Compact speed control switch, new and old- test NOS parts before fitting.

Cost of replacement trolley:  ££££ Cost of repair; £10 plus time.  Moral of the story; don’t assume NOS parts will work.  Test them first.


Satellite Bass Guitar that wouldn’t go to 11.

A Fender Precision style Satellite P Bass guitar repair…

A friend of mine, who plays in a Portsmouth-based Psychedelic Garage Rock & Roll band, brought in a Satellite Bass Guitar with a few issues.  Firstly the volume control was noisy and crackly and secondly, it was a little quiet.  Not good for those moments where you need to go one higher, to eleven.

The band are:  60th Parallel

IMG_4905
FixItWorkshop Jan’18, Fender Precision style, Satellite P-Bass.

Opening up the compartment behind volume, tone and jack plug socket revealed messy wiring and dodgy connections.  The owner had already supplied a replacement potentiometer for the volume control, so all I had to do was replace the one fitted, re-make the poor connections and give the wiring a general tidy-up.

IMG_4908
FixItWorkshop Jan’18, Fender Precision style, Satellite P-Bass, wiring before work.

The guitar has Dimarzio ‘Model P’ pick-ups which can be wired many different ways, depending on the application and musical taste.  This particular guitar, circa 1976, is a Fender Precision style Satellite bass (P-Bass) and has a modified ‘through neck’.

IMG_4906
FixItWorkshop Jan’18, Fender Precision style, Satellite P-Bass, volume (top) and tone (bottom) controls.

Testing the guitar before commencing work revealed a slightly quiet, but mainly crackly output from the amplifier, the tone control was fine.  The owner had also complained that the bass sometimes cut-out, mid song.  Not ideal.

Removing the volume control was straightforward and only required a spanner to remove the nut, after pulling off the volume knob.  The rest of the job just involved careful de-soldering, cutting out the poor wiring and replacing it with new wiring where needed and some heat shrink to tidy things up. Having not repaired an electric guitar before, I did make a quick wiring diagram for reference!

Once completed, I hooked it up to the amplifier again which revealed a much cleaner, crackle free note.  Sadly, I can’t play the guitar, so I wasn’t able to test it properly!

IMG_4911
FixItWorkshop Jan’18, Fender Precision style, Satellite P-Bass, neater wiring.

Cost of a new bass:  Name a price.  Cost of the repair; about £2.00 plus tinker time.


Kenwood Chef A901 -a fishy story!

If your Kenwood Chef A901 starts to smell of burning, don’t despair, it can usually be saved.

I had an enquiry via this site from a fisherman who was very upset that his trusty Kenwood Chef A901 had given up the ghost.  Rather than using the Chef to make Victoria sponges, it had been used to prepare fishing bait.  It just demonstrates how versatile these machines are.

Kenwood Chef A901
FixItWorkshop, Oct’17, Kenwood Chef A901 with motor speed control fault.

Whilst it was in use, the owner witnessed a bang then the smell of burning before the machine came to a halt.  The plug was quickly pulled!

Whilst discussing the fault on the phone, I suspected that the fault was probably due to the failure of the motor speed control circuitry, which is known to fail with age.  I had carried out similar repairs to other machines, including my own (in this blog) so agreed to take a look.

I received the machine quickly and upon inspection, the machine had obviously been cared for and considering its age, was in good condition.  The smell of burned-out components was clear, lifting it out of the box.

Dismantling the machine and removing the motor on the A901 is fairly straightforward, providing you allow time and make notes on where things go.  The components that need to be replaced are very accessible and anyone with moderate soldering skills would be OK with this task.

Luckily, the Chef is very well supported by long-term aftermarket suppliers and I bought an off-the-shelf spares kit at £14.10 delivered, from KAParts (www.kaparts.co.uk) via eBay, featuring upgraded components.  This kit is a little dearer, but component technology has moved on since this machine was first on the market, so fitting anything else is a false economy in my opinion.

With the old components removed and replacements fitted, the motor ran smoothly and fully reassembled, the machine is now ready to mix bait mixtures once again.  Lovely.

Cost of a new machine: Circa £300 and up.  Cost of repair:  £44.10 (kit plus my time).

Here’s a little video I made of the repair.

Enjoy.