Inside The Real Repair Shop 11: Lego, Radios and Allegros

This time, Matt talks about cars on fire, tinkering and repair education.

Festive greetings from the workshop and well, hasn’t the year flown by?

As some of you know already, repair work is a bit of a side-hustle for me, and it’s something I’ve enjoyed since I was a child. Seriously, I would dismantle my parents’ vacuum cleaners, radios, clocks and later, the family car’s engine. Things sort of got out of control when I set fire to my uncles’ Austin Allegro though by muddling up some dashboard wires. Fortunately, the Allegro was made of stronger stuff and survived my handy work, despite a few scorch marks. Anyway, what were they thinking, letting an 8-year-old work on a car unsupervised!

For me, a long-long time ago now, a Fisher Price handyman set turned into Lego building and craft play using old washing up bottles and loo rolls. This turned into blowing up electronics kits, which then moved on to building bikes and cars.  As a late teenager, I then got an apprenticeship with BT and studied while I learned about telephone exchanges and communications technologies. All of this might explain why I was never picked for the school team. You can’t have it all, I guess.

Playing with Lego and kits from Tandy (remember them?) for me as a kid definitely helped me to have a positive approach to repair and to not be fearful of getting it wrong. We only really learn from mistakes, of course. And I was lucky to have people around me at the time who were (mainly) happy with me dismantling household things with real tools, taking risks with real appliances and building weird inventions in the kitchen. But it wasn’t all good-humoured in our house! I still remember getting a stern telling off for dismantling a Mini carburettor on the draining board, next to the family’s drying crockery. My mum was upset with me for some reason.

Where’s all this going anyway? Well, as an adult who sometimes acts all grown-up, I’ve since had time to reflect on this maybe unusual set of circumstances, which ultimately lead me to where I am now in Worthing, at 44 years of age. I make no apology for being a pushy parent to my two daughters, encouraging them to create and build stuff; from toilet rolls and sticky tape to their increasing collection of Lego sets, or are they really my Lego sets? I want my kids to learn as I did, the joy of building, testing and usually failing to solve problems. It doesn’t always work like that, but you know what I mean.

I get a wide range of repair enquiries in my inbox, from Kenwood Chef restorations to lamp re-wires to kids’ toy repairs, many enquiries with interesting back-stories too. But sometimes I just can’t take on a repair if I feel that it can be done by the person enquiring. For example, fitting a new plug to an appliance, which I feel, if needed, should be attempted by most folk. The main issue affecting many people, and therefore preventing them from tacking the job themselves, is a lack of confidence. I see it all the time, from vacuum cleaners that just need minor adjustments or cleaning, to lamps that only need a new bulb.  When people ask me to do repair work like this, I’ll always give them the option to do the work themselves first, with some guidance – which probably isn’t good for business, but will ultimately help that person to maybe help themselves.

Of course, as adults, there are local repair cafés, DIY college courses and YouTube that can help any budding diy’er, but to be truly repair savvy, I believe that one must start their learning younger and begin through play and the classroom.

In this article, I wanted to share some of my educational thoughts on repair.  Appliance repair and general household maintenance isn’t covered as a subject at school (in the UK) to my knowledge, and as we make it to adulthood, we’re just expected to figure it out for ourselves or ask someone else. The closest we get to repair work in secondary school is in Design Technology, but hoover teardowns and rebuilds are not covered.  Is this because it’s perceived as unglamorous, basic, simple work, I wonder? Perhaps it’s something I’ll take up with the current Education Secretary, although I’ll have to be quick, as it may all change next week! In all seriousness, our education system needs to encourage practical self-reliance, encompassing repair, if our government is truly serious about sustainability and our environment.  In the same way that secondary school mathematics should include topics on mortgages and loan applications, technology subjects should also encompass domestic appliance fault-finding and furniture assembly education, alongside more classical topics so that our children today turn out as adults tomorrow, who can, at least, wire a plug.

Until the next time…

Janod Toy Phone repair/ Une réparation de Janod jouet téléphone

A Janod Toy Phone gets opened up and stuck back together.

There’s always a debate to be had on what age one should give a child a phone, but as a parent, groovy toys like this are hard to resist.  I mean, who doesn’t like a toy that makes cool noises, at the touch of a button.

I especially enjoyed the cuckoo noise (clock symbol).

Make and model: Janod toy phone

Fault reported: No sound, despite new batteries

Cost of replacement: About £10

Cost of parts: £0.00

Hours spent on repair: 0.5

Tools needed: Cutters, screwdriver and soldering iron

Sundry items: Glue

Repair difficulty: 2/10

Cups of tea: 1

Biscuits: 0

A friend of ours got in touch to ask if I could look at their daughter’s toy phone, which had stopped working after being dropped on a hard surface.  Despite the rubber outer cover fitted, after being dropped, the phone now rattled and made no sound.

The (adult) owners had changed the small coin cell batteries, but to no avail and were now wondering what to do, so I said I’d admit it to the workshop.

Janod.com are a French company specialising in making funky wooden toys with a retro warm vibe, while offering modern features.  I like their stuff.

However, on the repair side of things, the designer had not allowed me any service access to the rear of the phone.  It was glued.  The only way of getting in was to break the casing open to see what was going on.

Janod:  I like your products, but please consider changing your designs to allow repair.  Tamper proof screws and other child-resistant systems can be used so that only those with intent can open up the casing to perform a repair.

I used a small flat-bladed screwdriver to gently prise the casing apart and after some nail-biting moments, (I was worried I was going to snap something), the back came off.

The fault became apparent almost immediately.  The small speaker had become detached from the mounting and a wire from the circuit board to the speaker had snapped.  A little soldering and a bit of hot melt glue and the speaker was installed back where it was meant to go, ready to sound off again.

The last job was to repair the now broken case.  Since it was wooden, I used PVA wood glue on the mating surfaces and held the phone for 48 hours gently in my bench vice and now, no one would never know the repair ever happened.

This slideshow requires JavaScript.

The toy was returned to its owner ready to bring child happiness and parent irritation, once more.  I had to press the cuckoo noise button a few times before I gave it back.


Jonathan Deer the III

A Christmas novelty toy gets a new lease of life…

IMG_0509
FixItWorkshop, Worthing, December 2019, Jonathan Deer III.

I meet some really interesting people with this hobby of mine with some quirky things to fix, often with personal and meaningful backstories.  This repair is one such item.

Make and model: Jonathan Deer III rubber deer thingy

Fault reported: Not running

Cost of replacement: About £0

Cost of parts: £0.00

Hours spent on repair: 2

Tools needed: Cutters, screwdriver and soldering iron

Sundry items: Contact cleaner

Repair difficulty: 2/10

Cups of tea: 2

Biscuits: 0

Someone got in touch to see if I could repair a festive family favourite Christmas novelty, which was a big hit with the children, back in the day.  Jonathan Deer III has become a family legend and Christmas simply wouldn’t be complete without him.  Intrigued, I agreed to see the injured deer.

A few days later, a parcel arrived and upon opening, I was greeted with a deer’s head made of rubber.  Not one’s average delivery.

This slideshow requires JavaScript.

‘Jonathan Deer’ was available about 20 years ago in the UK and I suspect the US as a novelty singing Christmas toy, designed to hang on the wall, to bring festive joy when anyone walks past the deer’s motion sensor.

Sadly, or maybe fortuitously, depending on your perspective, Jonathan was now silent and despite new batteries, it was dead.

The thing about Christmas decorations is that they get used for about 4 weeks a year and then packed away, usually in a loft or alike where it’s not necessarily that warm or dry for the remaining 48 weeks.  Cold, damp and draughty conditions are not good for small electrical items.  Batteries left leak and metallic contacts corrode and these ailments had affected poor old Jonathan.

Repairs completed:

  • Battery terminals were corroded from battery leakage and therefore cleaned with a small toothbrush and protected with contact cleaner
  • Opening up the casing (several small screws) revealed a broken negative lead.  A Small re-soldering job fixed that

Still no action.

  • Lastly, the on/off switch didn’t seem to be working.  I was able to separate the small tangs holding the switch together and gently clean the switch wiper/ contacts with cleaning agent.  I didn’t replace the switch as it’s a bespoke item and getting a replacement would be difficult.  The repair I made seemed to work OK.

Once the switch was cleaned, Jonathan burst into life.  Upon switching him on in demo mode, he woke up by blaring out James Brown – I Feel Good.  Moving the switch to on mode, he worked as he should via the motion sensor.  Wonderful.

I was then able to return the deer to its owner to enjoy over the festive season.  Result.

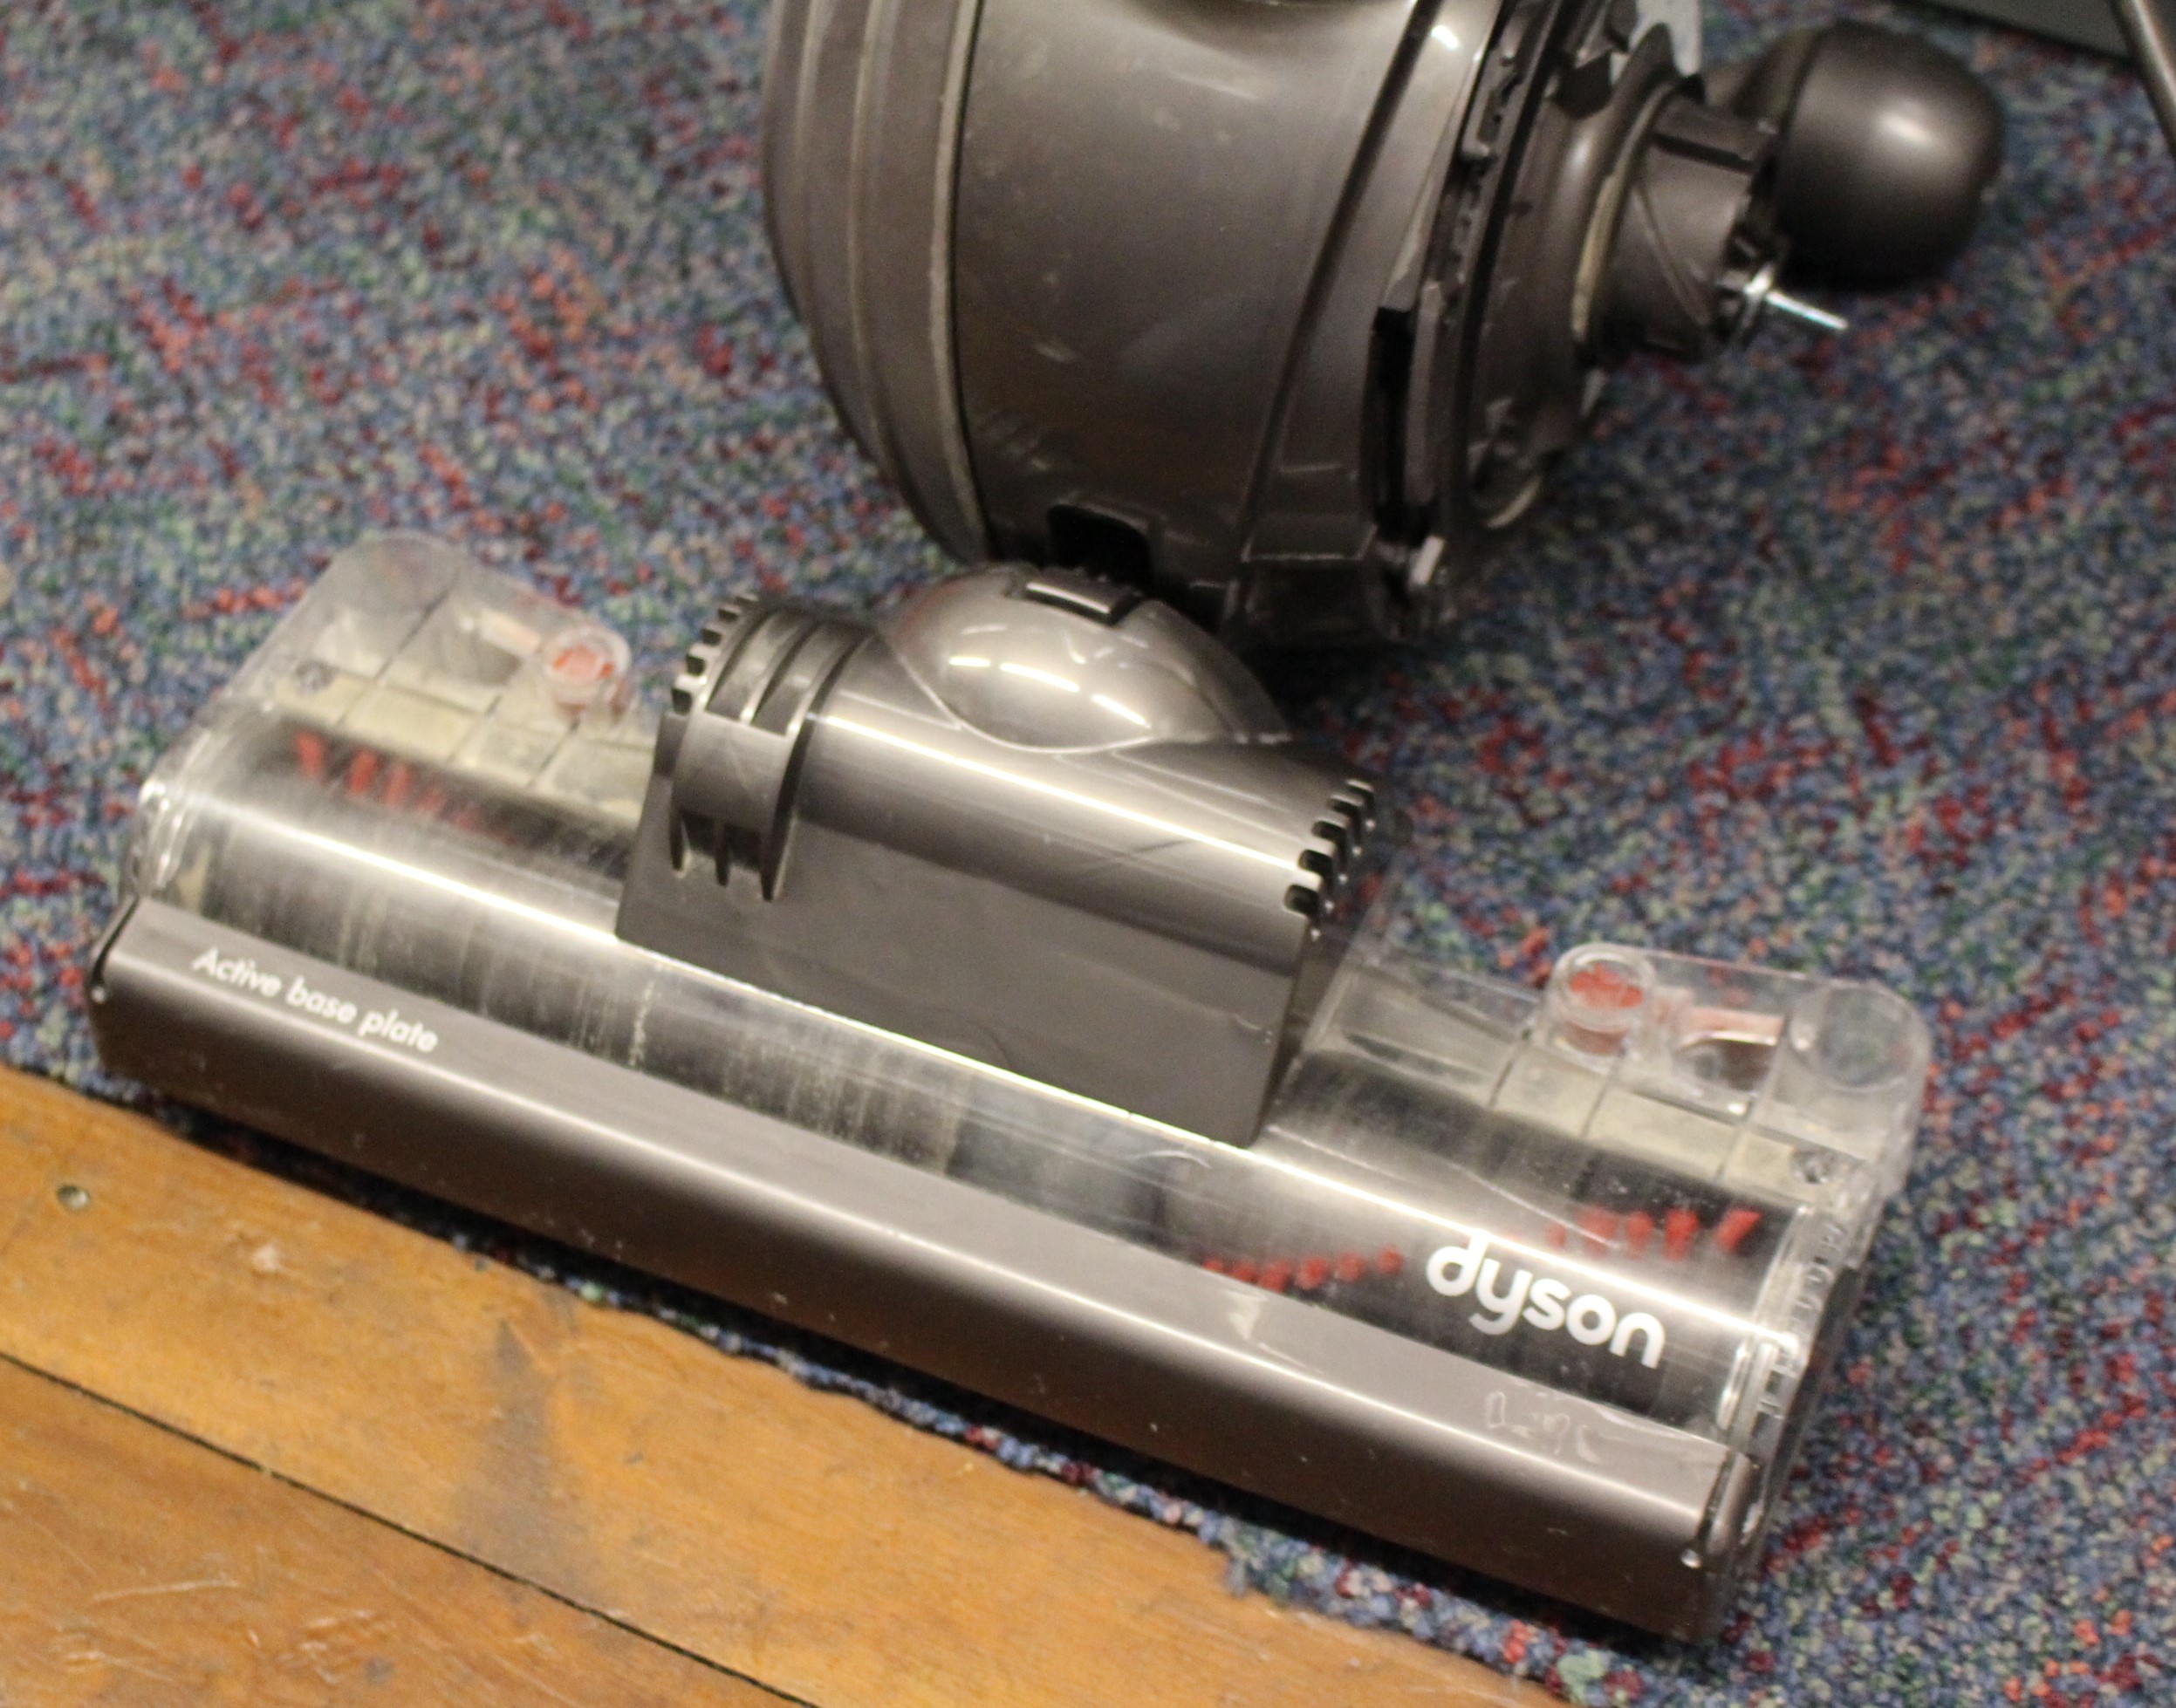
Dyson DC25 with various problems

Another Dyson dodges the dump

An email dropped into my inbox about a poorly Dyson DC25, that needed a bit of a clean up.  I said no problem, I’ll take a look.  What turned up was a vacuum cleaner that needed a bit more than a quick clean up with a J-Cloth.

Make and model:  Dyson DC25 (blue/ grey)

Cost of replacement:  £N/A, price when new £300

Cost of parts:  £6.89 (plus my time)

Hours spent on repair:  2.5 (plus testing)

Repair difficulty:  5/10

It soon became apparent, that the Dyson was quite ill.

Here’s a summary of the problems:

  1. The mains cable flex was split, exposing the internal cables risking electric shock
  2. The roller beaters would not spin
  3. Suction was limited

None of these features were useful in vacuum cleaner, so out came the screw drivers.

The mains flex damage was about 90 cms from the handle end, so rather than replacing the whole cable at about £30, I decided to shorten the one already fitted on the Dyson.  This involved removing three screws on the reverse of the handle to expose the wiring.  From there, the broken flex could be cut-out and the sound part of the flex, reattached to the Dyson’s wiring.  See below.

This slideshow requires JavaScript.

The DC25 features a roller-ball, enabling the beater head to twist and turn in to tight spots on the floor.  This means that mains power must navigate the various joints and hinges on the way from the main body to the roller beaters.  A quick test revealed that the power was not getting through.  After removing one of the side covers, there was evidence of a previous repair.  One of the mains cables had broken and had then been twisted back together.  Clearly, an improvement was needed.  Using a section of repair cable, a small joint was soldered back in to place with some mains-rated heat shrink around the connection for insulation and reinforcement.  See below.

This slideshow requires JavaScript.

The beater head also needed a good clean, which meant a strip-down and re-build.  All parts were cleaned, inspected and reassembled.  During that process, a small break in the beater head wiring was found, repaired and put back together.  See below.

This slideshow requires JavaScript.

Finally, the machine needed a good clean up.  The main cylinder was washed, the filters washed (although I later decided to replace these) and the main seals on the vacuum system, cleaned and silicone sealed.  See below.

This slideshow requires JavaScript.

During clean up, the spigot-yoke that holds the roller ball in place on one side was found to be missing.  Luckily the owner had kept this and dropped it back to me to re-fit.

This Dyson was on the brink, but with a little bit of spanner-time, it’s now ready to serve many more years.


Dyson DC40 missing a beat

A small repair on a Dyson DC40 leads to a big improvement.

A powerful, easy to manoeuvre vacuum cleaner, that gets into every nook and cranny.  But not this one.

IMG_8891
FixItWorkshop, Worthing, May’19, Dyson DC40.

Three top tips for keeping your Dyson DC40 in rude health:

  • Keep all filters clean (wash or replace frequently)
  • Clean all rubber seals with a damp cloth to remove dust build-up
  • Occasionally lubricate moving parts of jockey wheel mechanism (springs and lever) with silicone spray

Do these things and your Dyson will love you forever.

I’m a bit of a sucker for Dyson products.  They are well engineered products from the school of function over form and in my opinion, objects of art.

This Dyson wasn’t very well when it was admitted to the workshop.  The owner had complained that the vacuum cleaner wasn’t picking up dirt and dust properly.  The beaters were not spinning either.

IMG_8890
FixItWorkshop, Worthing, May’19, Dyson DC40 beater head.

The beater ‘head’ is attached to the main body of the vacuum cleaner and is held in place with a sliding clip.  The head can rotate and move to allow maximum control.  The beater roller is driven not via a belt from the main motor, but from its own smaller motor in the head unit.  So, there is an electrical connector between the main body and head unit.  As the beaters were not spinning, it seemed sensible to test the electrical connection.  Upon testing, it was not working.

The mechanism on this vacuum cleaner is quite complicated and relies on levers and joints working in harmony.  Dismantling the wheels, filters, brackets and covers around the motor revealed the problem.  The supply that feeds power to the beater head is routed around the motor and sliding lever mechanism and a broken cable was to blame for the beaters not spinning.

Access was difficult due to the design so rather than completely tearing down the body to replace the supply loom, I reattached the broken wire with some soldering and heat shrink to make a robust repair.

After carefully rerouting the cables and reassembling the body, wheels and beater head, the beaters spun once more.  Result.

This slideshow requires JavaScript.

After a new set of filters were fitted and a light service, the machine was as good as new.

Cost of replacement machine:  £000’s.  Cost of repair parts: £11.69 plus my time and two teas.

Aldi Bauhn Radio with no power

A cheap radio gets a cheap fix.

I love a good radio.  I used to collect them as a kid, working or not, do them up, get them working and I eventually ended up with, er… lots.  I’ve since scaled my collection back a bit these days to around 10 or so, quite frankly more than is healthy really.

So when someone got in touch recently with a broken DAB radio to fix, I got quite excited.

IMG_8145
FixItWorkshop, Worthing, February’19, Bauhn DAB Radio.

These Bauhn DAB radios (available from Aldi or Lidl in the UK, I think) were on the market for about £10 and at that price they represent great value when compared to more expensive devices.

However, the one in the workshop appeared to have a problem power connector, which when wobbled, made the radio work intermittently.  Suspicious.

Having already repaired a similar radio with a similar fault before, I decided to video the repair to encourage others to check theirs, if something similar happens.  I hope you find it useful.


Happy fixing!

Cost of a new radio:  £10.  Cost of repair:  One cuppa and a bit of tinker time.

Christmas blackout

A Christmas treat for me…

Christmas wouldn’t be complete without having to fix last years’ tree lights and this year was no exception.  It’s a tradition I look forward to and savour.

Gone are the days spending hours trying to find a faulty bulb, now due to the wide availability of cheap LED products, the thing that’s often likely to fail is the wiring, something which was much more unusual, a few years ago.  Manufacturers must make savings somewhere and I often wonder how retailers can offer new decorative lights, so cheap.  Compromises must be made somewhere I guess.

IMG_20181215_112843
FixItWorkshop, December’18, Worthing, Christmas Lights.

Being cheap, like a lot of things, makes them more disposable, which is a shame when things fail, often for trivial reasons.  This year’s blackout was caused by a couple of broken wires on the control box, which didn’t appear to have any obvious way to get inside.

We don’t like to be beaten in the workshop and sealed units and tamper-proof items are just seen as a challenge, rather than a deterrent.

Like many multi-function sets, the lights are operated via a control box with a switch, mounted in a plastic enclosure which appears sealed.  The fault was obvious here, just the main wire from the transformer had broken ‘flush’ with the control box, meaning that there was not enough wire either side of the break to re-join it.

The control box has no screws nor visible clips, holding it together, so it was time to break it open, using a small flat-bladed screwdriver.  The small section covering the wires snapped off cleanly, revealing several terminals covered in hot melt glue, annoyingly.  This meant that before any repair, the glue must be removed.  Several minutes picking this off with the screwdriver, revealed some conventional post terminals.  The fix was easy from there, just cut down the wire to make a new connection, remembering which way round they went, clean up the terminals and solder back together.  A little bit of fresh hot-melt glue to seal the connection and a bit more on the surface to be stuck together, and the cover was refitted.  I also fitted a little heat shrink to repair to reduce the chance of the cable from breaking again.

This slideshow requires JavaScript.

As I had the soldering iron out, I also did a small repair to the control box wire to transformer plug, which had also broken.  It was a case of cutting back two sides of the break, soldering, isolating with a small amount of electrical tape and sealing with heat shrink.

Now that’s all done, Christmas can now officially start.

Cost of replacement: £ 5.00 up.  Cost of repair: 1 cup of tea, heat shrink, tape and solder.


Elna SP foot pedal went bang

Elna SP foot pedal to the metal

On the back of a previous article about a repair I did on the rather wonderful Elna SP sewing machine, a reader got in touch.  She was a genuine sewing aficionado and had several top of the range current machines, but she used the trusty Elna SP for many smaller jobs, where the other machines didn’t quite cut it.

All Elna SP machines are getting on a bit and parts are either re-manufactured, scarce or secondhand, if you can find them.  Having said all that, a well-maintained Elna will run for many years and last much longer than new metal on sale now.

IMG-1971
FixItWorkshop, Worthing, November’18, Elna SP Special, in action

The foot pedal on this machine had gone pop, bang, finito.  It smelled terminal.

Knowing that parts for this machine are rarer than hens teeth and I do like a challenge, I took on the job.  I’m based in Worthing, West Sussex and the machine was located in Scotland, so after a short wait, the knackered pedal arrived in the post.

The pedal is held together with four small self-tapping screws and came apart easily.  The reason for failure was two-fold.  The copper leaf contacts had arced excessively and caused major pitting in the contact strip (see slide show) and the probably ensuing resistance had caused the main resistor to overheat, causing the winding to fail.

This slideshow requires JavaScript.

The contact surfaces were easy-ish to fix, or rather breathe new life into as all they needed was cleaning and re-shaping.  The resistor was a bit trickier to mend.  Getting hold of a replacement was going to be near impossible, so the only thing to do was to try and repair it.  Without that particular style of resistor, of that value, it wouldn’t work again.  Luckily, there was some excess resistance wire on the thing and I managed to twist it in to the broken section.  Soldering was not an option, since the wire was an alloy that wouldn’t take to solder and in any case, these things get hot in normal service.  I twisted both ends of the break to form a new section, while maintaining the same length of windings on the resistor, essential if I was to match or get close to the original specification.  Difficult.  Luckily, after a few goes, I managed it and the applied a little heat-conducting (and therefore dissipating) paste to the join.

With the pedal reassembled, I was only able to test it with my meter, since the sewing machine was far too heavy to post.  The pedal tested as a closed circuit (OK), which was a result.  I then had to wait for the pedal to be collected, taken back to Scotland and tested.  Fortunately, my fix worked and the machine sprang in to life, without a hitch or missed stitch.

Now, a word of caution with this one.  This is NOT the best way of mending something like this and all I’ve probably done is prolong it’s life a little longer.  There are generic sewing machine pedals that would work with this machine and will be fine, when this one fails in future, but that’s not the point.  The main thing is that something that was broken is now working and even if it’s not the best fix, at least it will run for a bit longer.  Happy days.

Cost of replacement: (generic part) £15-30.  Cost of repair, my time, a bit of solder and several cups of tea.