KONGMAN lives again!

A classic 1980s Tomy Kongman game pays a visit to the workshop, for some much-needed TLC.

Every now and again, a little gem drops right into my inbox and I think; Christmas has come early. My eyes light-up! It’s nice to get something different to work on, and hopefully repair, especially when it involves motors, batteries, ball bearings and a gorilla.

A customer contacted me after rediscovering Kongman in his attic, not literally you understand, but the 1980s hit toy from Tomy. The toy was in wonderful condition, despite being a little dusty. A new battery had been installed, but upon switching it on, nothing happened. Not even a peep.

FixItWorkshop, Worthing, June’21, Kongman box

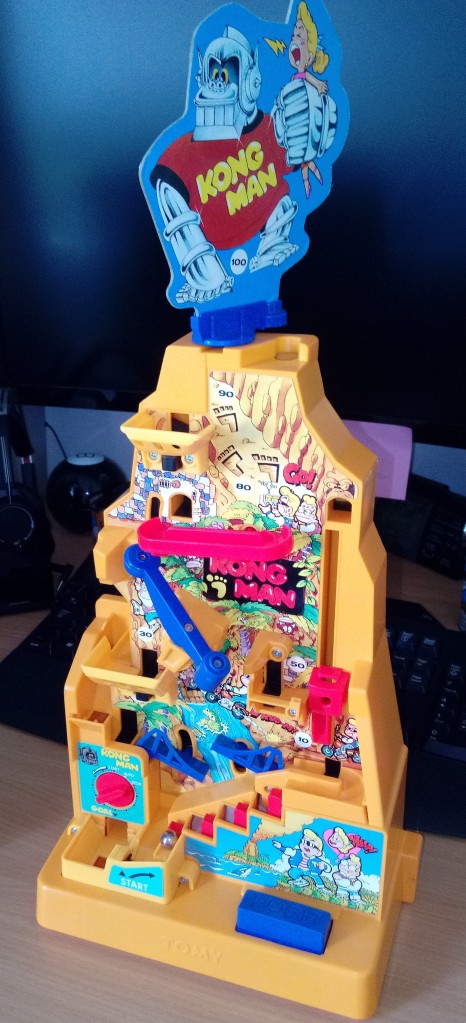
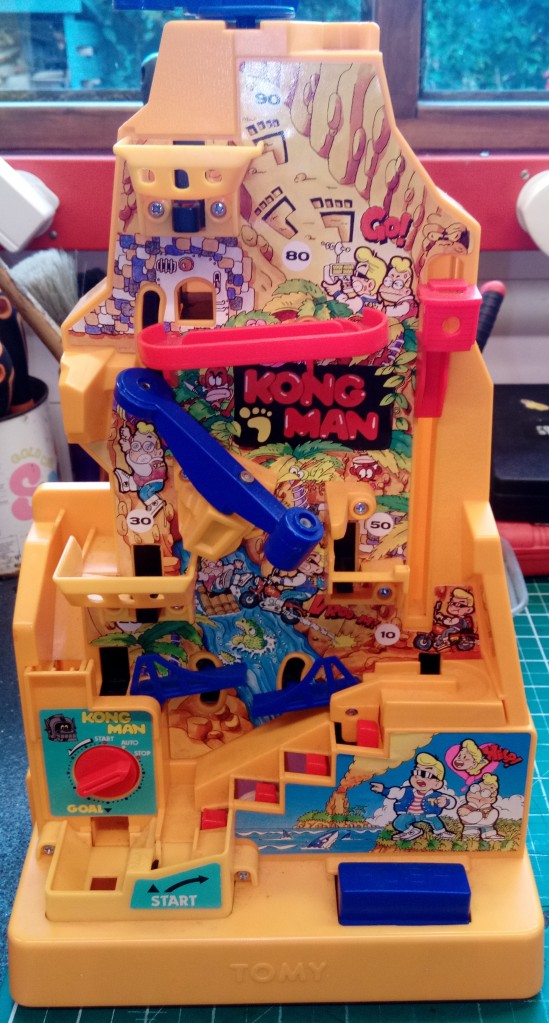
I should really kick this thing off by saying what Kongman (the game) is. Kongman is an animated vertical game with the objective of getting a small metal ball bearing from the bottom of the wall to the top. The player must defy gravity and move the ball up-stairs, across a bridge, along several steps to a magnetic swing and then into a lift. The zenith of the game is reached with a quick flick of the ball on to Kongman’s magnet hand, which then gets dropped down a hole, ringing a bell on the way down. Fun really doesn’t get any better. If you’ve ever played Screwball Scramble, you’ll have a pretty good idea of what I am talking about. Did I mention that this infuriating game can be set against the clock too? Bonkers!

Tomy’s Kongman comes from a time just before kids games started to contain many electronic gizmos and wizmos within, parts that when kaput, render a toy useless, forever. Luckily, Kongman uses an electro-mechanical animation movement; elegant and clever. Old, but good.

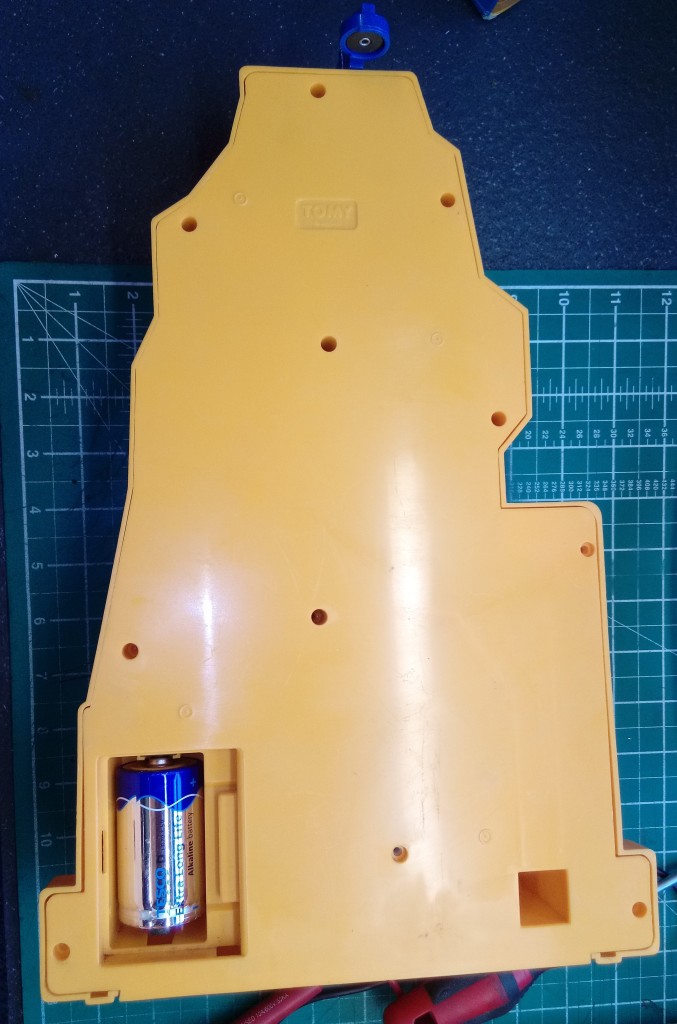
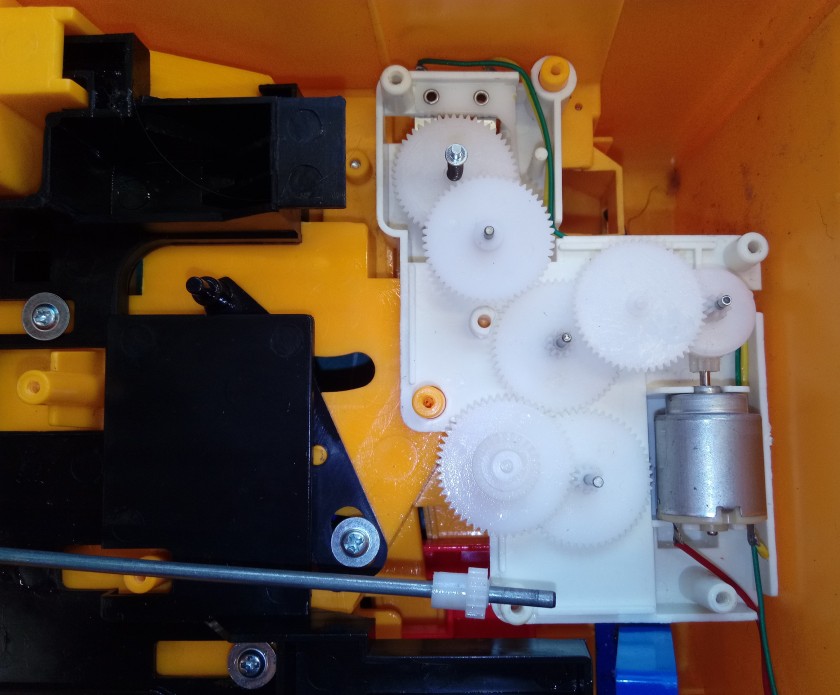
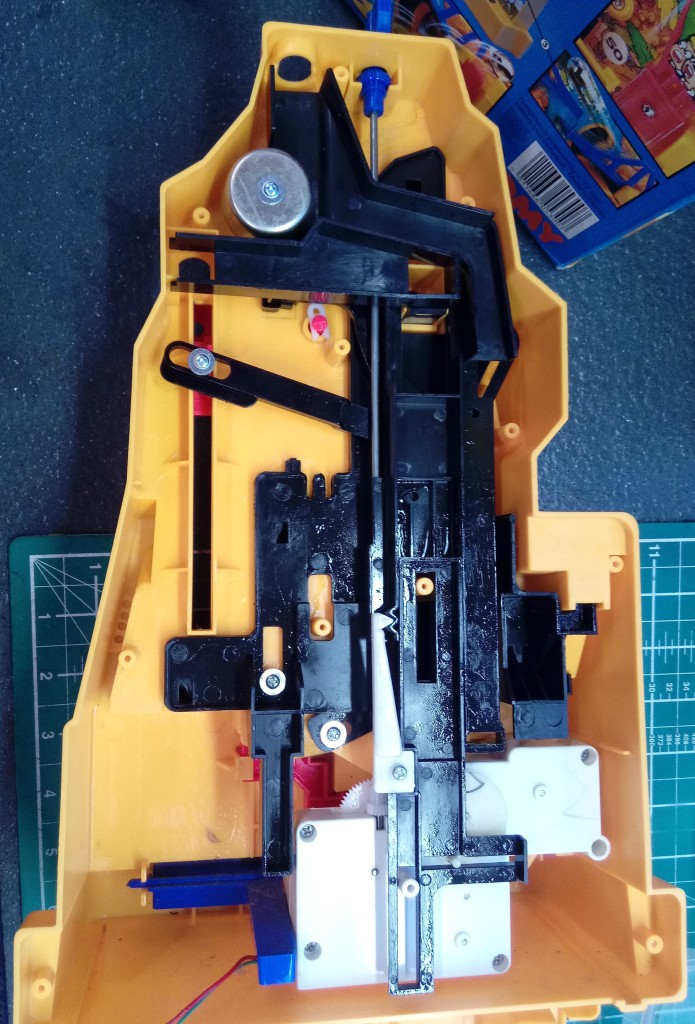
Kongman is powered by a single D-cell, 1.5V battery and the motion of the toy is actuated with a reassuringly simple little motor, connected to a compact gearbox driving a series of levers and rods, which make up the games’ animation. On a slightly different note; are D-cell batteries an endangered species? I mean, really, ‘what the 1980s torch’ takes D-cell batteries any more?!

Make and model: Tomy Kongman, circa 1981

Fault reported: Not working

Cost of replacement machine: £40.00 if you can find one working

Manufacturer support (in the UK): 0/10

Cost of parts (for this repair): £0.99p

My time spent on the repair: 1 hour

Tools needed: Small knife, pliers, small screwdriver

Sundry items: None

Cleaning materials: Silicone spray, contact cleaner

Repair difficulty: 5/10 (fiddly)

Beverages: 2 teas

Biscuits: 2 custard creams

So, on to the repair.

The toy wouldn’t run and after checking the basics like battery contacts and proving that the local wiring from the battery compartment to the main gubbins was OK, it was time to dive in.

One of the things that makes this already difficult game to complete, is the fact that as a player, you’re up against the clock. This seemed to be the next logical place to check.

The timer seemed to be part of the gearbox which is responsible for driving the rest of the game’s motion. I found this a most practical application of sound and efficient design. You can trace the DNA of this toy back to early pinball machines and jukeboxes, something I also love. Anyway, I seem to be getting romantic, not the workshop way.

The gearbox was easy to remove, just a few screws, and it was out. The timer’s switch contacts were situated within the ‘box and came apart with a gentle prod of a small screwdriver. This allowed me to apply a small amount of additional tension to the switch’s spring and to clean the contacts with cleaner. Reassembling was pretty much the reversal of the disassembly.

With the gearbox back in, it was time to turn some attention to the mechanism, to ensure smooth, reliable performance. With nearly 40 years’ worth of dust to contend with, it was time to clean all of the game’s nooks and crannies with a small brush and treat some of the sliding parts to a little silicone, plastic-friendly, lube.

With the D-Cell battery installed, a deft twist of the timer’s knob, and the game sprang to life.

I’ll be honest with you now. I tried several times to get the ball the whole course to ring the bell, against the clock, but alas, I failed. I did complete the game, but only with the timer set to ‘auto’… which provides as much time as you need, or at least until the battery runs out.

Until the next time…

A KitchenAid struggling to make dough!

A KitchenAid 5K45SS gets a light overhaul and a replacement worm gear assembly to restore it to its former glory.

My regular reader might gasp in horror to learn that this time on ‘Diary of a Tinkerer’, I’m writing about the opposition. What? Uh?

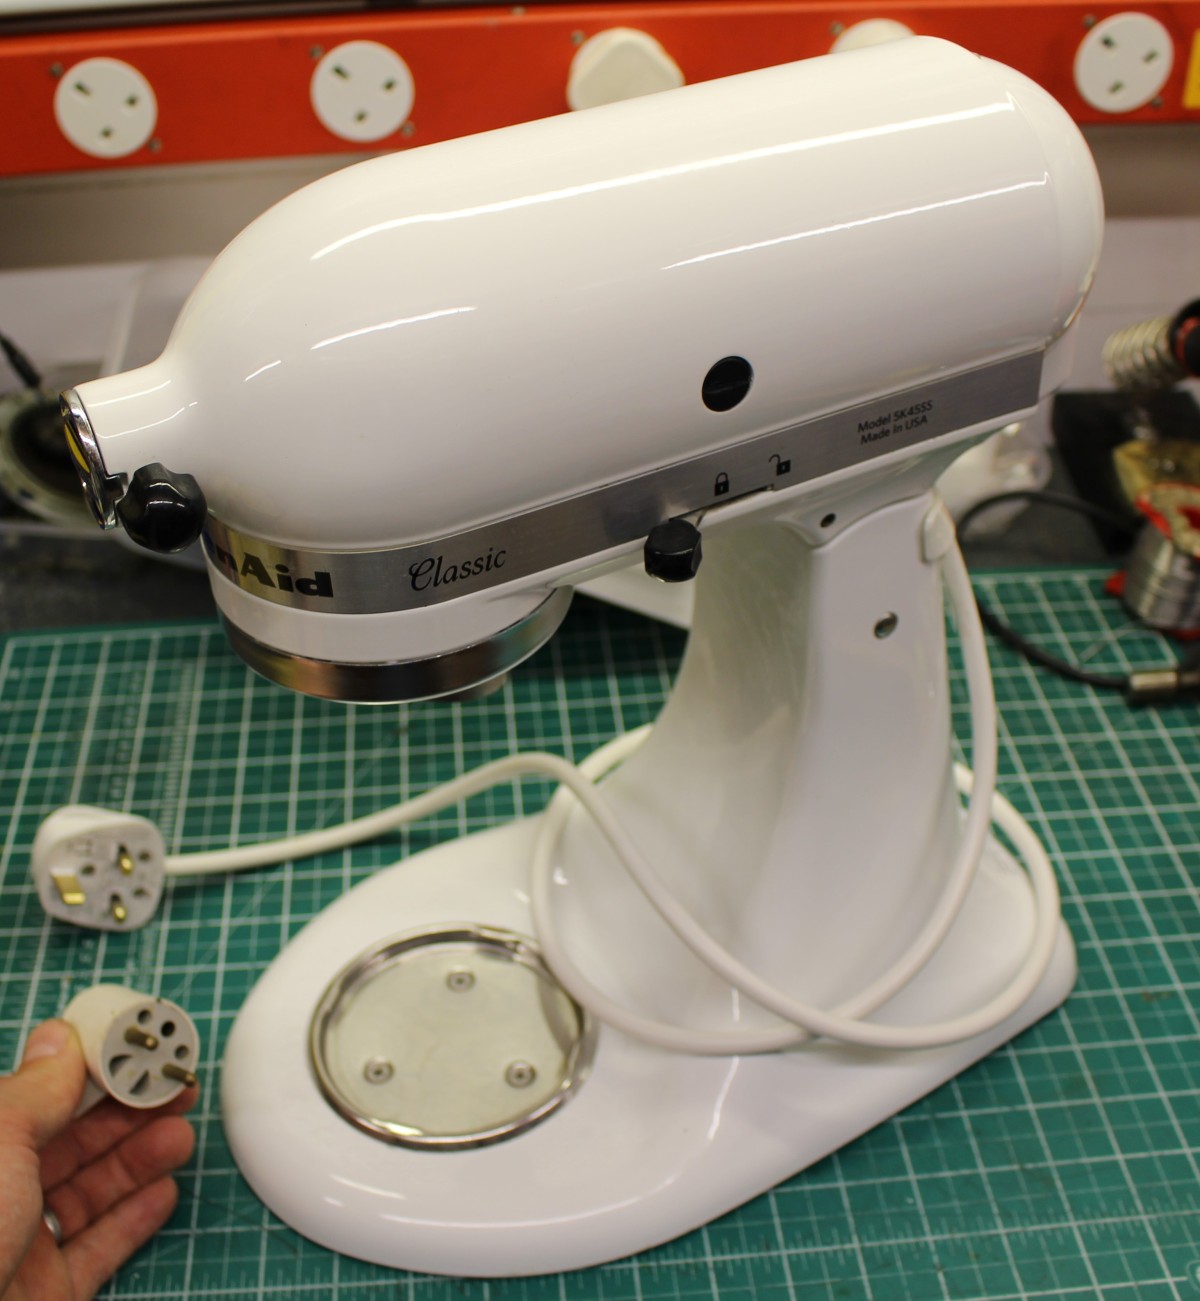
Yes, I’m writing about a KitchenAid stand mixer and not a Kenwood Chef for a change. Are these things all the same? Well, I guess that the model you see below does a similar job and has a wide range of accessories, making it extremely versatile, like a Chef. However, the overall package is different and while the Chef has gently evolved over 70-odd years in production, the original KitchenAid remains closer in function and form to its original design. That’s not to say that a KitchenAid bought today is the same as one bought 50 years ago, far from it. New models benefit from modern motors and modern manufacturing processes, but it’s all packaged with a retro-feel. I’m not a fan of retro-stylised items as they’re often not as good as the original. However, the KitchenAid is different as it’s truly original, well-made and not just playing at it.

KitchenAid stand mixers have been around for over 100 years and the basic design has its origins in the US with the Hobart Company. The KitchenAid brand is now owned by the Whirlpool Corporation, and current models feature robust construction and hard wearing finishes ensuring long-service. KitchenAid machines are durable, stylish and available in a wide selection of colours.

Now, I know what you’re thinking; Do I prefer the Kenwood Chef or my new American friend, the KitchenAid? Well it’s hard to say. I love the construction and the sound industrial design of older Chefs, and it must be said that recently made models have lost some of that robustness with the use of overcomplicated electronics and gimmicky LED lighting.

Over the years in production, KitchenAid machines have retained a ‘function over form’ approach and appearances have changed little. KitchenAids are simple to operate, durable and can be repaired easily. It’s an example that ‘modern Kenwood’ and other manufacturers, could learn from.

KitchenAid’s mantra is simple; Less is more, so much so, that it’s now a design classic in its own right.

Make and model: Whirlpool Corporation KitchenAid 5K45SS

Fault reported: Rough running, noisy operation

Cost of replacement machine: £500

Manufacturer support (in the UK): 6/10

Cost of parts (for this repair): £37.98 (Worm gear assembly 240309-2)

My time spent on the repair: 2 hours

Tools needed: Screw drivers, pliers, cutters, drift for planet pin

Sundry items: Food safe grease

Cleaning materials: Silicone spray, damp cloth, cleaning spirit

Repair difficulty: 4/10

Beverages: 2 X teas

Biscuits consumed: 3 X ginger nuts

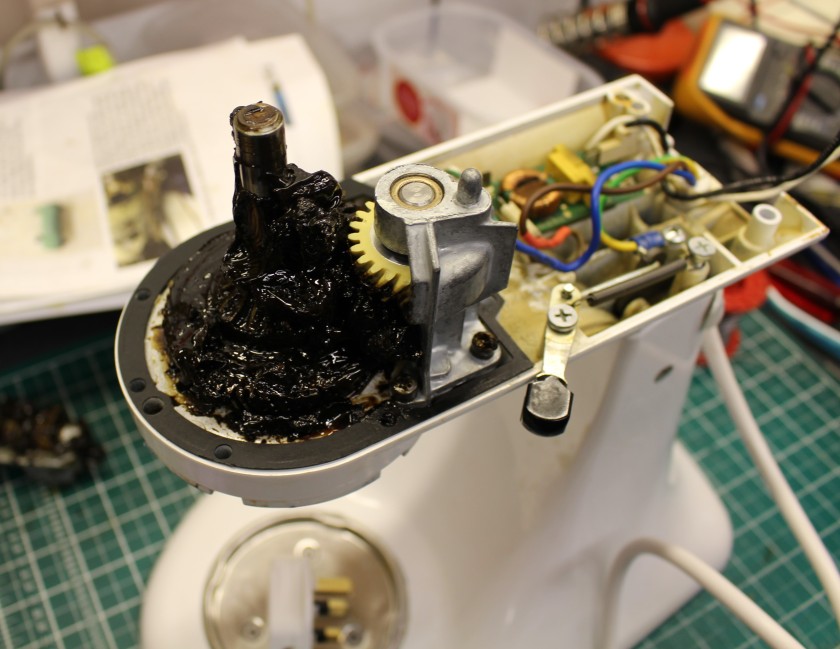
This machine you see in the photos came into the workshop with a few issues. Firstly, it needed a good clean; something that machines visiting me get whether they need it or not. I always make sure that things are polished or paintwork touched-in, if possible. It’s a little bit of OCD that’s hard to shake-off. I think I want all my customers to see what’s possible with a little-workshop love!

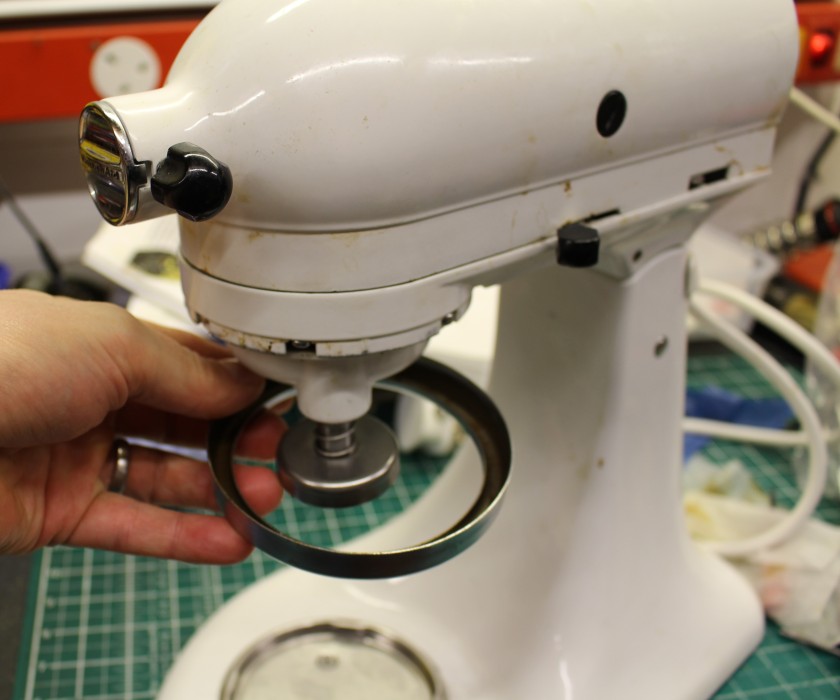
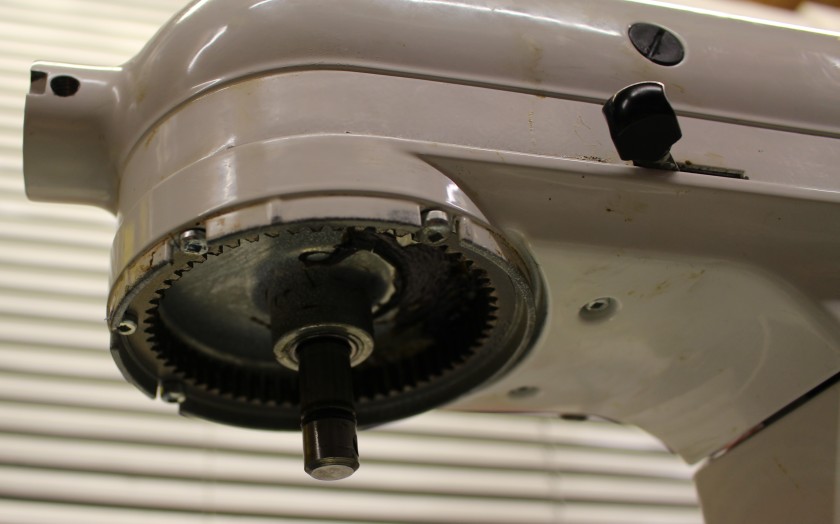
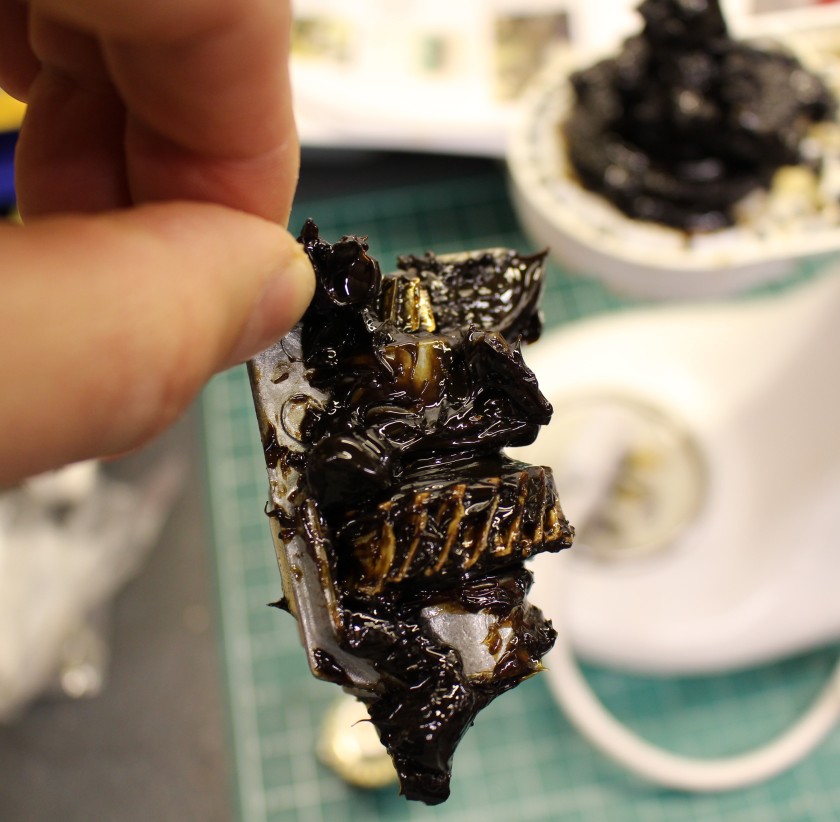
Cleaning over, and on to the main problem. This machine had had a hard life making lots of dough, or maybe cement, and routine use day-in day-out had taken its toll on the worm pinion gear assembly. I’m sure you’ve heard of that. In Plain English, it’s the bit that transfers the movement from the motor to the bit which drives the mixer’s blender.

The machine was rough in operation and the planet wheel (where the mixer bit attaches) was intermittent. No good for dough. No good for anything.

Due to their simple construction, dismantling just involves one cross-head screwdriver and a small drift and soft hammer. Simple stuff, no Torx screws or plastic tangs to worry about here, just traditional assembly techniques, which means that the machine can be repaired many times over a long-life, without fixings becoming loose and tired.

The worm pinion gear assembly (I hope you were paying attention) is available as a complete unit with bracket and bearing or available as seperate components. On an item like this, I prefer to replace the whole assembly as parts like this wear together. It’s personal choice at the end of the day, but sometimes, it’s a false economy to replace a spare part within a spare part, as I’ve found out to my cost, during many a previous repair.

As a side point; the worm gear on this machine can be described as a sacrificial part. The motor output is made of toughened steel, the gear that drives the mixer bits is forged steel, both hard and tough. The worm gear is made from Nylon, which is hard wearing, but less so than the other moving metal parts. If the machine is overloaded, it’s the worm gear that will fail first before the other, more expensive parts. Many manufacturers do this and it’s recognised as good engineering practice.

With the gear replaced, just a couple of screws to remove and replace, together with new (top-up) grease applied and the mixer worked well, once again.

The last job on this machine was to replace the very short flex and Euro plug fitted. This particular machine had been owned by an American couple, living in Europe but were now living in England and therefore required the correct UK specification plug. Together with the correct three-core flex, this machine was ready again to earn its keep.

Time to make a pizza I think.

Inside The Real Repair Shop 2

Practical vacuum cleaner maintenance advice from the workshop!

I have 5 vacuum cleaners, each kept for specific tasks, as you can imagine.  No, seriously I love vacuum cleaners.  From friendly faced Henrys and Hettys to ‘frickin’ Sharks, I love ‘em all.  Why you ask? Well I guess that using a hoover is sheer joy to me.  You take your machine to a grubby area, run it around the floor, and you are rewarded with instant gratification! The carpet is returned to near pristine condition.  Better still, with many machines, you can see all the muck that was once on the carpet, swirling around in mesmerizing dust-storms, in the see-through debris collection bin!  Cosmic stuff.

Decent vacuum cleaners cost a few quid and far too many repairable machines end up at tips across the country, prematurely.

I suspect that many machines could be saved with basic skills. Most people could manage light servicing with basic tools and a small dusting of knowledge so here are some top tips to help you keep your hoover running well for longer.

Models vary, but you are likely to need the following: 

  • Big flat-head screwdriver
  • a cross-head screwdriver
  • damp cloth bowl of hot soapy suds

Before you start work on any appliance, always unplug from the mains. 

Brush heads: Upright vacuum cleaners probably have a rotating brush head. Remove any dog, cat, child hair, Lego etc from the brushes, especially the stuff stuck at the sides, where it can cause damage to things like bearings.  Use a knife or some old scissors to cut-away trapped hair etc.  This will improve performance and prevent damage. 

FixItWorkshop, Worthing, January’21, Dyson DC07 brush head- looking clean.

Filters:  Many vacuum cleaners have at least one, sometimes three filters to prevent dust entering back into the environment it was sucked-up from, preventing sneezes.  Usually all you need to do is see where the filters are located and to remove any retaining clips/covers.  Some machines use screws to hold the filters in-situ, so you’ll need to familiarise yourself with your instructions. 

If you’ve held on to your instructions, well done.  If you’re like most people and have chucked the instructions away, you might need to Google your model and download them. These filters need to be cleaned every three months in warm soapy water and left to dry for at least 24 hours or until bone dry.  Clean filters not only prevent dust build-up in the air, but are essential for the free flow of air into your machine and out again.

A blocked motor filter could cause overheating and damage to the motor bearings and brushes.  Suction can be reduced by a blocked cylinder filter. HEPA filters need to be replaced and can’t be cleaned, however eBay is awash with good quality, cheap alternative filters, so there’s no excuse for not lavishing your machine with some filter-love to let your machine breathe easy.

FixItWorkshop, Worthing, January’21, old and new filters.

Seals:  All vacuum cleaners rely on good seals between joints to ensure perfect performance.  Rubber and foam seals need to be cleaned regularly to prevent the build-up of dirt. Get a bowl of hot soapy water and an old cloth to clean up joints and seal-like surfaces, no special skills required.  Don’t scrub too hard as you might damage the smooth surfaces, just a gentle clean is all that’s needed.  Remember, dirty seals equal vacuum loss.

FixItWorkshop, Worthing, January’21, keep seals clean with a damp sponge or cloth.

Just a small tune-up in the way of basic servicing will mean that your trusty vacuum runs sweeter for longer, saving you time, money and valuable resources.  You’ll also bond with your machine, which is a good thing.

After all that cleaning, you’ve earned yourself a cup of tea. Time to put the kettle on, make a brew and grab a custard cream.

Nilfisk GM80 industrial vacuum cleaner

This ‘vacuum beast’ from the 1960s gets serviced, ready for today

Sometimes big is best and when it comes to longevity, this machine is tough to beat.

I wasn’t born when this machine was made, but good quality designs and engineering foresight, means that new parts fit retrospectively.  Why aren’t all machines made this way?

Make and model: Nilfisk GM80 (large)

Fault reported: Poor running

Cost of replacement: £600-800 (approx.)

Manufacturer support:  8/10

Cost of parts: £14.94, inc. carriage

Hours spent on repair: 1.5 hours

Tools needed: Screwdrivers, test meter, soap and water etc

Sundry items: Silicone spray, WD-40, cleaning materials, wire wool

Repair difficulty: 3/10

Cups of coffee:  X1

Biscuits: X2 Chocolate Hobnobs (that don’t dunk that well in coffee, truth be told)

Recently, I got the opportunity to tackle an industrial vacuum cleaner in need of a proper service, which had been in continual use since the late 1960’s.  Judging by the condition it was in when I first received it in the workshop, I doubt that some parts of the machine had received any care since its first day at work.

The machine in question is a Nilfisk GM80 (large).  It’s a ‘large’ as it has a milk-churn sized base to it, which means it can swallow a lot of dust.  The large base has long been discontinued, but you can still buy the current smaller base, should yours be damaged.  Indeed, the Nilfisk GM80 range of vacuum cleaners are all quite modular and feature different levels of filtration, depending on the specific environment they are put to use in.  This means you can easily swap parts from donor machines to keep older machines going. The design means that parts seldom go obsolete, new parts just get improved and fit older models.  Great news for sustainability.

Back to the machine in question.  It had been covered for many years under a service contract, but for whatever reason, that company were no longer taking quite as much time as they should and applying as much care with each inspection.  This ‘serviced’ machine had recently had a new motor (hence later model motor housing) but the basics of vacuum principles had been overlooked.

I won’t go into the repair blow-by-blow, so here’s a summary of the work completed:

  • clean of all rubber seals and mating surfaces, essential to avoid air leaks
  • check and adjust all housing clips and adjust as necessary (all of them in this case)
  • wash motor diffuser (this had been changed within the last year)
  • wash main cotton filter (this had never been done, it was so clogged)
  • wash motor intake filter
  • check condition of motor brushes and bearing end-float (all fine)
  • check and tighten electrical IEC connection
  • inspect flex for damage (all OK)

This slideshow requires JavaScript.

The previous service agent had stated that the damaged hose (original 1960’s rubber item) was now unavailable and that a replacement was impossible.  Impossible eh?  That’s two letters too long.

Upon taking the old hose connectors apart (and removing layers of gaffer tape), I discovered that the internal diameter was similar to a Nilfisk-to-Numatic aftermarket adaptor and with a little adjustment, this 1960’s Nilfisk machine could be made compatible with Numatic’s vacuum cleaner hose design, which is much more abundant, here in the UK.  So, with a little jiggery pokery, this machine is ready to work for its living, once again, with a shiny new hose.

So yet again, when an ‘expert’ tells you that something cannot be repaired, don’t necessarily take their word for it.  A second opinion can sometimes save you time and money.

The repair didn’t break the bank either and I have since taken on more machine service work for this organisation.

Touch control lamp repair

An old lamp sees the light…
You’ve got to be in the mood for certain repair work.

A friend of ours dropped in a ‘dead lamp’ to the workshop with a message:  “Matt, can you mend it”?  I then sort of forgot about it for er, nine months.  Whoops.  I need to focus on the workshop more.

The lamp was much loved by its owner and its current lack of light was leaving her in the dark.

IMG_1732
FixItWorkshop, Worthing, May’20, Endon Touch Control Dimmable Lamp.

Make and model: Endon Touch Control Dimmable Lamp

Fault reported: Not working

Cost of replacement: £30ish

Manufacturer support:  0/10

Cost of parts: £3 approx.

Hours spent on repair: 30 minutes

Tools needed: Screwdrivers, test meter etc

Sundry items: None

Repair difficulty: 2/10

Cups of tea: 1

Biscuits: Wagon Wheel (Jammie)

These touch lamps were a bit of a novelty back in the day and seem to have fallen out of favour in recent times.  However, the owner of this one was a bit upset when suddenly one day, it wouldn’t work.

When working on anything mains operated, I always start with the basics:

  • Is the bulb working? Yes.
  • Is the mains flex OK?  Again, yes
  • Is the fuse (UK) intact? All OK

Lamps like this are pretty simple; there’s a mains wire, there’s a bulb and holder, a switch and the main lamp unit itself.  Some dimmable lamps, like this one, feature an electronic dimming module, which in this case was built into the base of the unit.

First step:  Remove the base cover

Removing the cover was fairly straightforward and only involved a few self-tapping screws, under the felt pad base.  This exposed the dimmer module, which when tested with the meter, was not outputting any current to the lamp circuit.

Second step: Dismantle the dimmer

Dimmer modules like this are not designed to be repaired and contain no user-serviceable parts (don’t get me started on that!).  But in the past, I’ve had some luck cleaning components and re-heating the odd dry joint with a soldering iron.  In this case, it was no joy.  A replacement module was needed.

Third step:  Find a new dimmer!

I can’t remember what I used to do before finding specialist electronic suppliers on eBay and alike.  Oh yes, I just remembered:  I struggled!

It didn’t take long to find a new (almost identical) dimmer module on eBay for about £3, delivered.  How do they do it for the money?

After 2 weeks of waiting, the new module arrived in the post, hand delivered by our usual friendly posty, Keith.

This slideshow requires JavaScript.

Forth step:  Fitting the new module and test

Comparing the dimmers side-by-side revealed that they were more or less the same, using the same wire colours…but in a different combination.  This meant that it wasn’t a simple ‘cut and re-join’ the new dimmer to the existing wiring.  Oh no, it meant cutting everything out and starting again.  Still, with only four wires, it didn’t take long.  With a little soldering and heat shrink, one would never know I had been tinkering.

A good job, jobbed, even if it did take me months to get ‘aroundtuit’.

Quite literally illuminating.


Wheezy Dyson DC19

Another Dyson not biting the dust, just yet.

A mate asked if it was worth saving his abused Dyson cylinder vacuum cleaner which has been residing in the garage for a couple of years, in the dark, unused. It had last seen service when clearing-up building dust and allsorts of non-domestic detritus and that abuse had now given the vacuum cleaner breathing difficulties. A vacuum with breathing issues means no suction.

IMG_0937
FixItWorkshop, Worthing, January 2020, Dyson DC19.

Interestingly, the reason the Dyson was being called out of retirement was due to a lack of performance from the family’s more recently purchased battery machine. Hopefully I’ll get to see that in the workshop soon as well. I’m getting ahead of myself already.

Make and model: Dyson DC19 (grey and purple)

Fault reported: 70% reduction in suck

Cost of replacement: About £200

Cost of parts: £9.54

Hours spent on repair: 1

Tools needed: Cleaning tools

Sundry items: Silicone spray

Repair difficulty: 1/10

Cups of tea: 1

Biscuits: 2 (M&S Belgium Selection)

This slideshow requires JavaScript.

Like many abandoned vacuum cleaners I see in the workshop or at the tip, there really wasn’t much wrong or really broken, yet its owner was considering its future. What to do. I’ll write about readiness to repair and repair inertia another time!

The repair in stages:

  • Remove, clean (and replace) filters and refit once dry (48 hours)
  • Remove collection cylinder and clean thoroughly and refit once dry (48 hours)
  • Clean all seals with soap and water, dress with silicone to revive
  • Check by-pass valve and clean as needed
  • Check power cable (clean to improve flex rewind system)
  • Check and clean roller brush head
  • Test!

The filters on this machine were so dirty that I decided to invest in a new set which, at under £10, seemed good value and will certainly extend the life of the DC19.

After giving the main unit a good polish the Dyson DC19 was ready to go home to clean-up. Another Dyson not biting the dust, just yet.

An orange Kenwood Chef A901! I mean, what’s not to like?

More orange please!

Why oh why oh why are more kitchen machines not orange?  I mean, just look at this beauty.  Rare-ish and as a Chef spotter, I think the only time I’ve seen another is on the kids’ TV program, Waffle the Wonder Dog on Cbeebies, here in the UK.  Do you have one in another funky colour?  If so, please send me a picture!

An orange Chef in the workshop:  It was like Christmas had come early.

IMG_20191209_213850
FixItWorkshop, Worthing, December’19, orange Chef A901.


Make and model: Kenwood Chef A901 (orange)

Fault reported: No go

Cost of replacement: About £300

Cost of parts: £13.74

Hours spent on repair: 2

Tools needed: Cutters, screwdriver, soldering iron, multi-meter, cleaning tools

Sundry items: Light oil

Repair difficulty: 5/10

Cups of tea: 1

Cheesecakes: 2

Capture
FixItWorkshop, Worthing, Kenwood Chef Major in Orange.  Super rare?

The Chef had actually been working for a living since it provided daily assistance in the production of artisan cheesecakes, being sold at a local market.  Recently it had decided to start a smoking habit and then go on strike leaving the owner in a bit of a muddle and customers with rumbling tummies.  That simply wouldn’t do.

Anyway, on with the repair. Opening up the casing revealed the problem straightaway.  One of the capacitors had failed and a resistor had burned out, leaving a failed circuit.

IMG_7870 cap
FixItWorkshop, Worthing, December’19, A901 failed components.

With a decent repair kit bought (from eBay), I replaced all components relating to the speed control circuit, which made the motor run again.  I also replaced all the machine’s 5 feet, since the originals had long since gone to mush, something they all do with age. Since the motor was out of the unit, I took the trouble to adjust the motor’s end float and oil the bearings, for ultra-smooth running.  Very satisfying.

IMG_20191202_210500
FixItWorkshop, Worthing, December’19, orange Chef in bits.

With the casing all back together, I gave the machine a light T-Cut and polish to make it look as good as new and despite its 30-odd years and the odd bit of flaky paint, I think you’ll agree- it looks fab.

IMG_20191209_213838
FixItWorkshop, Worthing, December’19, orange Chef A901, open, looking fab.

PS, thanks to Andrew for supplying the very yummy scrummy, lime cheescakes.


Genuine or pattern parts? A Dyson DC40 gets a little tune-up.

Genuine or pattern parts? What to do!?

Article 100!

It’s a dilemma sometimes.  Should you always fit genuine replacement parts or is it OK to fit quality aftermarket or pattern parts.  My answer:  It depends.

Make and model: Dyson DC40

Fault reported: Torn hose and loss of suction

Cost of replacement: About £200.00

Cost of parts: £16.53 (hose and filters)

Hours spent on repair: 1

Tools needed: Screwdrivers

Sundry items: Silicone spray, PTFE spray, rag

Repair difficulty: 2/10

Cups of tea: 2

Biscuits: 1 McVities Gold Bar

A mate of mine contacted me to ask if it was worth fixing his 6 year old Dyson DC40 and as always, I said yes it was.  A couple of days later, it was working again, like new.

IMG_0446
FixItWorkshop, November’19, Dyson DC40.

The DC40 is still supported by Dyson and parts are readily available direct from them.  Problem is that, as my mate did, the price of some spares (although quite reasonable actually) can put some people off, which means that serviceable machinery can end up at the local dump, prematurely.  Which is a shame.

This is where pattern parts can help.  Often, aftermarket manufacturers will make spares for popular models and the advantage of these is that they are often much cheaper than the original part.  However, it’s not as simple as that.

I’ve fixed 100s if not 1000s of things and have used and continue to use a mixture of genuine original (often called OE or Original Equipment) and pattern parts for different reasons.  Assuming original equipment parts are the best, here are my thoughts, in no particular order, to help you if facing a similar dilemma.

In favour of pattern parts:

  • They can make a repair viable, financially
  • Parts can be available, long after original parts become obsolete
  • They can provide enhanced features that were not part of the original design

In favour of genuine/ original equipment parts:

  • They will fit exactly as the specification will be to the original design
  • They maintain manufacturers warranties, where applicable
  • They normally last well and perform as expected

As a further example, I will only fit genuine water pumps (on car engines) but will fit pattern air filters.  Water pumps must work within very exact performance tolerances whereas air filters, although important, don’t so much.  It’s a personal thing at the end of the day.

Back to the repair.  This Dyson wasn’t picking up dirt and the extension hose was torn, so a new hose was ordered from a supplier on eBay for under £10, a genuine part was over £25.  The hose just clicks out and in, so all that was required was a small flat bladed screwdriver to remove and refit the hose.  Nice and easy.

The next job was to sort out the lack of suction.  As with all Dysons with a problem like this, I always check filters.  As suspected, both filters were expired and needed to be replaced as they were too far gone to be washed.  Again, pattern part filters were available on eBay for under £7, genuine ones were much dearer.  All new parts fitted well and soon the vacuum cleaner was breathing easily again.

Another issue with the DC40 is the switch lever which diverts suction from the beater head to the hose, which was sticking on this machine.  A quick clean up and a small spray of silicone spray on all the moving parts had it all working again.

This slideshow requires JavaScript.

I always clean-up the beaters on any vacuum cleaner in for a service and this one seemed to have half a head of hair stuck in it, which would have impeded performance.  The hair was so bad, I had to remove the beaters (just one screw) and cut off the hair with a knife.

With all the remedial work completed, the Dyson ran well proving once again that it’s usually worth repairing, rather than replacing.


JD Bug Scooter gets a light service

A bit of TLC to bring a scooter back from the brink.

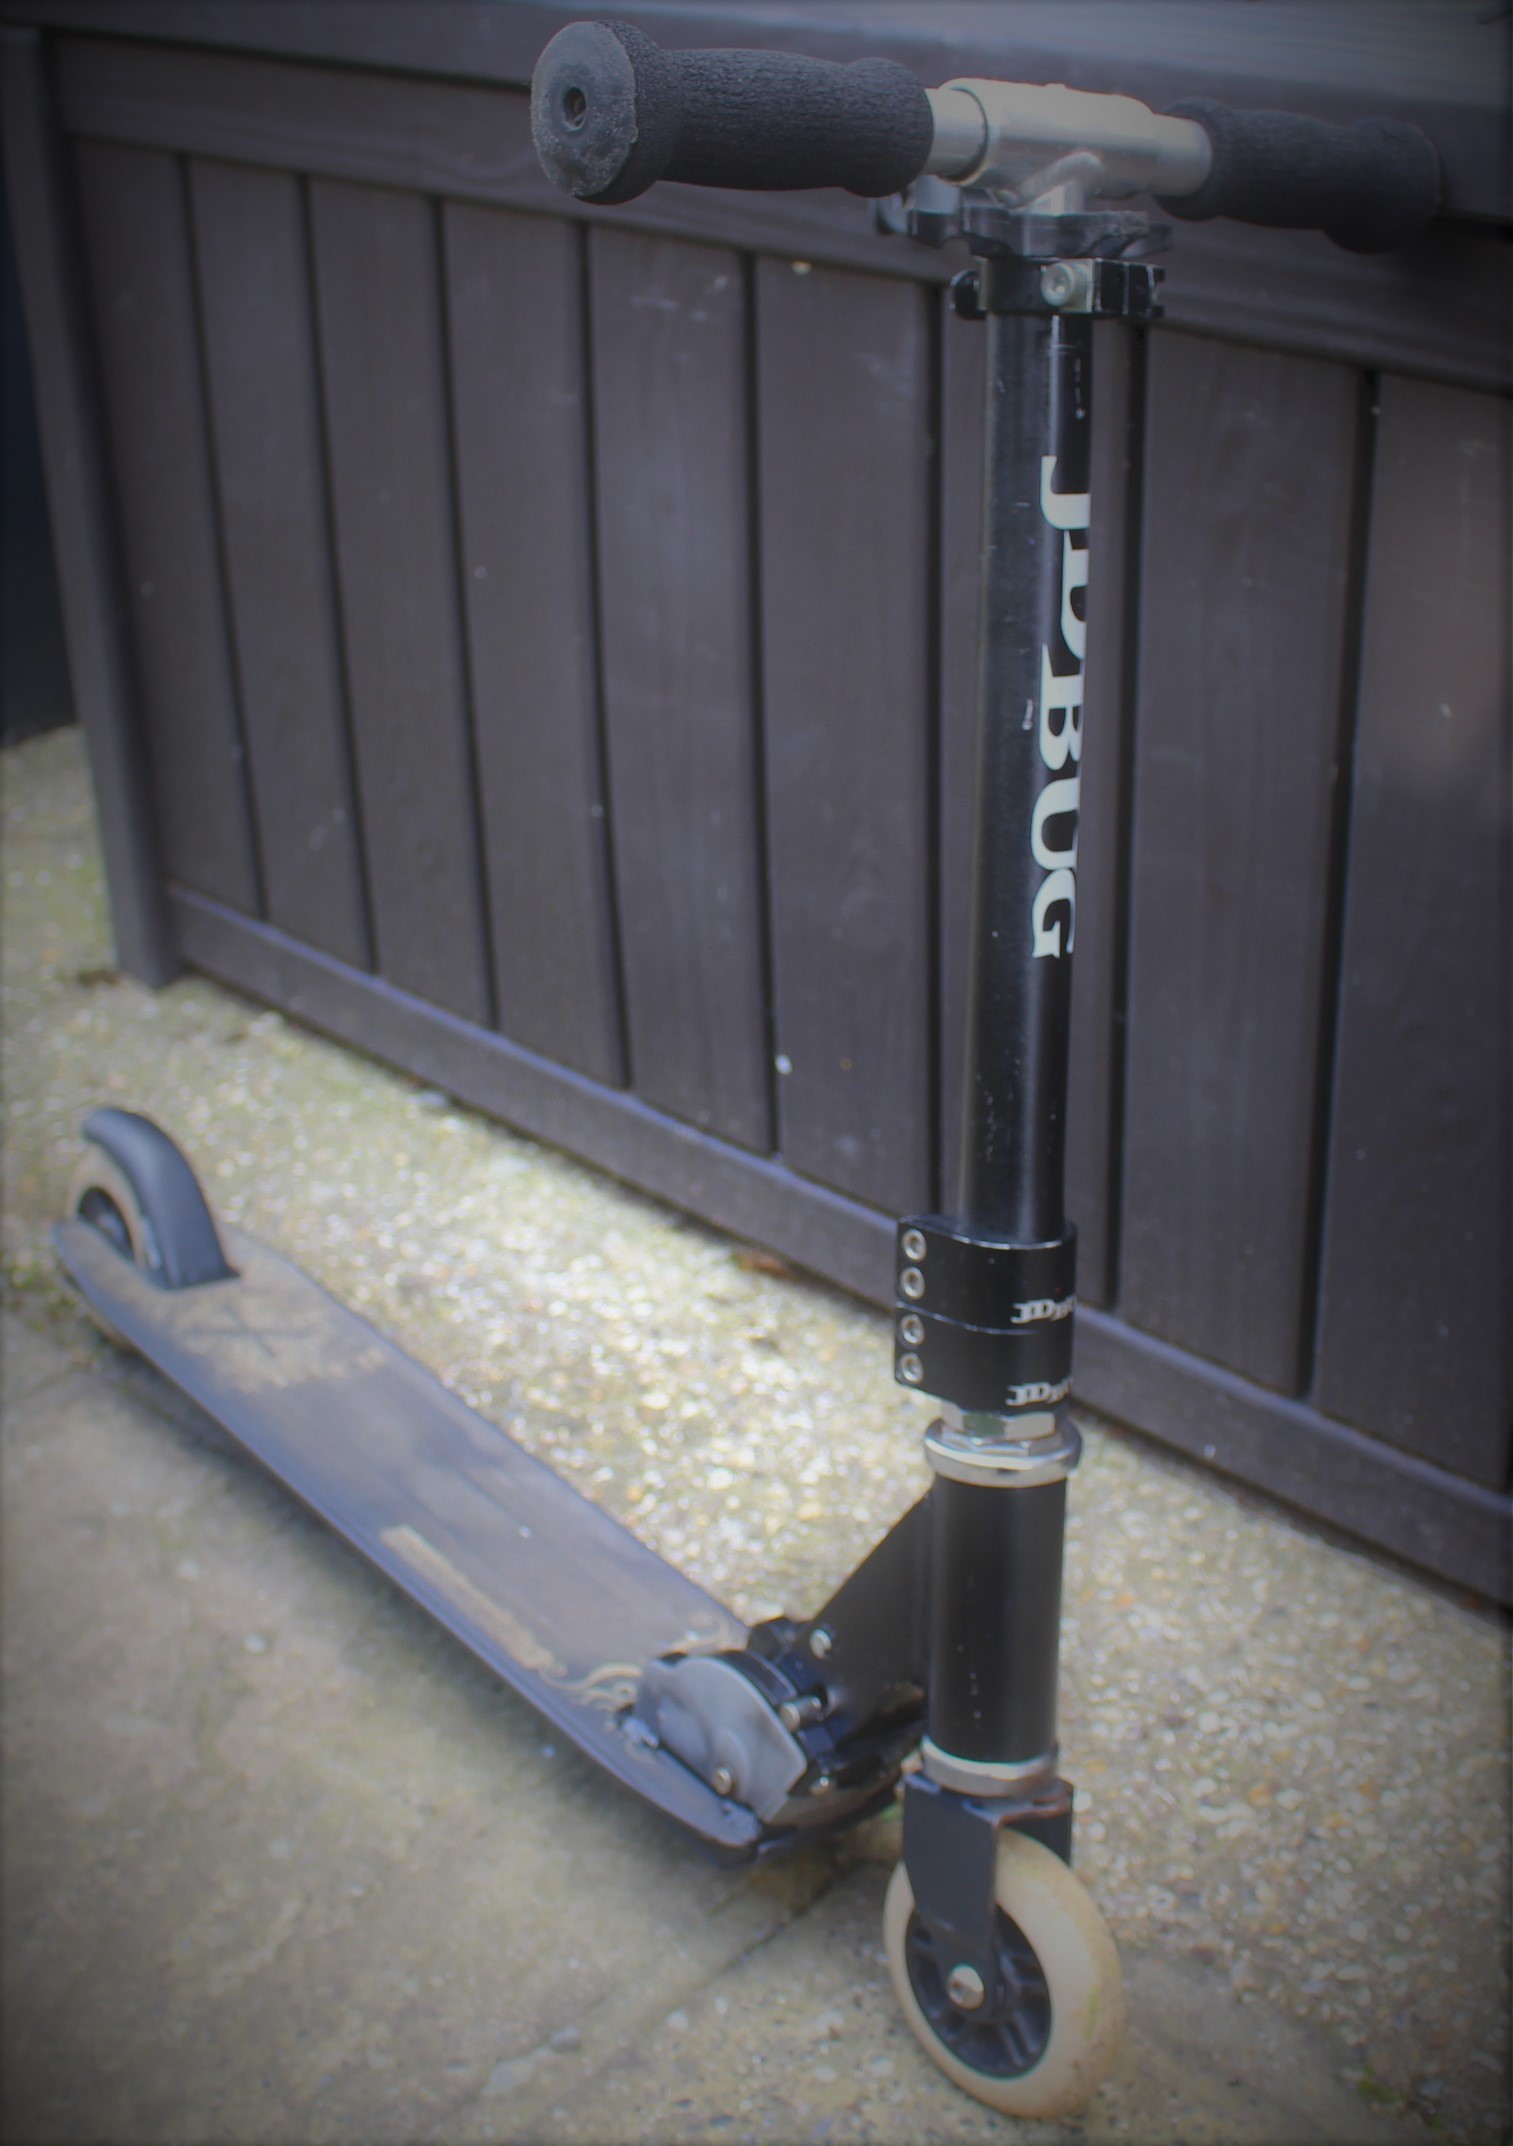
We were very lucky to be given a ‘micro style’ JD Bug scooter for one of the kids, by a kind neighbour.  It features mini wheels, a solid metal foldable frame, which makes for easy portability and height adjustable handles.  It’s easy to see why loads of kids have these scooters as they’re easy to ride and very manoeuvrable.

IMG_8481
FixItWorkshop, March’19, JD Bug Scooter.

This one had been well used, but had been kept clean and tidy.  However, before issuing it to the child concerned, it needed a few ‘bugs’ addressing.

First and foremost was the wheels.  Both wheels are fitted with standard skateboard bearings (a total of four).  Both wheels were noisy and tight when spun, which would affect speed and handling of the scooter.  Now, I might eventually change the bearings as they’re pretty cheap and easy to obtain, but for now, I just removed the wheels, popped out the bearings and regreased them, once I’d removed the dust cover.  Refitted, they sounded much better.

Next was the frame and the locking mechanism.  It was rattly and weighward which again would have affected handling.  After a light application of spray white grease and a small adjustment to the lock, the frame was much more rigid.

This slideshow requires JavaScript.

The last thing was the headstock, which is similar to those found on a bicycle.  This one sounded hideous and clearly had no lubrication whatsoever.  Again, access was straightforward and just involved basic tools, although I did have to dig out my 36mm spanner- serious stuff.  Just a couple of pinch clamps and two locking nuts held the headstock together and after a clean up with penetrating oil, an oily rag and some new grease, it was as good as new.

So after some light TLC, this scooter was ready for another child to enjoy, for little cash.

Cost of replacement:  £40.00  Cost of repair:  Some oil, grease and a bit of fettling, one cuppa.

Money, that’s what I want

A cool 1980s toy robot money box gets repaired.

Who doesn’t like a toy robot? I mean, everyone loves a toy robot, especially one with pop up eyes and one that eats coins.  No?  Well, you’re wrong if you don’t agree!

Money 2
FixItWorkshop, March’19, Tomy Mr. Money.

This is my own Tomy Mr. Money, which I’ve had since about 1988 ish, so it’s getting on a bit.  Like me.

Back then, I wasn’t that diligent about leaving batteries in situ for long periods and when I dusted off this piece of retro cool for my daughter to play with, we discovered that the passing of time had not been kind to the old battery or insides.  Which was a bit of a shame.

However, I wanted to show everyone that old toys are way cooler than new ones, so out with the screwdrivers, cleaning stuff and hammer (well, not the hammer) to see what could be done.

Luckily for me and Mr. Money, the battery compartment hadn’t fared too badly with just light corrosion to the battery terminals, which soon cleaned off with brake cleaner and some light filing to near good as new standard.

With a new AA battery installed, Mr. Money didn’t really respond that well to having money placed on his hand.  In years gone by, a coin placed on his hand would trigger his eyes to open, the hand to raise to his mouth, the coin to be eaten and lips to be licked, as well as doing a little side to side dance.  Mr.Money was now looking a bit arthritic.  Could it be that new money is a lot lighter than the 1980s money he was designed for or was it just that the battery corrosion had run deeper than first appeared.  I suspected the latter.

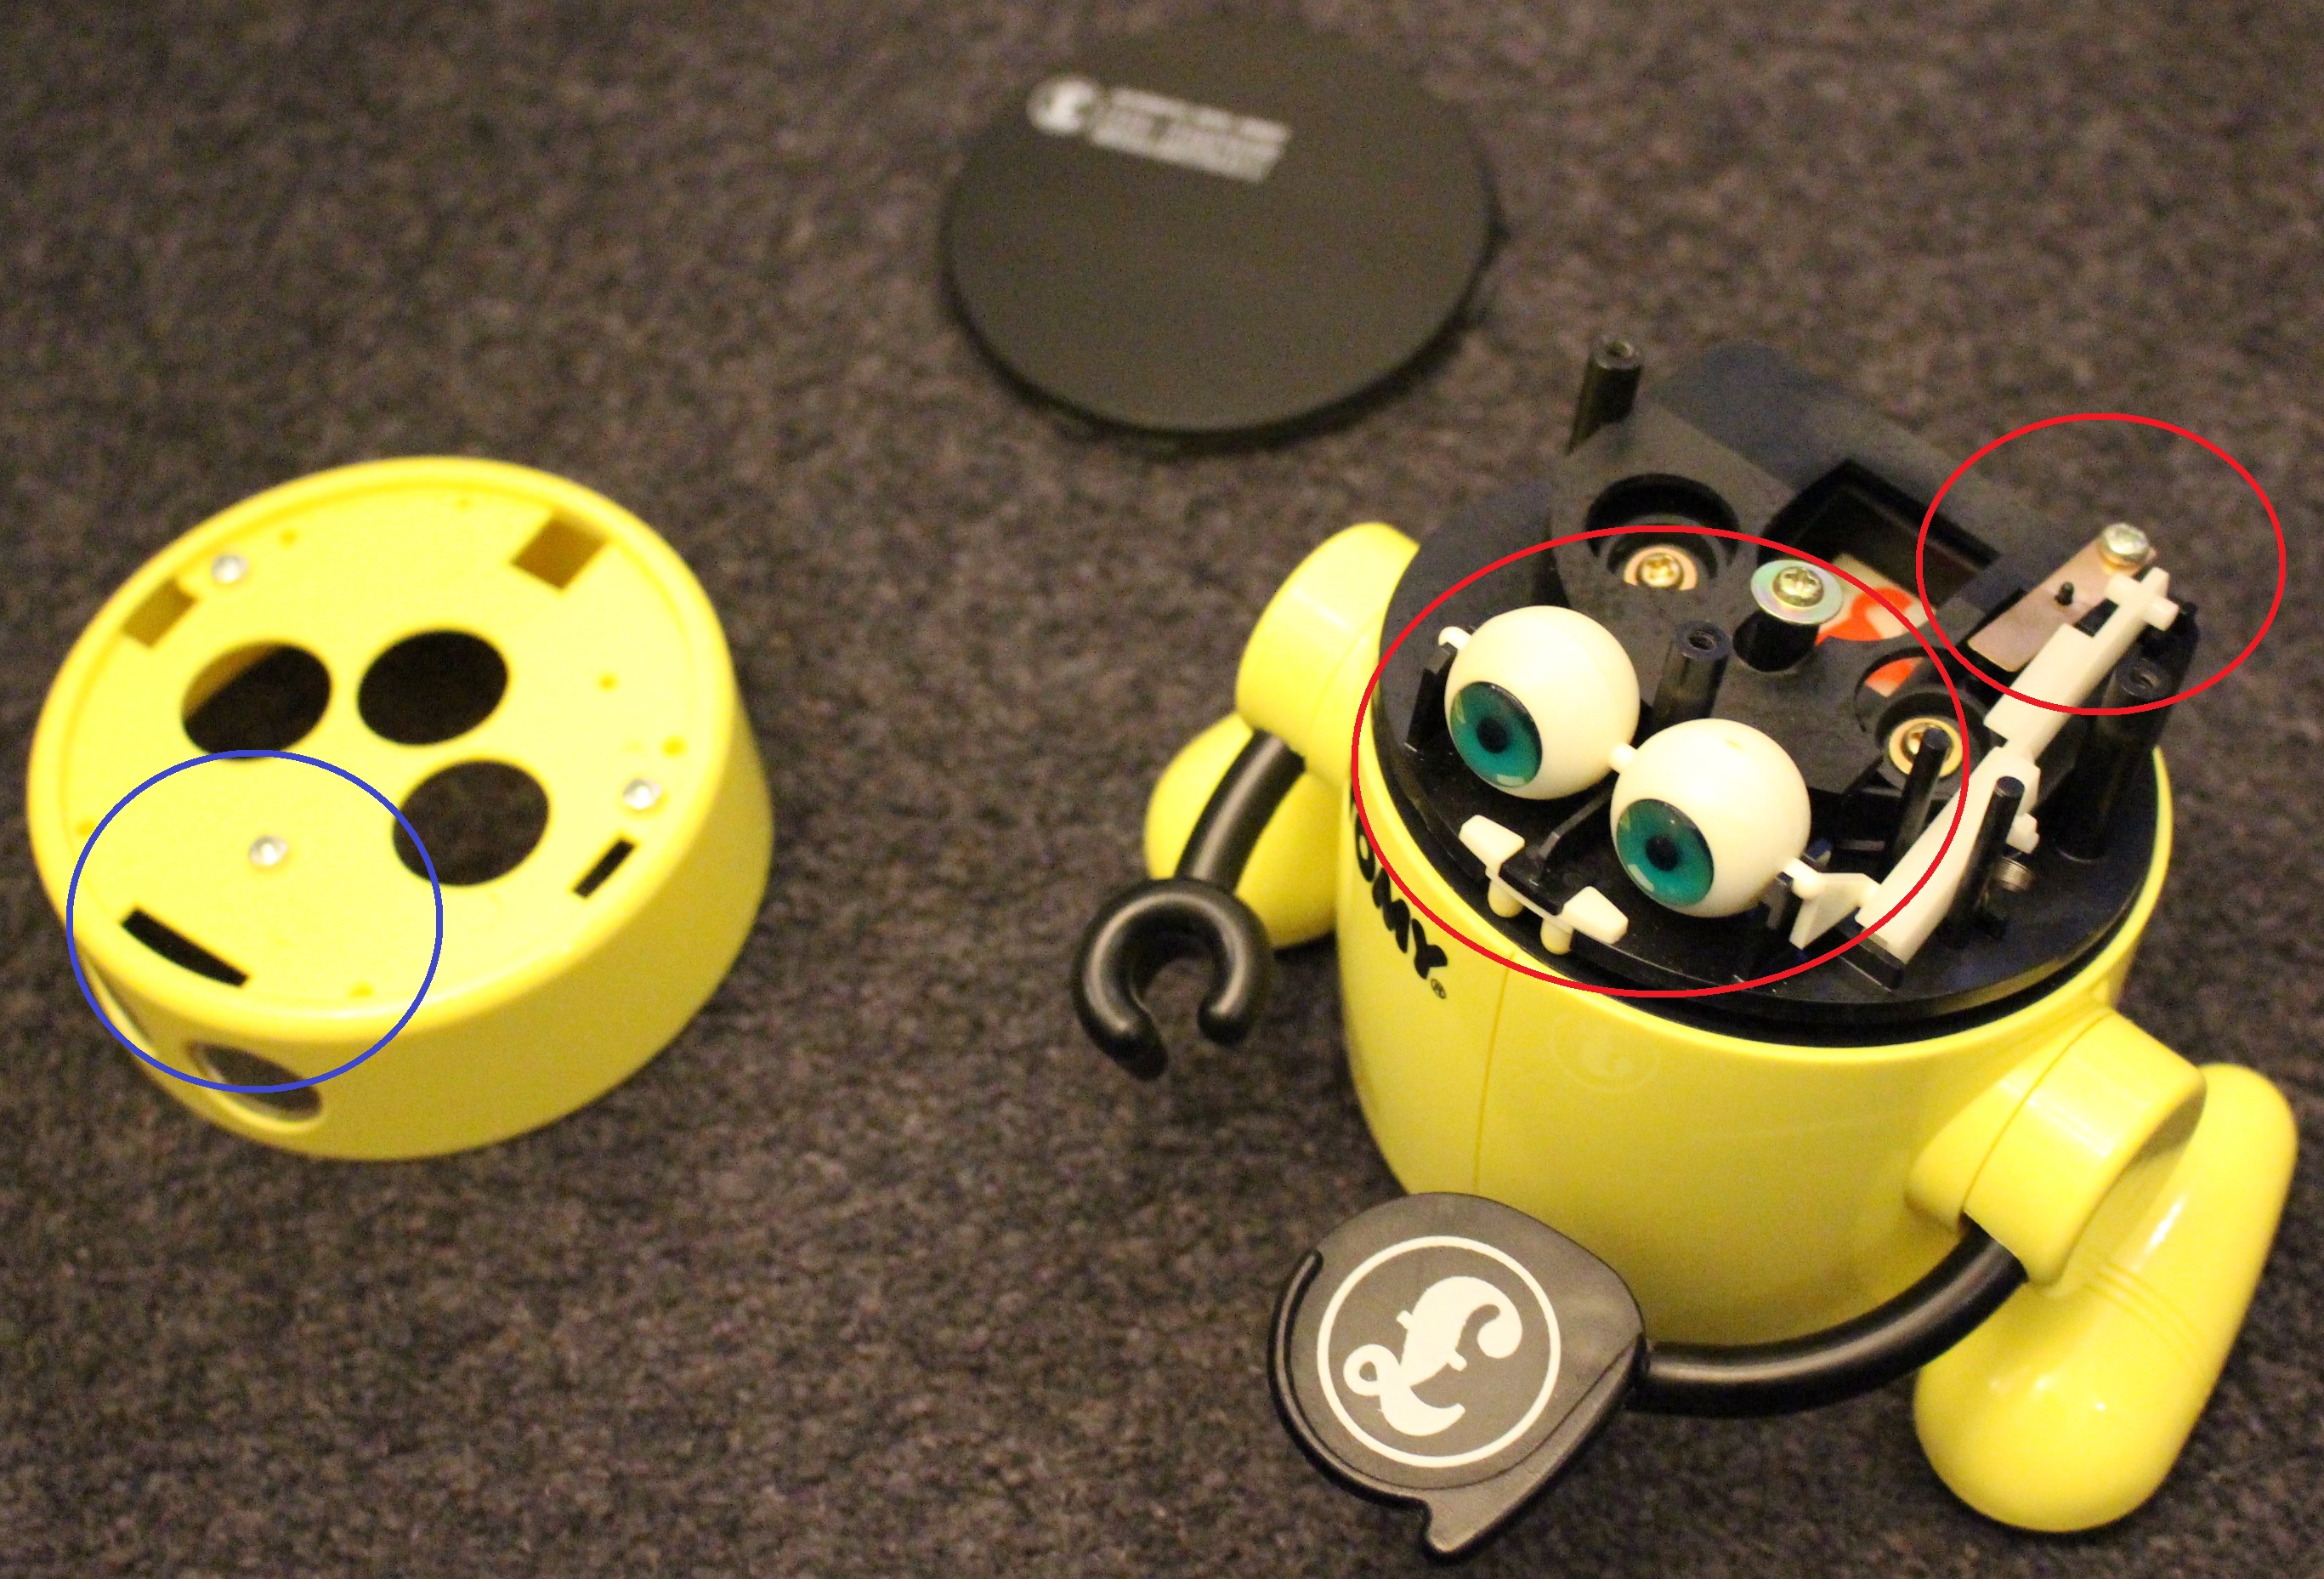
I took Mr. Money apart and found that the microswitch that triggers the mechanism was corroded and needed cleaning and that some of the moving parts also needed a quick brush up, all of which had Mr.Money back to rude health.

IMG_5190
FixItWorkshop, March’19, Tomy Mr.Money, in pieces.

While doing the repair, I decided that it wasn’t obvious how the toy came apart and that some owners might decide to scrap theirs due to similar problems.  So, I decided to make a little slide show of the dismantling, to help others.  Enjoy.

Cost of replacement:  £ priceless/ eBay if you’re lucky.  Cost of repair:  One IPA beer.