KONGMAN lives again!

A classic 1980s Tomy Kongman game pays a visit to the workshop, for some much-needed TLC.

Every now and again, a little gem drops right into my inbox and I think; Christmas has come early. My eyes light-up! It’s nice to get something different to work on, and hopefully repair, especially when it involves motors, batteries, ball bearings and a gorilla.

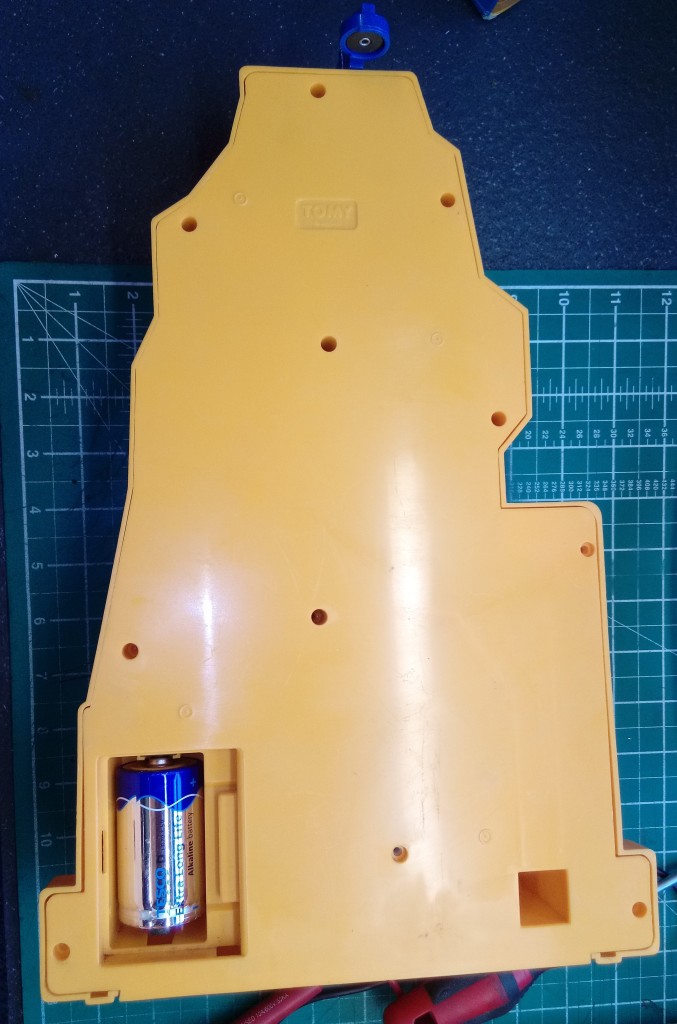
A customer contacted me after rediscovering Kongman in his attic, not literally you understand, but the 1980s hit toy from Tomy. The toy was in wonderful condition, despite being a little dusty. A new battery had been installed, but upon switching it on, nothing happened. Not even a peep.

FixItWorkshop, Worthing, June’21, Kongman box

I should really kick this thing off by saying what Kongman (the game) is. Kongman is an animated vertical game with the objective of getting a small metal ball bearing from the bottom of the wall to the top. The player must defy gravity and move the ball up-stairs, across a bridge, along several steps to a magnetic swing and then into a lift. The zenith of the game is reached with a quick flick of the ball on to Kongman’s magnet hand, which then gets dropped down a hole, ringing a bell on the way down. Fun really doesn’t get any better. If you’ve ever played Screwball Scramble, you’ll have a pretty good idea of what I am talking about. Did I mention that this infuriating game can be set against the clock too? Bonkers!

Tomy’s Kongman comes from a time just before kids games started to contain many electronic gizmos and wizmos within, parts that when kaput, render a toy useless, forever. Luckily, Kongman uses an electro-mechanical animation movement; elegant and clever. Old, but good.

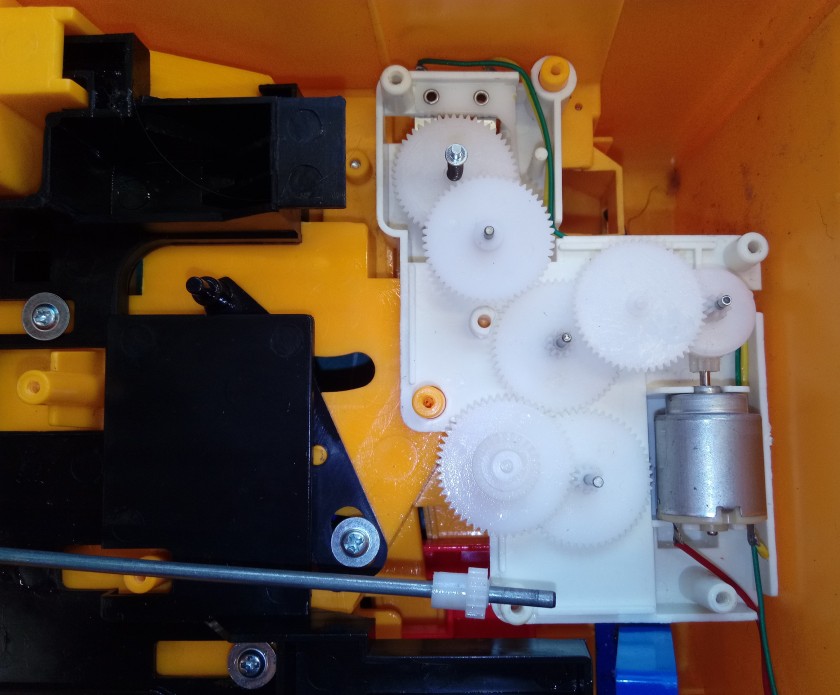
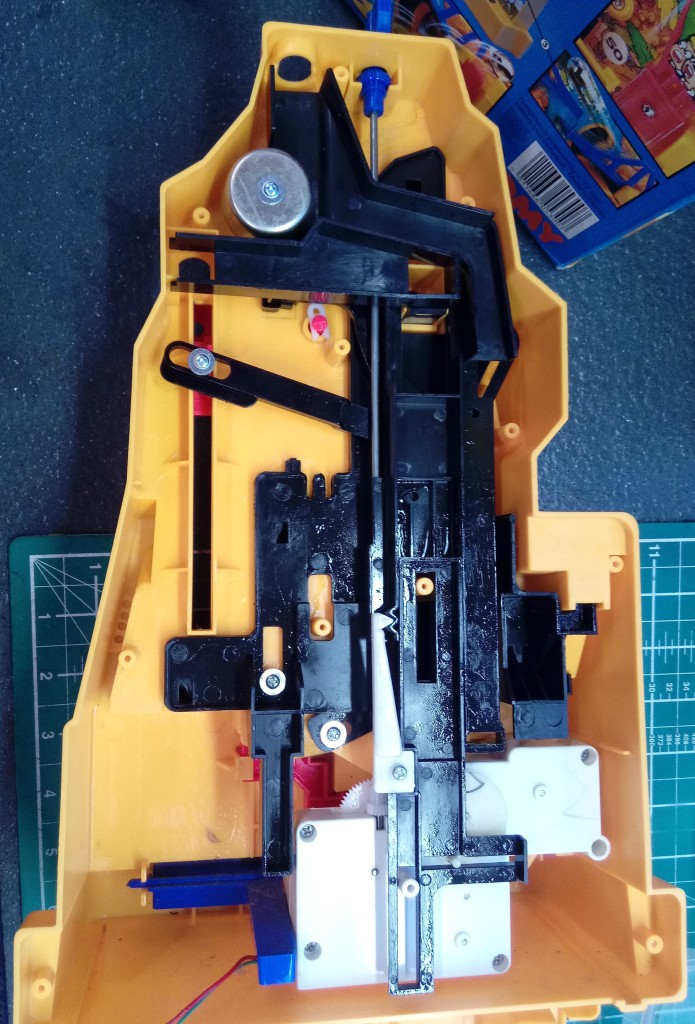
Kongman is powered by a single D-cell, 1.5V battery and the motion of the toy is actuated with a reassuringly simple little motor, connected to a compact gearbox driving a series of levers and rods, which make up the games’ animation. On a slightly different note; are D-cell batteries an endangered species? I mean, really, ‘what the 1980s torch’ takes D-cell batteries any more?!

Make and model: Tomy Kongman, circa 1981

Fault reported: Not working

Cost of replacement machine: £40.00 if you can find one working

Manufacturer support (in the UK): 0/10

Cost of parts (for this repair): £0.99p

My time spent on the repair: 1 hour

Tools needed: Small knife, pliers, small screwdriver

Sundry items: None

Cleaning materials: Silicone spray, contact cleaner

Repair difficulty: 5/10 (fiddly)

Beverages: 2 teas

Biscuits: 2 custard creams

So, on to the repair.

The toy wouldn’t run and after checking the basics like battery contacts and proving that the local wiring from the battery compartment to the main gubbins was OK, it was time to dive in.

One of the things that makes this already difficult game to complete, is the fact that as a player, you’re up against the clock. This seemed to be the next logical place to check.

The timer seemed to be part of the gearbox which is responsible for driving the rest of the game’s motion. I found this a most practical application of sound and efficient design. You can trace the DNA of this toy back to early pinball machines and jukeboxes, something I also love. Anyway, I seem to be getting romantic, not the workshop way.

The gearbox was easy to remove, just a few screws, and it was out. The timer’s switch contacts were situated within the ‘box and came apart with a gentle prod of a small screwdriver. This allowed me to apply a small amount of additional tension to the switch’s spring and to clean the contacts with cleaner. Reassembling was pretty much the reversal of the disassembly.

With the gearbox back in, it was time to turn some attention to the mechanism, to ensure smooth, reliable performance. With nearly 40 years’ worth of dust to contend with, it was time to clean all of the game’s nooks and crannies with a small brush and treat some of the sliding parts to a little silicone, plastic-friendly, lube.

With the D-Cell battery installed, a deft twist of the timer’s knob, and the game sprang to life.

I’ll be honest with you now. I tried several times to get the ball the whole course to ring the bell, against the clock, but alas, I failed. I did complete the game, but only with the timer set to ‘auto’… which provides as much time as you need, or at least until the battery runs out.

Until the next time…

Magimix 4200XL – safety as standard

A little bit of ‘shed magic’ to rescue a Magimix 4200XL

Like everything else, food mixers come in all shapes and sizes and there’s a make and model on the market to suit all applications, tastes and budget. Magimix have been around for a long time and make premium mixers for the wannabe chef. These mixers specialise in chopping and slicing and tend to be more specific in task over, say, a traditional bowl mixer. The Magimix 4200XL is a current model at the time of writing and is all yours for around £300. When whisking something delicious in the kitchen myself, I prefer a traditional Kenwood Chef, but if I was regularly chopping veg with NASA micron-precision, I can see why a mixer like this might appeal. Since I’m a bit of a salad dodger, the need for this has never arisen.

Make and model: Magimix 4200XL

Fault reported: Not running

Cost of replacement: £300

Manufacturer support: 4/10

Cost of parts (for this repair): £0.00

My time spent on the repair: 1 hour

Tools needed: Screw drivers, pliers

Sundry items: None

Cleaning materials: Silicone spray, damp cloth

Repair difficulty: 3/10

Beverages: 1 X tea

Biscuits consumed: 2 X custard creams

The owner of this mixer reported that despite every effort to press buttons and click the safety catch on the lid, the mixer simply wouldn’t comply when switched on. Dead as a dodo.

FixItWorkshop, Worthing, November’20, Magimix 4200XL, inside the mixer’s safety switch.
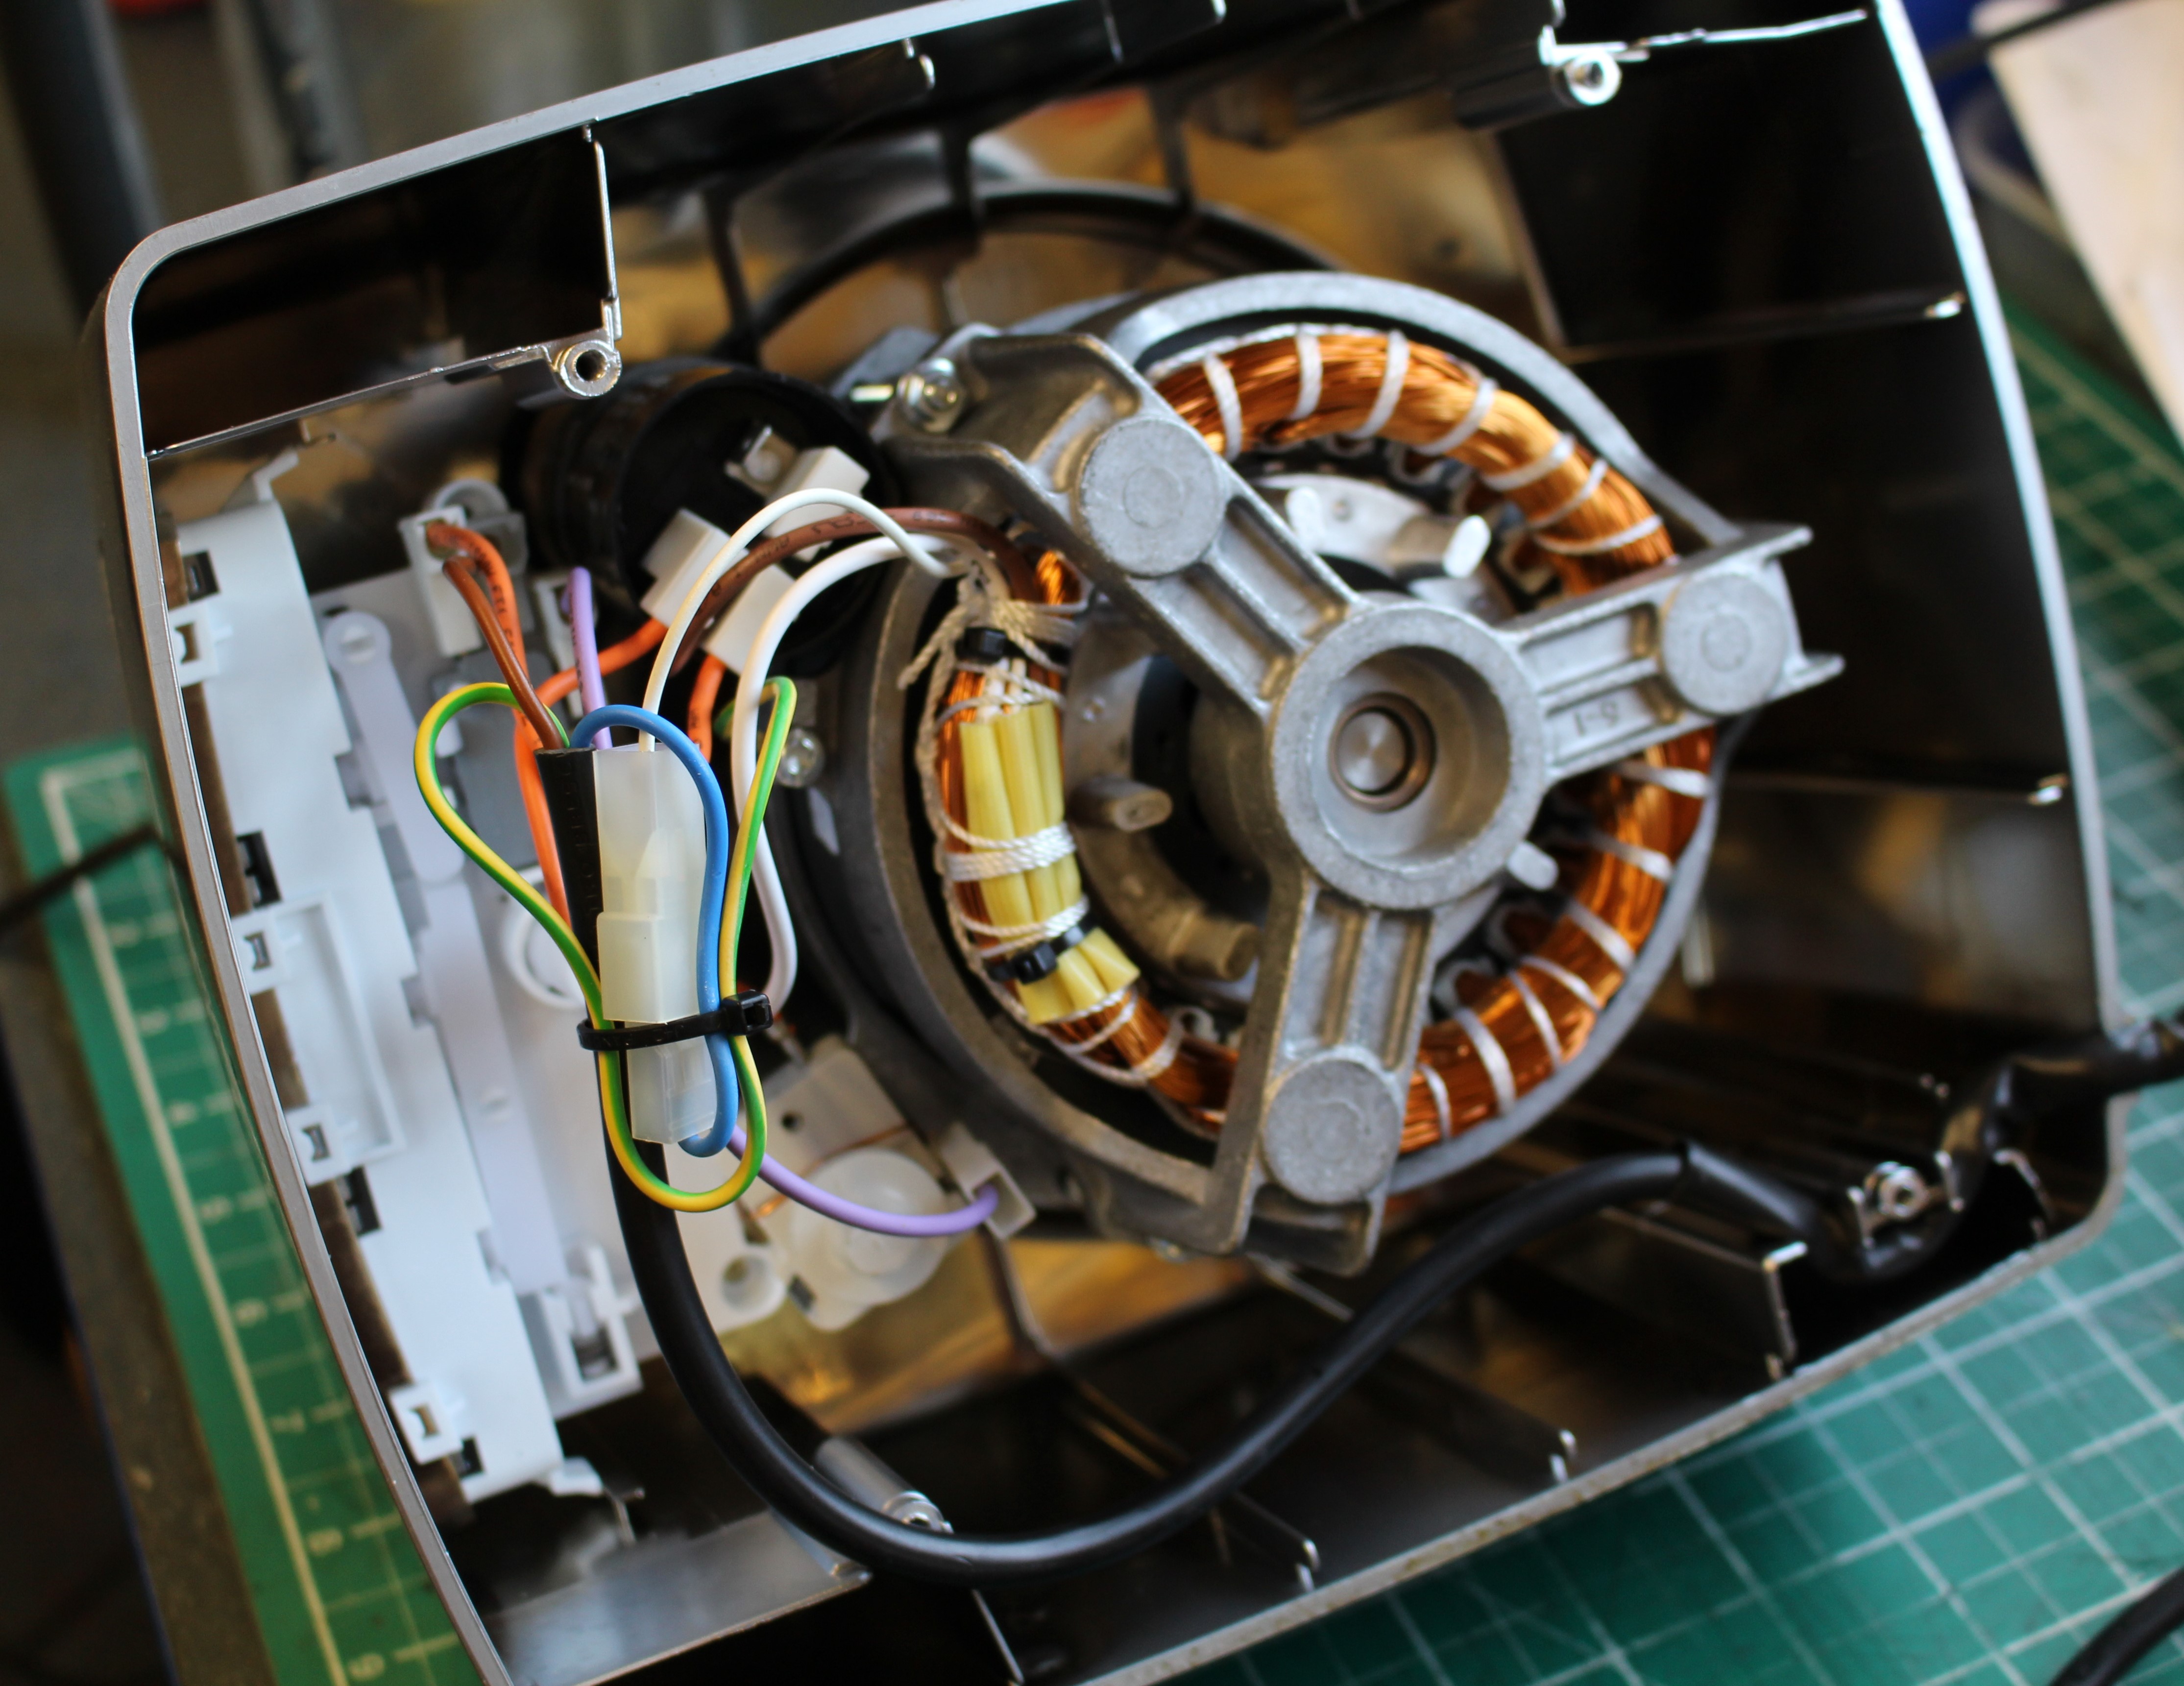
FixItWorkshop, Worthing, November’20, the 4200XL features a motor with oomph!
FixItWorkshop, Worthing, November’20, Magimix 4200XL, removing the base.
FixItWorkshop, Worthing, November’20, Magimix 4200XL, these little horrors are designed to deter repair- I dislike them immensely.
FixItWorkshop, Worthing, November’20, Magimix 4200XL, the repaired mixer.
FixItWorkshop, Worthing, November’20, Magimix 4200XL, the cheeky little safety switch.

The owner of this machine reported that their beloved Magimix 4200XL was playing up and despite trying to wriggle, jiggle, shake, rattle and roll things, it simply wouldn’t comply and work. They asked if I would take a look at it for them before it was launched out of the window. There’s nothing like a frustrated owner.

The Magimix 4200XL features a really rather elegant, totally passive, safety device to ensure that one isn’t tempted to operate the machine without the lid fitted correctly, risking one’s little pinkies. A simple sprung lever mechanism built into the lid and jug matches a small recessed switch in the machine’s base. The machine will only fire-up once the lid is in place on the jug, which must be correctly aligned on the base. It’s a nice touch that probably keeps Magimix out of the courtrooms.

On first inspection, I decided that this mechanism was a reasonable place to start my investigations. After you’ve checked things like ‘is the power on’ it makes sense to ‘start simple’ and go from there.

Taking the base cover off only involved four Torx screws, the damned anti-tamper kind. Luckily I have the technology to do this.

Taking the base cover off revealed good access to the safety switch mechanism. Thankfully.

The mechanism all seemed correct and present, which was a bit of a guess since I’d never worked on a mixer like this before. However, a lack of loose parts rattling inside is usually a good sign. Phew.

Despite appearing OK, the operating safety switch lever did seem stiff, so a quick spray with silicone lube had things sliding nicely once again. A quick continuity test of the switch proved that it was switching OK. Things were starting to look up for ‘Maggy’.

Since I had the lube out, it made sense to clean up the jug and lid mechanism and give that the same treatment. It all seemed to work better after and testing the lid and jug, refitted to the base with the base cover removed allowed me to visually confirm that the safety switch mechanism was indeed doing its thing correctly once again. A good result.

After carefully reassembling the base cover, taking care not to damage some of the more delicate plastic parts, it was ready for testing. There’s always a little moment of ‘will something go bang’ when I switch things on for the first time, but luck was on my side as the motor spun up as Magimix intended. A good result. All fingers intact.

Swan tea urn off the boil

A cheap fix gets this essential tea making machine back in business…

I admit it. I do get some satisfaction when I divert an appliance, on a journey to the bin, to my workshop for repair.  I have been known to collect the odd item from skips or just dumped on the pavement while supposed to be doing something more productive. I think I just feel sorry for things. Weird, but true.

Make and model: Swan Hot Water Tea 20L Urn

Fault reported: Not staying hot

Cost of replacement: £80ish

Manufacturer support:  3/10

Cost of parts: £1.70

Hours spent on repair: 45 minutes

Tools needed: Screwdrivers, test meter etc

Sundry items: Cleaning materials, heat transfer solution

Repair difficulty: 2/10

Cups of tea: X1

Biscuits: Malted Milk X1

This Swan hot water tea urn was one of those items.  Spotted during an office reorganisation in the ‘scrap pile’, it had been put there as it wasn’t working properly and a new one had now been ordered.

IMG_20200621_214203
FixItWorkshop, Worthing, July’20, Swan Hot Water Urn… shiny!


Being fairly light-fingered, I spirited the urn away to the workshop for some tinker time.  Not strictly staff policy, but you know, seek forgiveness after etc.

An urn is really just a big kettle.  This one has an all metal 20 litre tank with bar-style tap to brew up, when needed.  There are no real controls as such; just an on/off switch with neon light and two tell-tail lights to indicate boil and keep warm.  Keep warm is usually on all the time when switched on.

The fault seemed to be that the urn reached boiling temperature when switched on, but then switched off totally, allowing the water to cool again excessively.  Timing the switching intervals of the thermostat, 20 minutes or so, and a 15-200 hysteresis confirmed a fault. There was also no ‘keep warm’ green light on, when in use.  To push the thermostat further, I poured cold water into the urn to see if that sped up switching between hot and cold, it didn’t.

Opening up the urn’s base involved just three screws, allowing access to all components.  Such a nice change to not have layers of covers and things to move out of the way first!

Checking the wiring out for logic revealed that someone had been here before! The wiring was incorrect and the ‘keep hot’ element was not wired up correctly and effectively not in circuit with the power source. A small wiring change corrected this and meant that the ‘keep warm’ element was now working again.

The thermal reset fuse/ button seemed to be working OK- proved with a test meter and the thermostat did seem to switch on and off, albeit with excessive hysteresis.  Time to fit another one! Luckily, these thermostats are very common and I managed to get one from eBay, rated at 1000 (a couple of degrees over the one fitted) for less than £2. Fitting a new thermostat only involved a couple of screws, a light smear of heat transfer solution and reconnecting back into the wiring harness.

This slideshow requires JavaScript.

With all wiring back in place and the cover refitted, it was time to test and brew up.  This time, the urn boiled, switched off and then stayed warm on the secondary ‘keep warm’ circuit.  To prove that the new thermostat was an improvement, I then topped up the urn with cold water and within 5 seconds, the thermostat clicked in and the boiling process started again.

Time for a brew.

(PS, the urn has now returned to its normal place of work)

Repair, kettles and er, the Citroen 2CV

Less is usually more. Simpler devices can mean repair is more likely in the event of failure.

I keep a model of a Citroen 2CV car on my desk at work.  It’s about 30-odd years old and it’s a bit battered due to an incident involving a shelf, my old cat and an 8ft drop, but that’s another story.

IMG_20200704_122535
FixItWorkshop, Worthing, July’20, The 2CV (AZ series)

The 2CV is there to remind me to keep things simple, to the point.

To me (and many others) the 2CV represents pure function over form.  Nothing on the car is superfluous to its function as a capable load lugging, robust, ever-repairable and frugal vehicle. I have a soft spot for these cars. They encapsulate the phrase ‘less is more’.

Not every story from the workshop is rosy and my heart usually sinks when I receive something to fix that has tiny printed circuit boards fitted inside that do ‘something’ and nothing at the same time.

What the Tin Snail do I mean by that? Many appliances and machines manufactured in the last 20 years or so often contain ‘mini’ circuits that control ‘something’.

Take an electric kettle, something that most people have in their homes. Kettles generally are a water holding vessel, a heating system, and an on/off switch with a boiling water state detecting negative feedback loop (it switches off by itself when the water boils).  There’s also some wire and stuff.

Electric kettles haven’t really changed that much over the years, after all the basic need hasn’t changed:  You put water in, you switch it on, you get hot water to make a drink. Nothing has changed. However, many offered these days are fitted with things like filters, LED lighting and other electronic temperature control systems with bells on.

Trouble is, all these (kettle) gadgets tend to be controlled by a small circuit board which isn’t repairable or even replaceable. It only takes an accidental water spill, some static electricity or bump mishap and that tiny circuitry is toast.  Not even a professional circuit repair agent, let along home spanner wielder would have a chance of repairing the broken circuit. When failure occurs, many will just discard the appliance and go and buy another one, quickly. Who wants to be without tea or coffee?!

The tragedy is that the rest of the (kettle in this case) appliance is, nine times out of ten, OK and if it was made with more traditional components that one could see with the naked eye, the appliance would stand far more chance of being repaired easily and economically. Something to think about, next time you’re considering a new purchase.


Is 12 years too long to keep a toothbrush?

A Braun Oral-B electric toothbrush gets a new lease of life.

Let’s just clarify one thing straightaway; I’m talking about an electric toothbrush with changeable brush heads.

I was given an Oral-B/ Braun electric toothbrush as a birthday present years ago, which when you think about it, is a bit of a strange thing to receive as a gift.  Maybe the gift contained a hint?  Back then, these toothbrushes were not cheap, starting at about £60.00 if I remember correctly.  Today, a new equivalent is quite a bit cheaper.

In the time I’ve owned it, it’s had about 40 new brush heads and it’s just about to start it’s third non-replaceable battery.

Make and model:  Oral-B/ Braun 3756 931 41306

Fault reported: Battery won’t hold charge

Cost of replacement:  About £20.00

Cost of parts:  £6.60

Hours spent on repair:  1

Tools needed:  Small flat-bladed screwdriver, soldering iron

Sundry items: None

Repair difficulty:  5/10

Cups of tea:  2

Biscuits:  2 Gingernuts

Electrical items with non-replaceable batteries are so annoying.

A message to manufacturers:  There’s simply no excuse for it as all batteries are replaceable.

In my experience, items with ‘non-replaceable batteries’ contain entirely replaceable items.  The batteries might not be standard ‘AA’ items, but there’s a host of online suppliers that are ready to supply just about any power cell for any application, you name it, usually for a reasonable price that costs-in for the repair process.

This slideshow requires JavaScript.

Now, I don’t know how long one of these toothbrushes is meant to last, but as a long-term test, I thought it would be interesting to find out.  After the first battery died, I decided to take the toothbrush apart, to see what was going on inside.

As you can see from the photos, there’s more within than one might think.  There’s a switch, charging circuit, timer circuit, over-pressure circuit, gearbox, motor, mini crankshafts and a battery.  Not to mention all of the tiny connecting parts all neatly engineered to work together, reliably.  It’s a small work of art really.

It makes me very sad that most of these toothbrushes will end up in landfill, after a few years.

The designers had clearly designed this toothbrush as a disposable item as the battery, despite being readily available from spares suppliers, was hidden, out of sight, under all of the gubbins.

To extract the battery (a simple nickel cadmium item) a full dismantle was required, in this order.

  • Prise off the top collar
  • Prise off the bottom cap
  • Pull out the main mechanism
  • De-solder the main pressure switch, charging coil, LED, and some other joints,
  • Take PCB off of battery carrier,
  • Split battery barrier from the main motor area
  • Remember the polarity of the battery, negative near the coil (a misleading ‘+’ there)
  • Reassembly, with the new battery is the same in reverse.  See pictures for hints.

Twelve years down the line and now on its third battery cell, the toothbrush is still going strong which proves that with a little tinkering, disposable items can be repaired and made to last longer.

It’s just a shame that Braun, the manufacturer, decided to ignore any notion of consumer maintenance.


Tommee Tippee Perfect Prep Problems

The right formula for a poorly Tommee Tippee Perfect Prep Machine

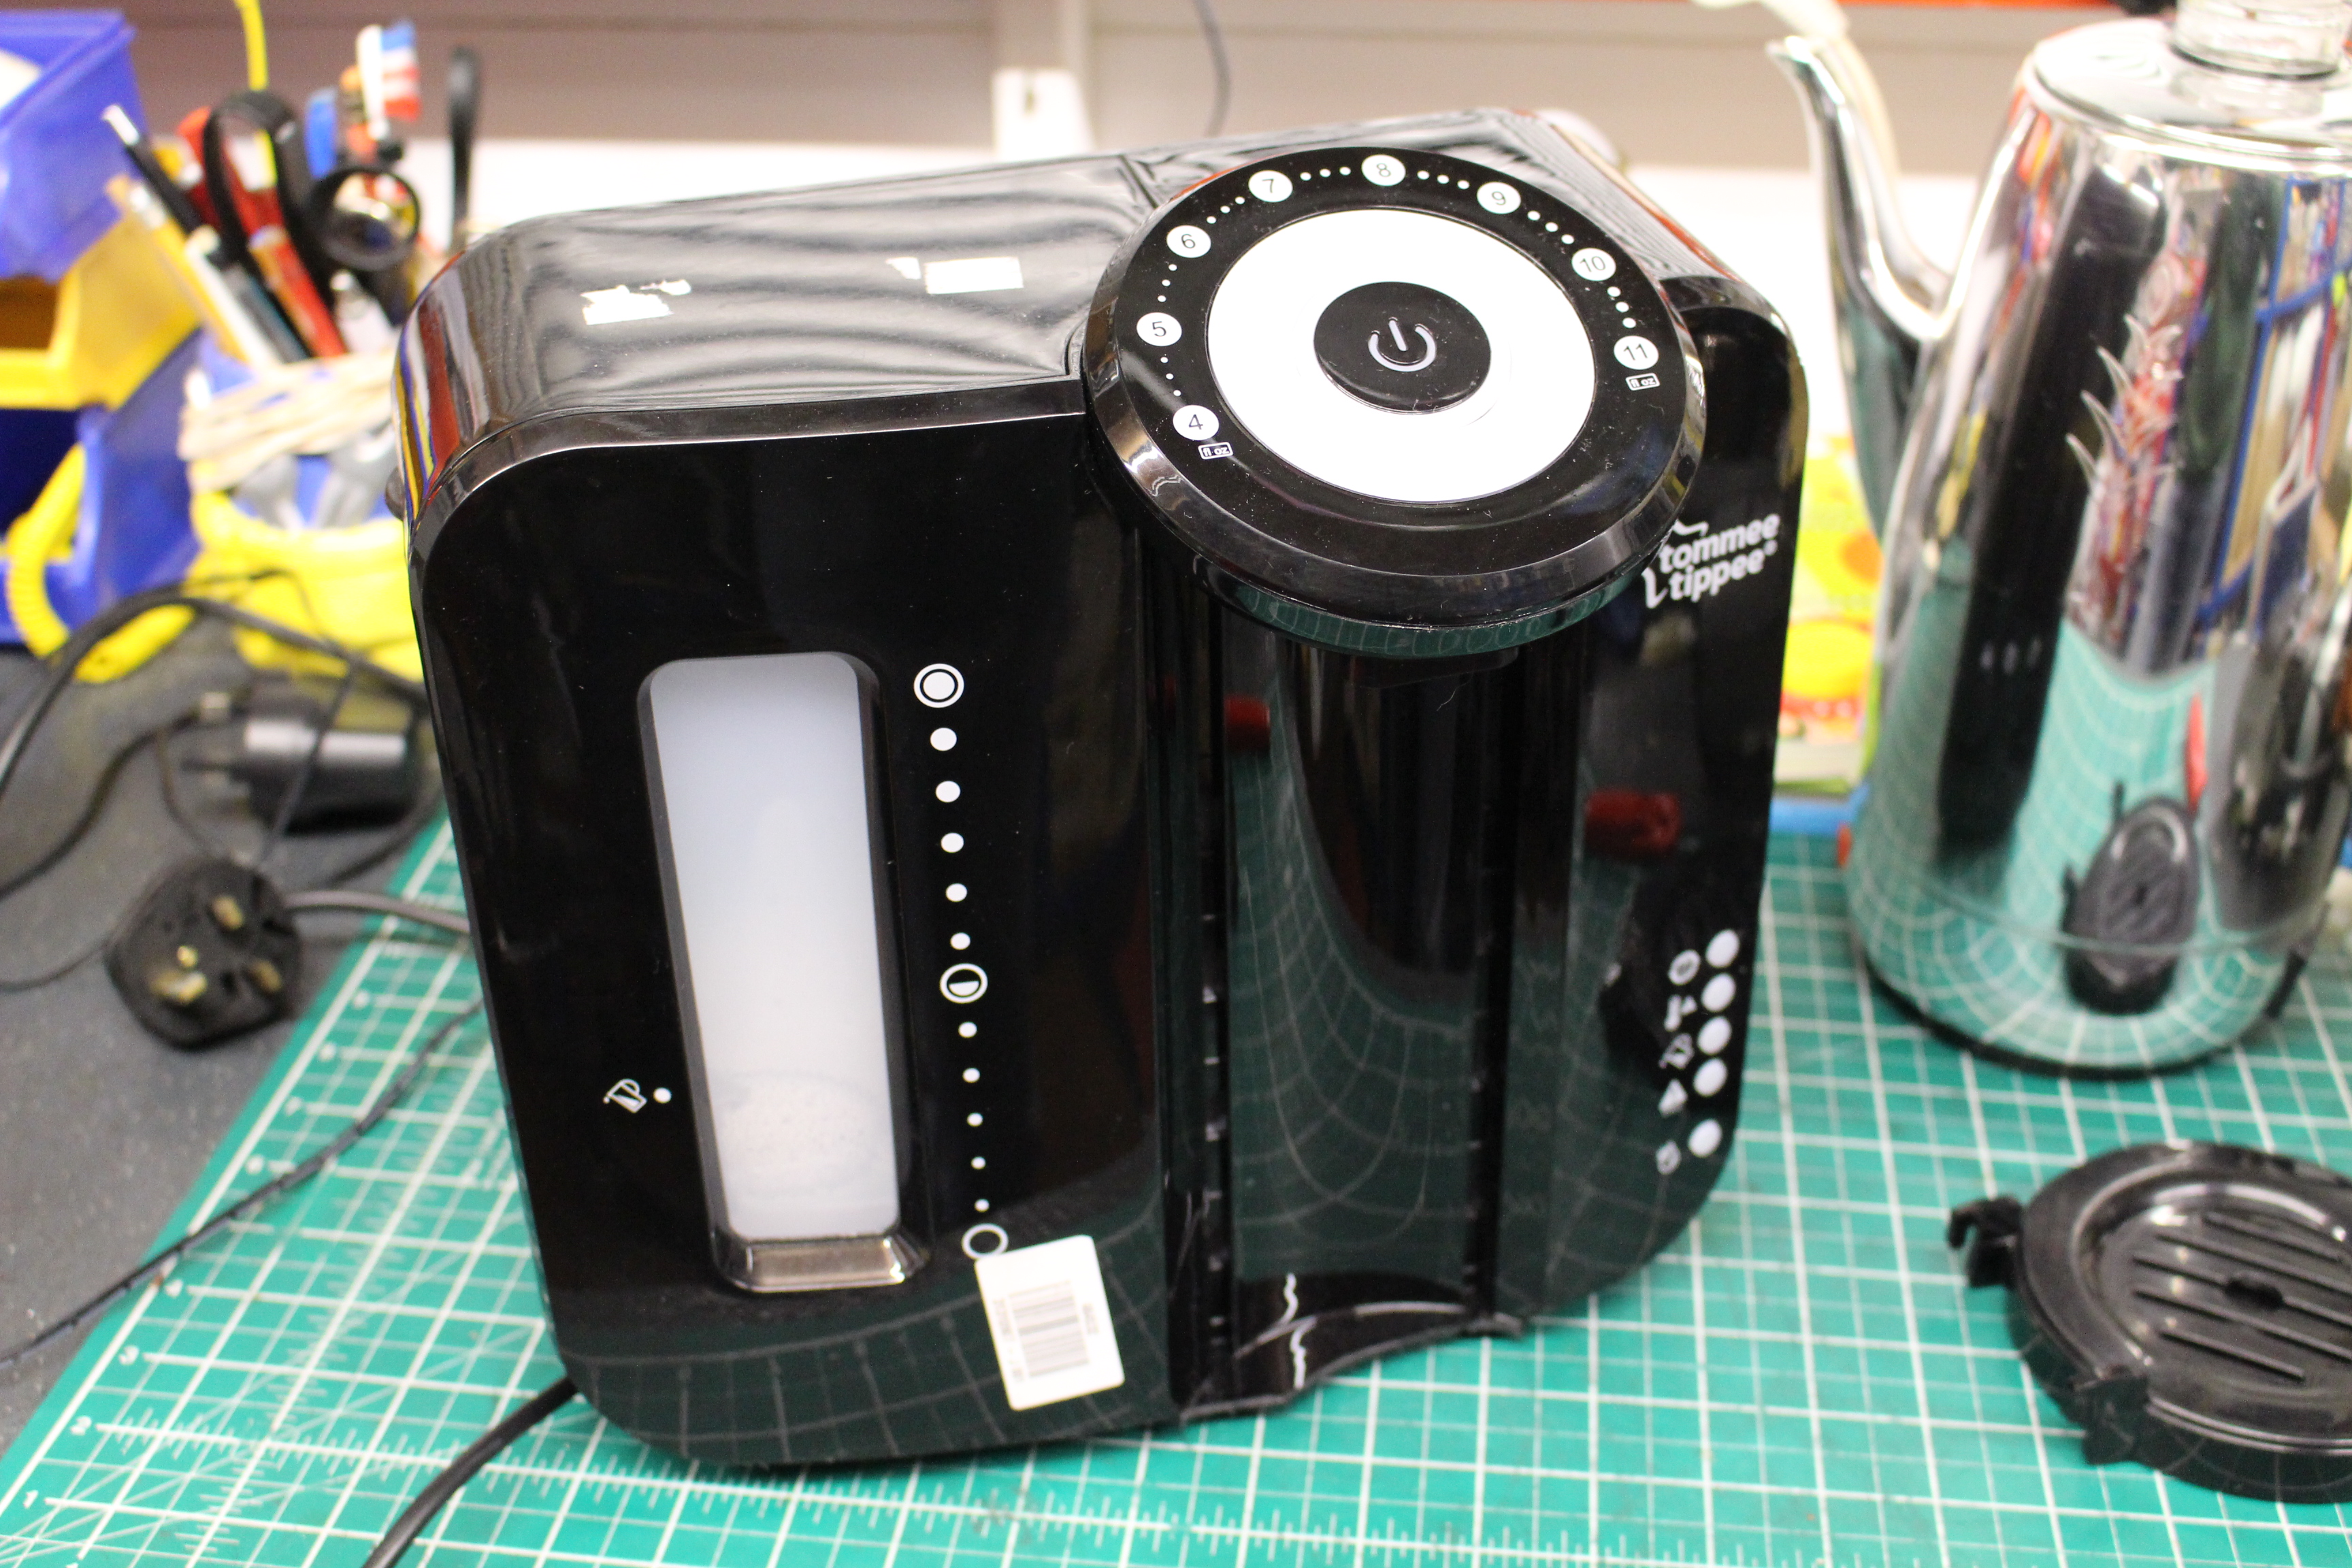
The owner of this Perfect Prep machine had reported that it had not been used for a while, then filled with water, powered up and … nothing.

Make and model:  Tommee Tippee Perfect Prep

Cost of replacement:  £70

Cost of parts:  £3.69 (plus my time)

Hours spent on repair:  1 (plus testing)

Repair difficulty:  6/10

IMG_8972
FixItWorkshop, Worthing, June’18, Tommee Tippee Perfect Prep.

I’ve repaired a machine like this before and I already had a theory about the problem, which went like this:

  • Machine not used for a while; watery scale deposits built-up in machine
  • Machine filled with water, with possible air-lock present
  • Air-lock causes bubble in heater, causing it to temporarily over-heat, safety thermal fuses blow

Dead machine.

At this stage, it was only a theory, so the only thing to do was to start wielding screwdrivers.

A few quick checks revealed that mains power was not getting to the main controller in the machine, which indicated that the safety thermal cut-out fuses had failed.  There are two on this machine.  A quick test with the multi-meter confirmed that both had failed.

After some dismantling, both fuses could be removed from the wiring harness.  Fuses like these are not available from the high street usually, but they are readily available online.  The manufacturer had used crimps to attach the fuses to the wiring, but I decided to solder the new ones back in place.  Care had to be taken as the melting point of solder is very close to the thermal rating of the fuses, so I came up with the idea of using a damp cloth wrapped around the fuse while doing the soldering.  A bit tricky!

Both fuses replaced meant that the unit powered-up and worked.  Great.

However, I wasn’t totally convinced that an air-lock wouldn’t happen again so I looked deeper at the machine’s plumbing.  There appeared to be a kink in one of the boiler tube feed pipes, so I decided to cut some material away, to prevent the pipe restricting water flow in future.

This slideshow requires JavaScript.

All back together, the machine worked well once again.


Tommee Tippee (not so) Perfect Prep

A formula machine is repaired in the workshop.

This fix was actually carried out during the summer, 2018.

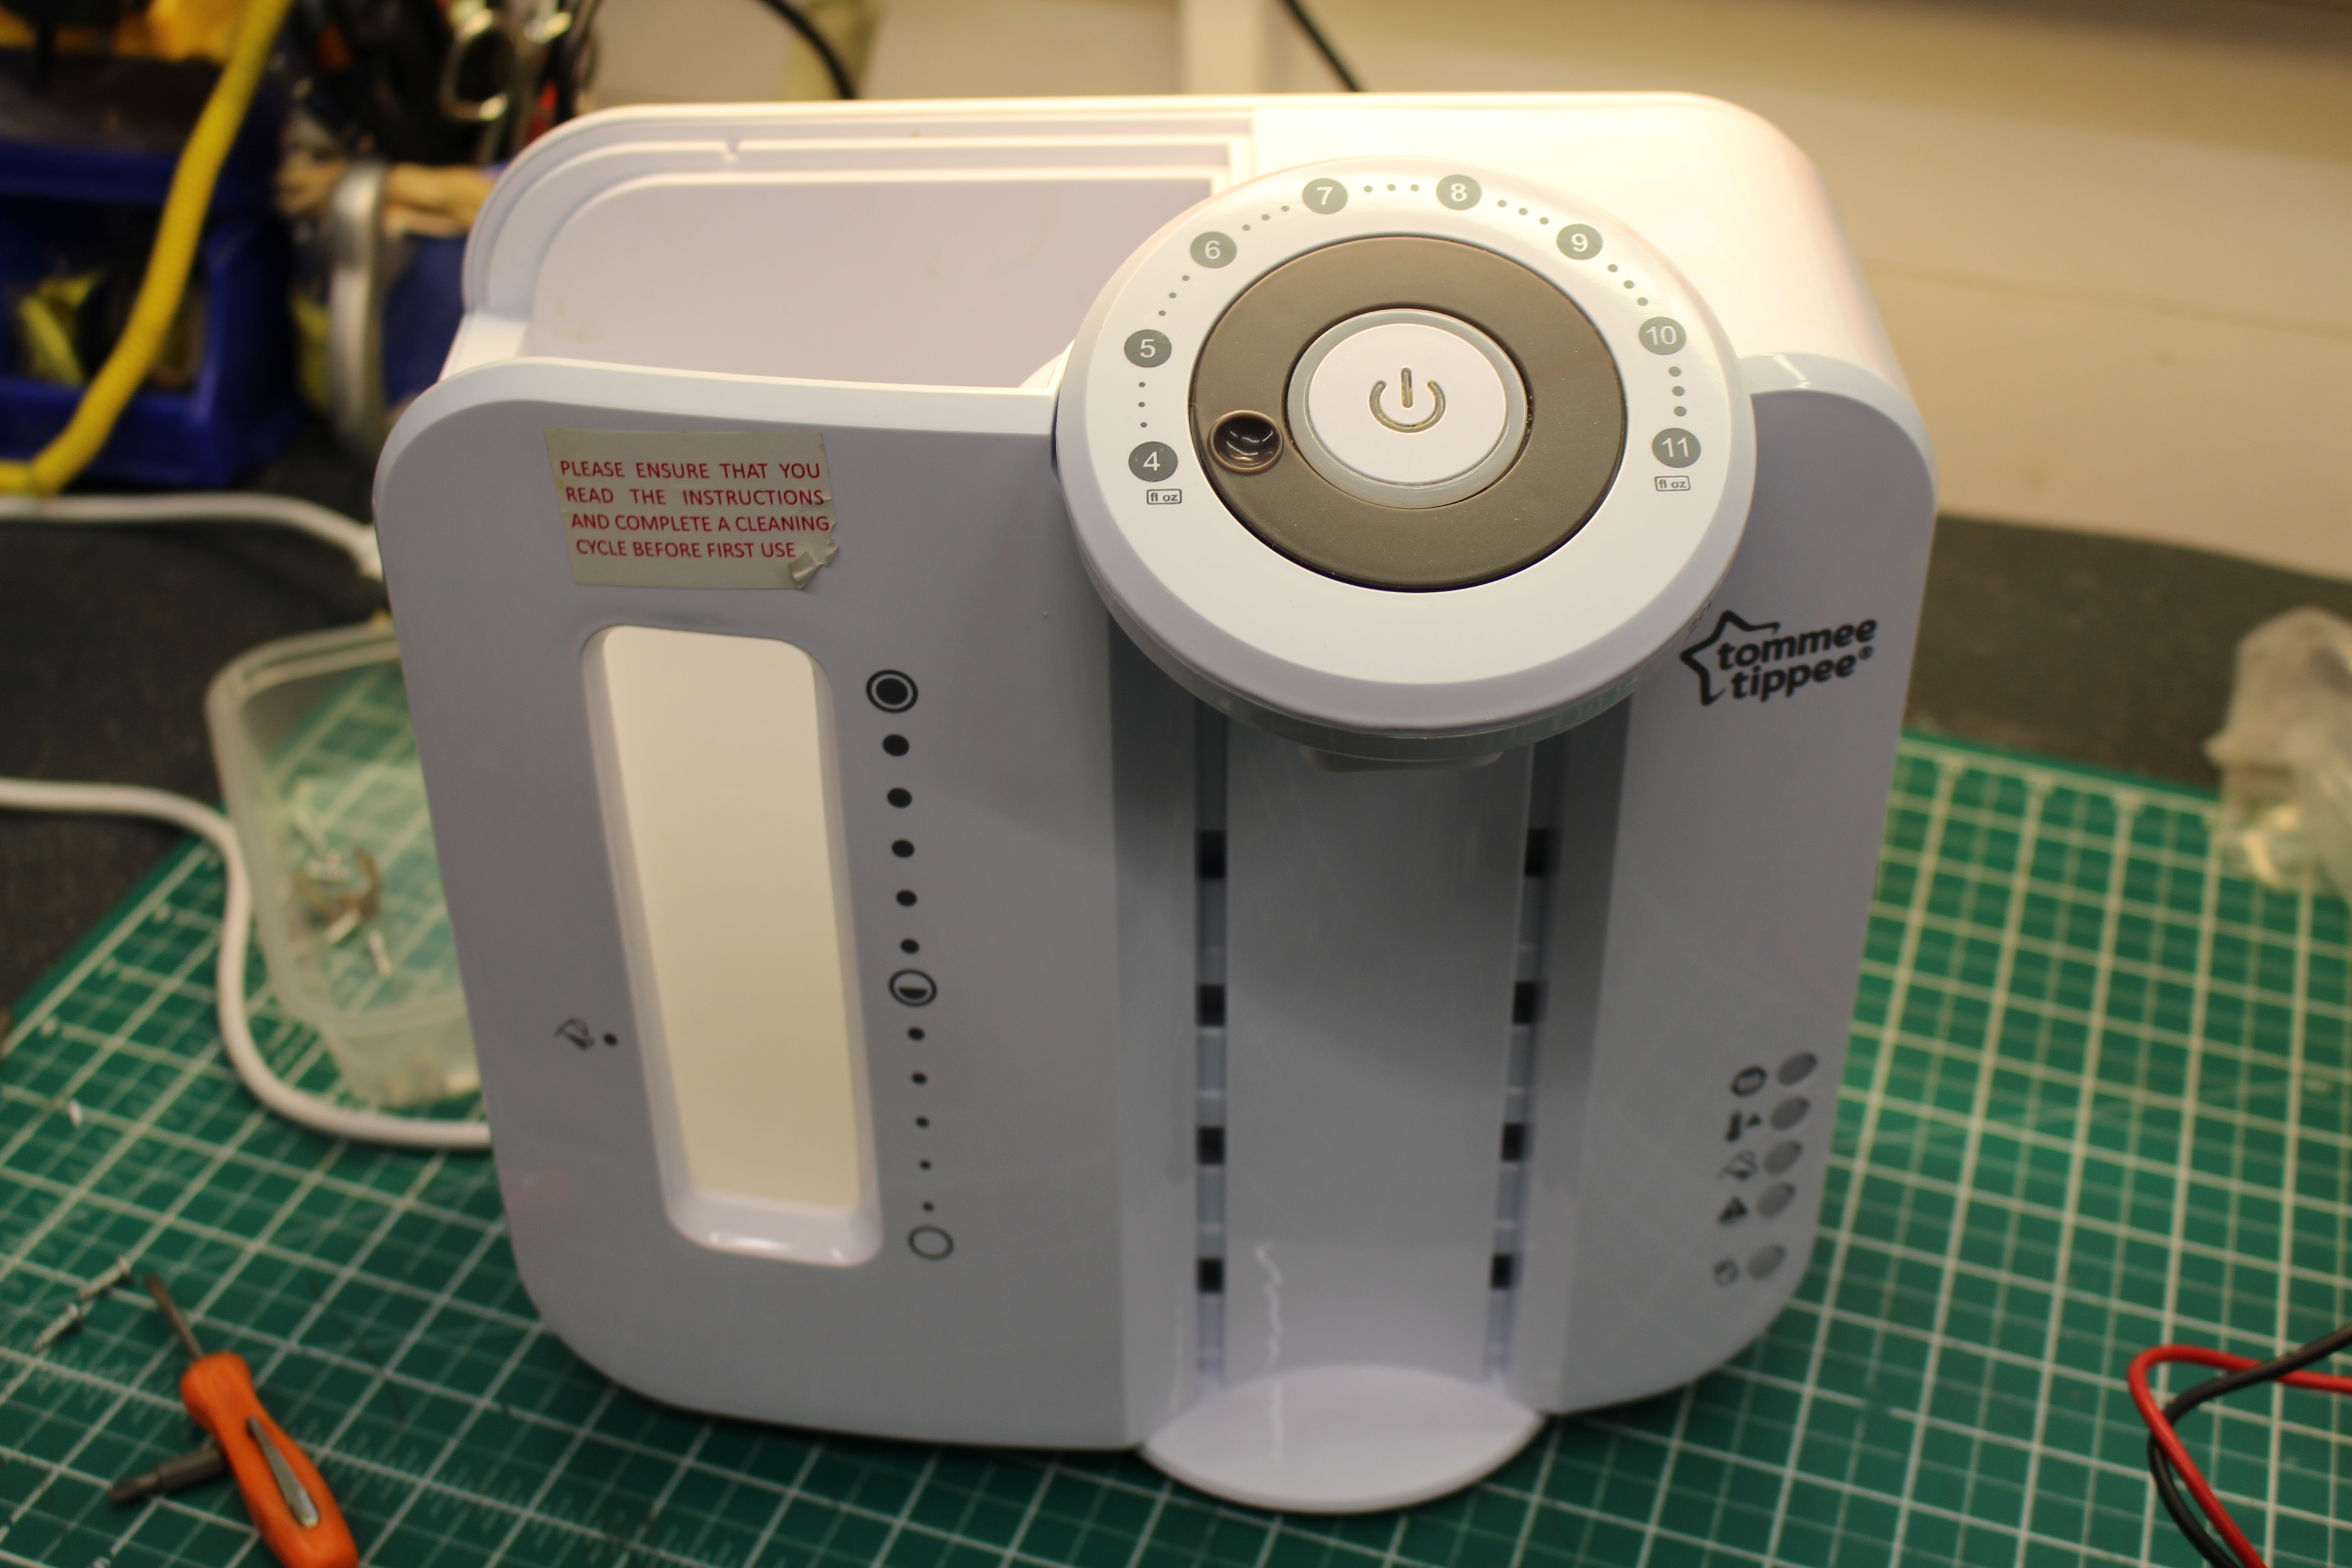
A friend of mine brought over a broken formula making machine for me to look at.  It had been stored after their first child had out-grown it and since having another baby, it was now needed again, urgently.  Following a couple of years in storage, it was brought out, plugged in and after briefly coming on, it failed.  No lights, no hope.

These machines save time and effort by allowing water to be heated rapidly and mixed exactly with the formula powder, to produce consistent results every time, perfect for new exhausted parents in the middle of the night. So it was important that I got this working quickly.

IMG_6428
FixItWorkshop, Jan’19, Worthing, Tommee Tippee Perfect Prep machine

After removing the back, I was presented with an electronic control unit, some solenoid valves and a heater, plus some other environmental sensors such as thermostats.  The plug fuse was OK, so it was time to check if power was getting to the machine.  It wasn’t.

This machine features a couple of power control devices; two  thermal aluminium ‘can-style’ fuses in-line with the heater, plus a thermostat on the output of the heater itself (to regulate heat).  After testing for continuity, it appeared that one of the can fuses had failed.

These fuses are common across a wide range of appliances, such as coffee machines, fans etc and are cheap, just a few pounds.  It could be that a temporary air-lock in the heater caused a hot-spot and therefore that excess heat caused the 172 degree fuse to pop.  It was worth a try to replace it and see what happened.

I replaced the fuse and re-assembled.  After filling with water and powering it up, normal service was resumed.

Since I replaced the fuse, the machine has been in continuous service for many months, so I can conclude that it was probable that the over heating was temporary.

I created a short video to help others who may have similar problems with their machine.

Cost of a new machine:  £90.  Cost of repair: a few quid and a few beers.


Non-starter: Pure Evoke H2 DAB radio

My own radio gets the workshop treatment.

Who wouldn’t love a new DAB radio for your birthday?  Well, that’s what I had this year and I was thrilled to receive this Pure Evoke H2.  After choosing a suitable location on my desk, I quickly unpacked it, plugged it in and…nothing.  Booooooo!

The display backlight appeared to glow a little, but that was it and I was missing Today on Radio 4.

IMG_7657
FixItWorkshop, Worthing, November’18, Pure Evoke H2 DAB radio.

To save a quite frankly dull story, the returns and replacement process offered by the company who supplied the radio was hopeless.  But, after 2 months, I ended up with a replacement radio, in addition to the one I already had.  The second radio worked, albeit with some fettling required to the speaker to make it sound ok (another story).

Time to dig out the screw drivers as I had nothing to lose.

Just 6 screws hold the back on and with these removed, the radio’s innards were exposed.  Now, I’ve made radios from kits in the past using components I can hold with my fingers, but with this radio, the circuitry was teeny-weeny and I would have to have some luck to fix it.

I was in luck.  The radio is made up like a sandwich.  The front fascia is screwed to the cabinet and the back, that I’d removed, was screwed to the cabinet, from the other side.  There are data-style cables between the two halves and one of them appeared to be loose.  I carefully pushed the connector ‘home’ and then re-applied the power lead and wouldn’t you know it, the display lit up and it burst in to life.  Now we’re talking.

Thinking I’d sussed it out, I screwed the radio back together and had about a week or two of unbroken service, until the screen froze and then nothing. Oh no.

Re-opening the back of the radio, I suspected that the tiny soldered pins on the back of the multi-way connectors on the data-style cables, had been dislodged.  I have average sized hands for a bloke, but I needed tweezers to get the connectors on during assembly.  I wonder how much it would have cost to add an inch or so to each cable, to make manufacture easy.  As a consumer, I would have gladly paid the extra penny.  I suspected that this is how the original fault came to be as it wouldn’t have taken much more than a shove in the wrong direction to break the delicate connectors, due to the short length of the internal cables.

This slideshow requires JavaScript.

Since this circuit board is a tiny stamped component affair, I had to be quick and neat with my re-soldering.  Each pin to PCB connector re-soldered, cables re-attached, back screwed back on and the radio worked once more.

Pure have a reputation for easy to use, excellent sounding products.  It’s just a shame they have seemingly penny-pinched on some of the internal gubbins on this model.  If yours develops similar symptoms, don’t give up, take the back off and have a look.

Cost of a new radio:  £40-90.  Cost of repair:  5 mins tinker time, one cup of tea.

Ultimate Speed Battery Charger from Lidl, on standby

Battery charger repaired at the workshop

My in-laws have an ornament on their drive, in the shape of a 2001 MGF roadster.  I say ornament because it’s fairly stationery, all of the time.  Even so, it’s battery gets topped up once in a while and the engine turned over when the urge presents itself.  Because the car isn’t used, the battery’s only means of charge is via a plug-in charger, my father-in-law occasionally hooks up.

IMG_5316.JPG
FixItWorkshop, March’18, Ultimate Speed (Lidl) Battery Charger.

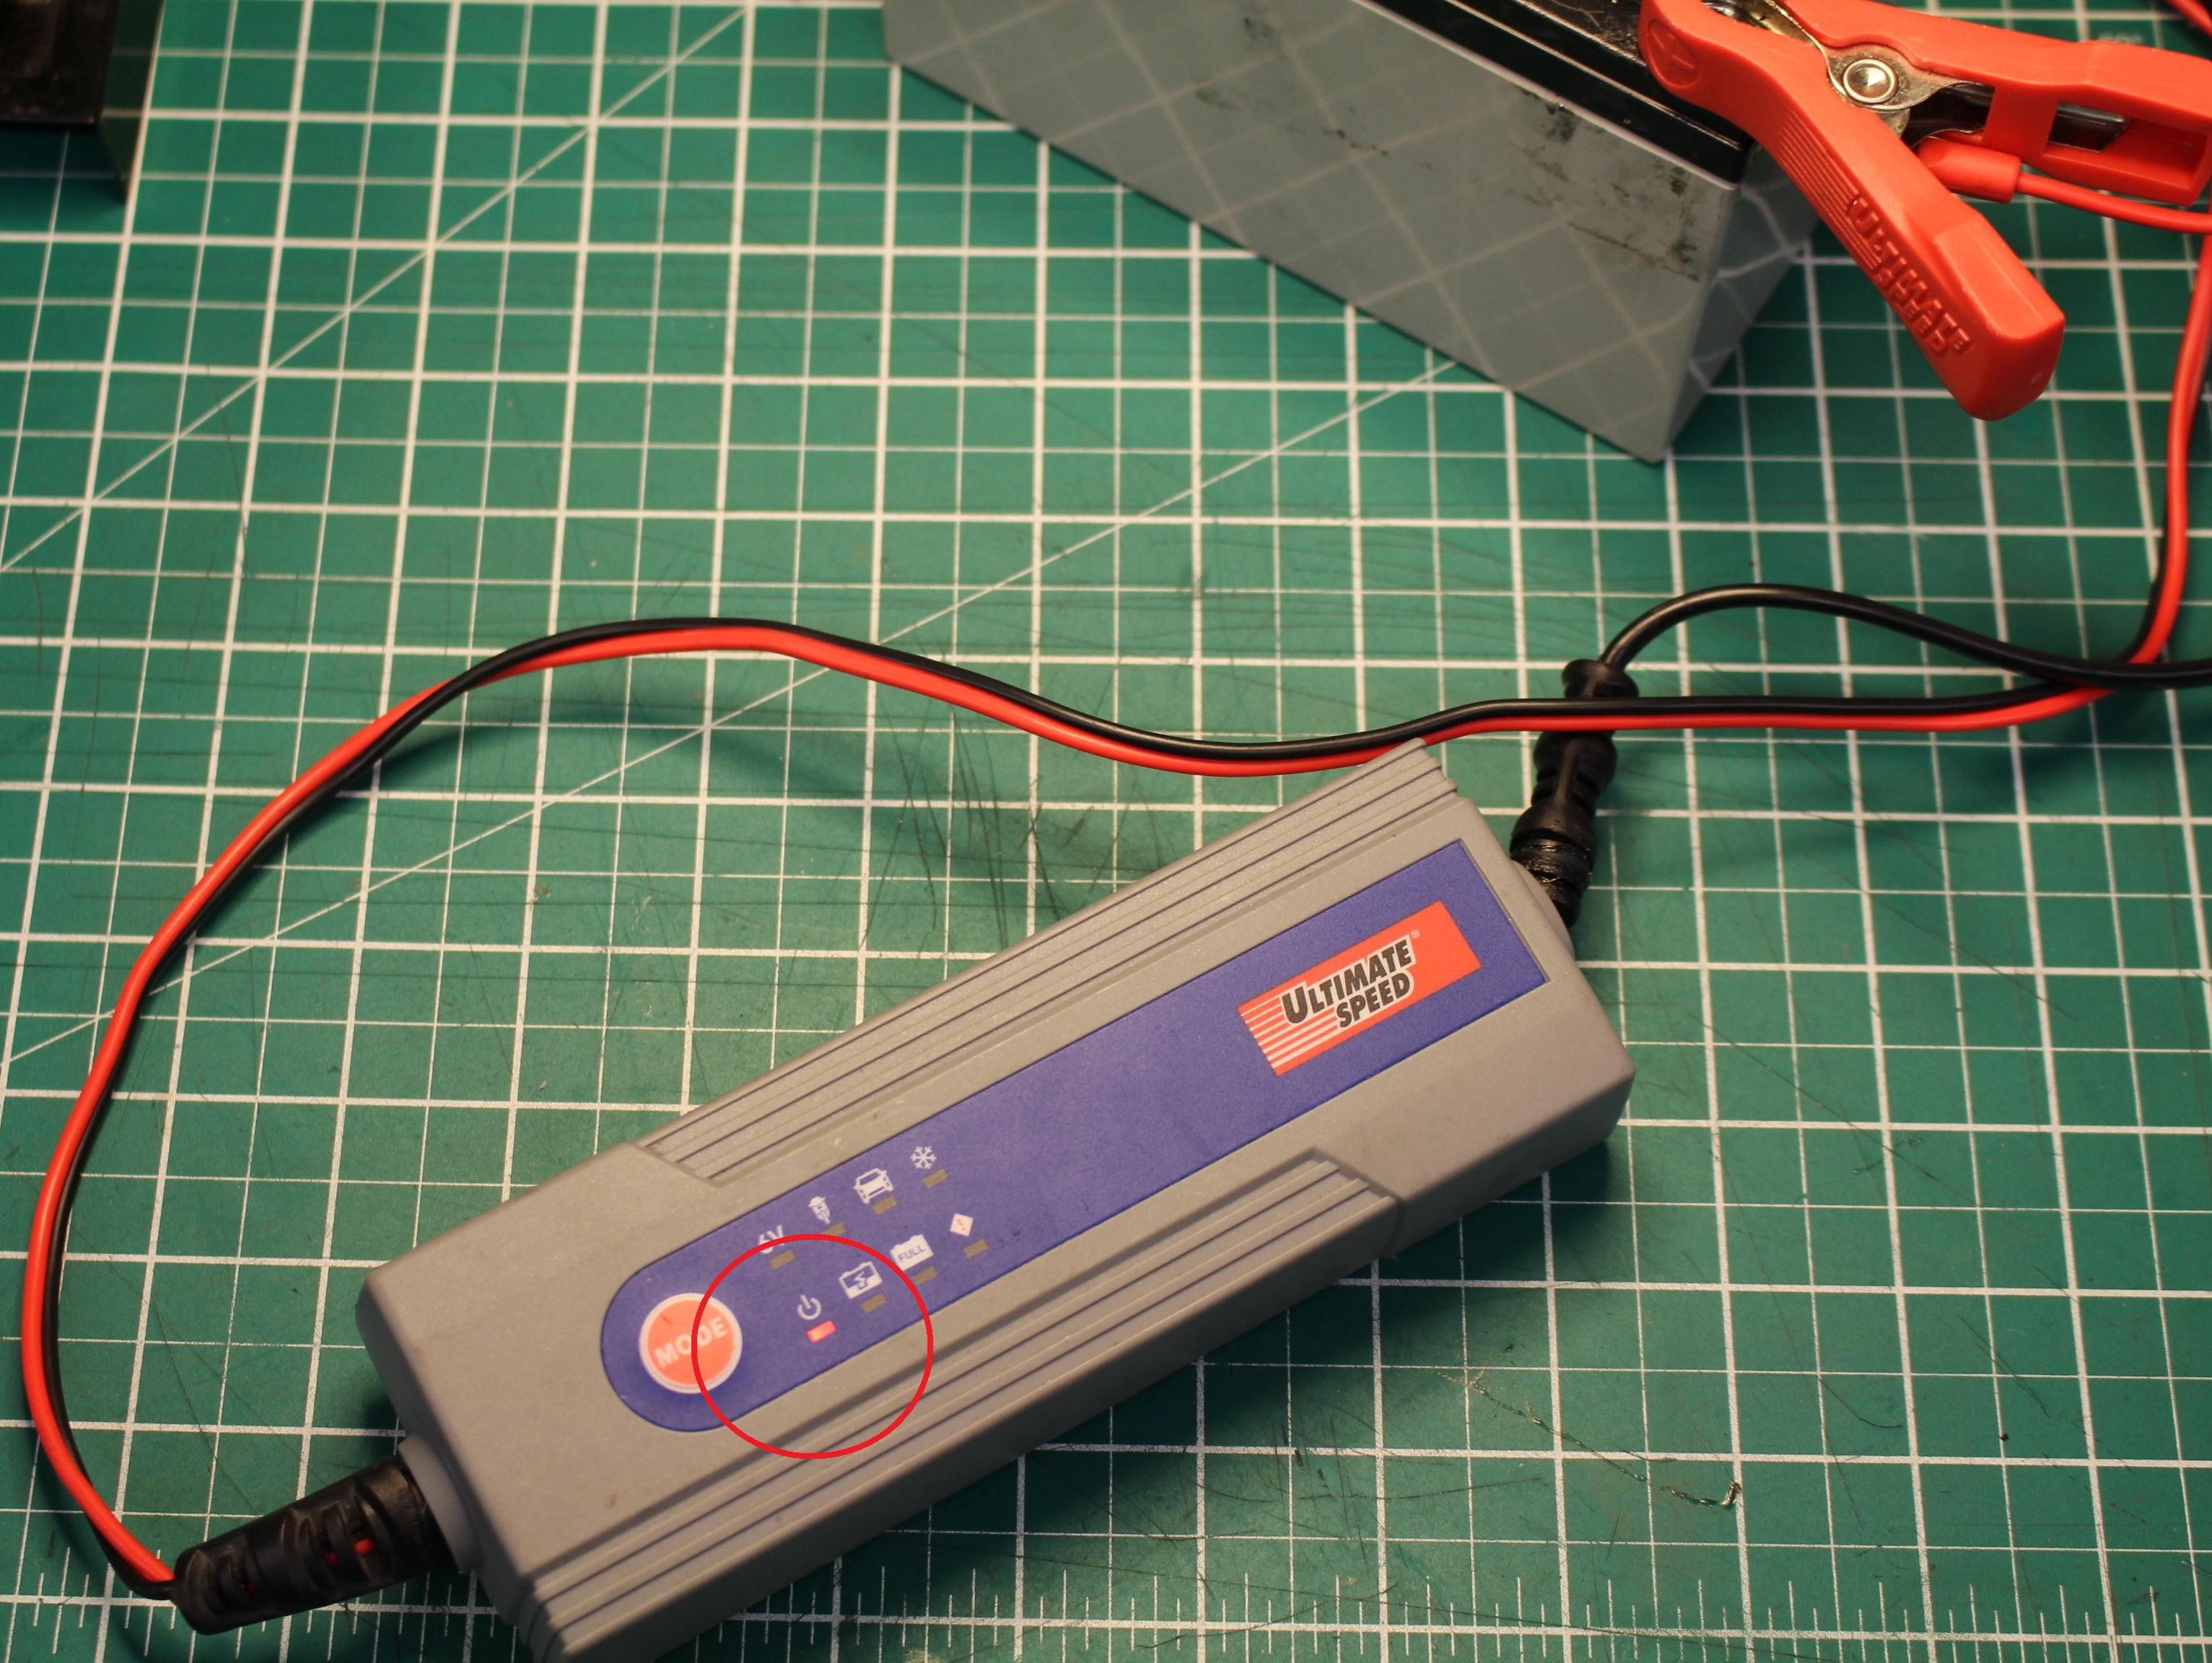
The battery charger in question is an Ultimate Speed (Lidl brand) universal battery charger.  They’ve been on sale in the UK for a number of years at the £15 (approx.) mark.  They’re really good value as they allow ‘smart charging’ of car and motorcycle batteries without the risk of damage at a fraction of the price of the ‘big brands’ or a replacement battery.

However, this charger decided that it wasn’t playing anymore and refused to offer it’s charging services when recently connected to the MG’s flat battery.  On it’s way to the great bin in the sky, I managed to divert the charger via the workshop.

Once connected to the mains, the standby light illuminated, indicating something was actually happening, but upon connecting the low voltage side to a battery, making a charge selection via the single push-button switch, nothing changed and the whole unit remained on standby.  Pretty annoying.

Luckily, I have the triangular screwdriver required to undo the six screws that hold the (IP) ingress protected casing together.  Triangular screw heads are annoying and pointless as they prevent, in my opinion, people with a basic tool set having a go at a repair like this.  If you do fancy getting one of these tools, they are easily available on Amazon and eBay.

On with the fix.  With the casing opened up, my first port of call was with the switch itself.  Past experience has taught me to 1; start with the easy stuff and 2; these push to make switches fail all the time.  They’re in everything from door bells to cookers at the moment and when faulty, make the most expensive item and expensive paper weight in the blink of an eye.

To test the switch, I connected the charger to the mains and hooked up the low voltage end to a battery and simulated the button push switch by shorting out the switches connections on the circuit board.  Hey presto, the charger worked perfectly, every time.  The switch either needed repairing or replacing.

Because I’m a skin-flint, I opted to see what could be done with the present switch.  With care, these switches can be prised apart, using a sharp knife and the insides cleaned.  I took the switch apart which revealed nothing more than slightly corroded switch surfaces.  I can only assume that the product’s bold IP rated claim is a little over exaggerated and that some damp had wriggled its way to the switch and mucked it up.  With a cotton bud and switch cleaner, the switch surfaces scrubbed up like new and I re-assembled the switch lever and securing plat using a soldering iron to re-melt the plastic nubs holding the switch together.  No one would ever know it had been in bits.

With the circuit board returned to the housing, all six screws done up, the charger was back to rude health once more and ready to tend to the stranded MGF.

Runaway Hillbilly Golf Trolley…

Golf trolley heads for the hills…

Readers of this blog (I know there are millions of you) will recognise this golf trolley and I’m pleased to report that my first repair, the one to the motor, is still working perfectly.  However, the owner of the trolley contacted me with a (funny) problem.  Whilst recently enjoying a round of golf on the local fairway, the trolley decided to, by itself, begin to edge away from the second tee and then with some speed, head off in to the distance, without any operation of the dial switch, situated on the handle.  Whilst this seemed funny at first, I remembered that the motor on this trolley had the kind of torque that, coupled to small gearbox and wheels on a heavy frame, could do some serious damage, left unchecked.

Original photo taken in Aug’17, below.

WP_20170803_14_08_27_Pro
FixItWorkshop, Worthing, Aug’17 Hillbilly Compact Golf Trolley

Unlike many modern electric golf trolleys, it doesn’t feature GPS guidance, remote control or amazingly, a dead-man’s switch, which seems like a major safety oversight to me.  I’d have expected either a kill switch or dead-man’s switch* fitted to the handle on a trolley like this as the runaway scenario could never occur due to fail-safe nature of the switch being operated.  With one, the trolley would only run when the operators’ hand was on the handle or cut out when the kill switch is activated, as with the saftety cord mechanism, on a jet ski for example.  Perhaps the Mk2 Hillbilly Compact featured this.

*For example, a dead-man’s switch is usually fitted to something like an electric saw where the operator must old a handle-type switch to make it run.  Once the operator lets go of the handle, the motor automatically fails-safe and cuts-out.

On with the repair.  The trolley features some exposed connectors and cabling and it seemed sensible to check the continuity of the cables running up and down the handle shaft, as repeated trolley folding might have caused a problem with the wiring.  Fortunately, the cabling was OK.

The owner had mentioned that the handle, where the speed control switch is located, had got wet in the past, which made my alarm bells ring.

Opening up the handle, which only required a basic tool kit, revealed evidence of water damage and corrosion to the speed control terminals.  Luckily the owner of the trolley had stocked up on spare switches!

Removing the existing switch revealed intermittent continuity and varying amounts of resistance, which was not good.  A fault most likely to have been caused by water ingress or excessive shock.  The owner had supplied two ‘new old stock’ (NOS) switches.  Which one to fit?

From time to time, it’s downright sensible to either fit NOS or second-parts as they’re usually cost-effective and are more likely to fit over pattern parts.  But time can also affect apparently shiny parts.  This was a case in point.  I knew that the switch should vary resistance from open circuit to 10KOhms in either direction from COMM.  The old one didn’t and one of the ‘new’ parts only went to 2KOhms, so was not in specification.  Luckily, the remaining NOS switch worked fine and once refitted, and the handle reassembled, the golf trolley was ready to make the job of carrying clubs easier, once again.

IMG_20180131_135745
FixItWorkshop, Feb’18, Hillbilly Compact speed control switch, new and old- test NOS parts before fitting.

Cost of replacement trolley:  ££££ Cost of repair; £10 plus time.  Moral of the story; don’t assume NOS parts will work.  Test them first.