Vedette Wall Clock ne marche pas

A little repair on a French wall clock

This lovely wall clock had been running perfectly fine until a friend of mine decided to move it temporarily from the wall, during a recent bout of home decorating.  Now, I’m no expert on French wall clocks, but we think this one is circa 1920s or 30s, but either way, it’s a lovely thing to have in the house.  This one is also fitted with Westminster chimes, so one assumes it was made for the English market as an export item, all those years ago.

IMG_20180122_202319
FixItWorkshop, Jan’18, Vedette Wall Clock (French)

Once the paint had dried, the owner decided to re-fit the clock to its hook on the wall, but it simply didn’t run, even when fully wound-up.  Strange, what had happened?

Having a quick look at the front of the clock revealed nothing much.  The pendulum was where it should be and appeared to swing freely, as a pendulum should, but there was a slightly strange ‘double-click’ tick-tock, indicating something wasn’t right.  Clocks of this type should emit a definite even tick – tock -tick-tock.  This one wasn’t. Hmm.

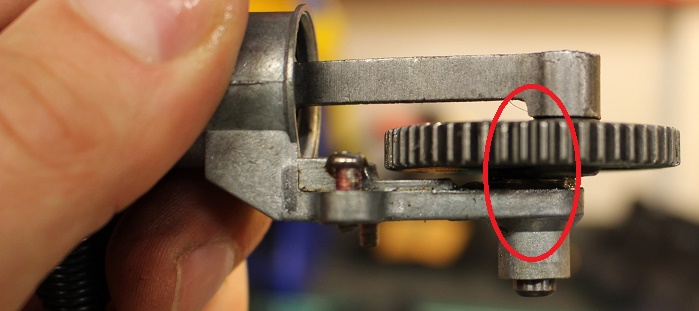
Before going to see the clock, I had already decided that the small spring that suspends the pendulum could have been broken, so I packed a few spares I happened to have, just in case.  Opening up the mechanism revealed that the spring was actually intact, not bent or warped and therefore perfectly serviceable.  It was fairly obvious almost immediately that the small clasp which secures the pendulum to the escapement lever was bent and the probably cause of the problem.  All that was needed was a small amount of tinker-time to fix that with a small pair of pliers.  However, that wasn’t the end of the story.  Having undergone a ham-fisted removal from the wall, the escapement pendulum lever was now in a slightly different position and some more fettling was required to get the clock back ‘in-beat’, a common requirement on this mechanism type and often the reason why a clock won’t run, even when fully wound.

As the clock mechanism was out of the main casing (see photo) I decided to prop-up the mechanism on two tins of beans to allow the pendulum to hang over the side of a level table.  This allowed me to access to the clock’s mechanism and hear what was going on clearly.  A slight adjustment on the main pendulum lever to the right on this mechanism and the clock was back ‘in beat’, keeping good time.

After giving the case a general clean up and polish, I refitted the clock mechanism back inside it and hung the whole thing back on its hook, back where it belonged, on the wall.

Cost of a replacement: Sky’s the limit. Cost of repair; 1 cup of tea and 1 chocolate digestive.

Poorly Scalextric Sport Digital Lap Counter (C8215)…

Scalextric C8215 lap counter repaired in the workshop…

First off, I must confess, that this is part of my own Scalextric collection, not part of someone else’s.  I’ve always enjoyed slot car racing and a lap counter is an essential addition to anyone who wants to prove that they’re the fastest around the track!  Trust me, it can be very addictive, especially when racing against one’s better half.

IMG_4854
FixItWorkshop, Dec’17, Scalextric Lap Counter C8215

Anyway, I wanted to share this little repair in the hope that others might benefit.

My once reliable lap counter started to miss laps on lane two at very crucial stages of a race.  It started by only happening occasionally before completely missing several laps in a row, forcing a stewards’ enquiry to settle the race finish times.  Lane one was fine.

Time to get out the screw driver and delve in to the workings of the timer.  Once removed from the main track layout, the back of the unit has a cover which is held in place with six small self-tapping screws.  These come undone easily and removing the back reveals two sets of electrical switch contacts, operated by a lever on each track, just under the slot car rails.  The idea here is that the slot on the slot car operates the lever as the car passes the lap counter track piece, operating the switches contacts, completing a circuit, thus counting the laps.

Comparing the switch contact clearances, lane one’s was considerably closer than lane two’s.  This means that the ‘dwell’ time on lane two’s switch would be less that the switch on lane one, which was working ok, meaning a possible cause of the problem.  To anyone who’s adjusted contact breaker points on an old car, you’ll know what I mean here.

I had no idea what the correct clearance should be, so took an educated guess and closed the gap to about 0.5mm, done by eyesight alone.  I made sure that both sets of switches were the same (see photos).  While I had the counter in pieces, I cleaned the contact surfaces with a little electrical contact cleaner, just for good measure.

After re-assembly and re-fitting to the track, a few test laps with my fastest race Mini, proved that the counter was working as it should once again.

Cost of a replacement counter (second hand) circa £12.  Cost of the repair; 10 minutes tinker-time.

Raucous Kenwood Chef A701a

A noisy Kenwood Chef A701a gets a gearbox rebuild.

This Chef had been sleeping quietly in a kitchen cupboard for some time before being woken up to make cake mixtures once again.  The owner had owned the mixer for many years from new and was sentimentally attached to it.  I fully sympathise, they’re great machines.  It had been used many times in the past and then packed away as new machines came and went.  Having decided that there was still a place for the A701a, it was fired up.

The owner didn’t remember it being quite as noisy and wondered if something was wrong with it.  She got in touch and brought it in to the workshop.   After listening to the mixer at varying speeds, we agreed that perhaps it was a bit noisy and that further investigation was required.

 At this stage I must confess at this repair has been on the bench for a long while..!

I think the A701 is my favourite Kenwood Chef product as it’s very elegant, beautifully proportioned and almost over-engineered.  It comes from a time where built-in obsolescence was a swear word.

White removed
FixItWorkshop, Oct’17, Kenwood Chef, A701a.

On with the problem.  After disconnecting the gearbox by removing the drive belt, I checked the motor for general wear and tear, the brushes and speed control mechanism and I concluded that it all seemed OK and working smoothly.  The gearbox however did seem a bit noisy when turned manually, nothing hideously graunchy, but a little rough.  To be honest, it would have probably survived, but I wanted to open up the gearbox to make sure that it was as it should be.

Whilst removing the Chef’s casing around the gearbox, I’d noticed traces of grease around the joints and various power take-offs.  All models seem to do this to an extent, but this one seemed to be quite bad.  Closer inspection revealed that some of the grease had escaped out of the seal between the two halves of the gearbox casing.  Opening up the casing revealed that the grease that was left had been pushed to the corners of the space within the gearbox and that the gears were a bit dry, this was probably the root cause of the noise.  The planet wheel that drives the beater was also bone dry.

Luckily, there are plenty of suppliers who can supply rebuild kits for Kenwood Chef gearboxes, including new gears and grease.  The gears in this seemed serviceable, but it seemed very sensible to replace the lubricant with the correct 130g of Kenwood gearbox grease, which is food safe.  I used ‘Kenwood Chef Restore’, an eBay seller and the kit was a reasonable £10.99, including P&P.  The kit included the main gearbox grease, white grease for the planet gear and sealant for the gearbox casing.

IMG_4570
FixItWorkshop, Oct’17, Kenwood Chef A701a, repair kit from Kenwood Chef Restore, eBay.

Before replacing anything, the first job was to clean out all traces of the original grease which had gone very sticky and was contaminated with general wear.   The first pass clean involved using paper toweling, followed by water and detergent, before a final clean with brake cleaner, which removed the last few traces of grease and dirt.

With the gearbox refilled and resealed making sure the spacers were re-fitted to the correct parts, the drive belt re-fitted with just enough slack, the gears sounded much sweeter with the final parts of the casing reassembled.  One last point to note is that I used silicone sealant on the blender attachment power take-off plate in replacement to the one fitted, since the original seal was well past it (see below).

As a finishing touch, I replaced the existing machine feet which had turned to mush with replacements from Sussex Spares (eBay shop) for a very reasonable £2.70, delivered.

The Chef was now ready to prepare cake mixtures again.

Cost of new machine: £300 and up.  Cost of replacement parts: £13.69 (plus my time).


Lucky Voice Microphone without the X-Factor

Lucky Voice Microphone repaired.

A colleague of mine came in with a broken microphone, which is part of a Lucky Voice karaoke set and retails for about £60.00 on Amazon.  The microphone had worked pretty well, but recently had lost its ‘X-Factor’ somewhat.

The microphone is fairly standard fare and connects to a standard XLR plug and socket arrangement.  As this part is usually under the most stress as the singer moves about, it seemed sensible to have a look at that first.  Upon connection to my amp, there was a huge amount of crackling which seemed to coincide with cable movements at the microphone end.  Swapping the lead for a known good one I had proved that the microphone was fine, but the lead not so fine.

Only one screw holds the plug together and straightaway, the problem presented itself.

IMG_4519
FixItWorkshop, Oct’17, X-Factor microphone, XLR connector.

The main core had detached from the connector, as the outer cable sheathing has come away from the XLR connector body clamp.  Not ideal.

A quick strip back and solder job and the wires were connected back where they needed to be.  A little dab of hot-melt glue on the cable grip and a re-tighten and the cable was not going to move anyway.

With the plug re-assembled and the screw put back, the microphone tested perfectly on the amp, ready for karaoke once more.

Cost of a new similar lead: £10,  Cost of repair: 15 minutes, dab of glue and solder.  Nice.

Nice customer feedback: Bosch Athlet

A customer got in touch to say thanks. Always appreciated.

It’s always good to get feedback on the stuff I write here and produce for YouTube.  I welcome it all, good and bad.

Here’s a nice one, relating to my Bosch Athlet repair, I received recently.  Makes it all worthwhile.  https://fixitworkshopblog.wordpress.com/2017/06/16/flimsy-bosch-athlet-25-2v-cordless-vacuum-cleaner.

From a chap who’s repaired his Athlet using my video.

Just a thank you.
I went looking for a solution to the intermittent cut-out on my Bosch Athlet and found your solution. It took all of about 2 minutes once I’d found a suitable length screw and works perfectly. Like it was designed that way.

In your video you thought maybe the handle was removable to allow the attachment of some accessory. It isn’t. It’s just a way of making the box smaller for shipping.

Which means if Bosch put the hole in, and supplied a screw, it would be a much better product. (But of course, then they could sell it as no assembly required:)

But seriously, thank you. I love the Athlet, but that bloody intermittent cutting-out was really beginning to bug me. If I’m ever in Worthing I’ll buy you a pint.

Name supplied.

Well, I know a few good pubs in Worthing!

IMG_3613
FixItWorkshop Aug’17, Bosch Athlet repair

Happy repairs.

Slow Fisher-Price Mechanical Music Box Record Player

Repaired Fisher Price record player

Here’s a blast from the past:  A mechanical toy, that’s really cool.  One that brings fond memories from my childhood… I’m 38 as I write this (I’m 40 as I edit this- time goes so fast).

Strictly speaking, this is not a customer’s toy, but a family heirloom which had been festering in the shed for over 20 years.  Consequently, it now wasn’t in great shape.

After dusting it down, we realised that records were playing intermittently and slowly at best and the problem seemed related to the rather cool winding mechanism within.

After dismantling the unit and giving the mechanicals a light service, the turntable platter turned freely once again.  Our two (now three) year old daughter can now play with the record player as her mum did – very cute.


Enjoy!

Kaput Bosch AL1450DV Drill Battery Charger

An old Bosch battery charger gets a new lease of life.

These chargers often lead a hard life, working in dusty, hot and noisy conditions, so I guess many of these fail in time.

This Bosch unit is fairly common among Bosch DIY drill sets and this one had died catastrophically.  With the power applied, this one refused to give the slightest charge to a drill battery, once plugged in.

After some basic testing, I decided to change four components which would have caused the other to fail in a ‘domino effect’.  The cost of the replacement parts was just shy of £10, but definitely worth saving since second-hand units seemed to be changing hands for £40 on eBay, with their condition largely unknown.  The parts (two resistors, MOSFET transistor and diode/ transistor) were readily available online.

I recorded a short video to help others who might have a similar problem with theirs…


Pump, ready for the dump

This asthmatic car tyre pump came in to the workshop with little going for it.  The owner had been very close to throwing it away when he came across my website.

This AirMan pump is designed to be plugged in to a car’s cigarette lighter socket and provide quick and convenient car tyre inflation.  This one was dead.

On first inspection, the fuse was OK, the switch seemed to work and all connections seemed sound, when tested with a multi-meter.

IMG_3604.JPG
FixItWorkshop, Worthing, May’17 AirMan Car Tyre Pump, repaired

Off with the cover…

IMG_3598.JPG
FixItWorkshop, Worthing, May’17 AirMan Car Tyre Pump, repaired- cover removed

When the motor was removed from the cam driving the piston, the bit that drives the pump, it spun freely when power was applied, using a battery in the workshop.

IMG_3588.JPG
FixItWorkshop, Worthing, May’17 AirMan Car Tyre Pump, repaired- gear wheel

Seemingly, the centre spindle was protruding far beyond it’s specified reach, causing the pump connection rod to it it during rotation.  Why?  To be frank, I wasn’t sure. I can only surmise that the vibration and heat had caused the flywheel/ toothed drive to slide outside of specification.

IMG_3596.JPG
FixItWorkshop, Worthing, May’17 AirMan Car Tyre Pump, repaired- washer

There appeared to be room for a small washer to take up the excess space, so I fitted one I had lying around.

IMG_3597.JPG
FixItWorkshop, Worthing, May’17 AirMan Car Tyre Pump, repaired- pump now in line with washer

The washer, once fitted, allowed the flywheel/ toothed drive to sit ‘square’ in-line with the pump.

Once resembled, the pump ran freely and was ready to inflate, once more.

Cost of a new pump, circa £20.  Cost of the washer, circa 5p.

Leaking Reginox Miami Tap

Reginox tap gets a new mechanism.

A friend of mine had long been complaining about a leaking tap in his kitchen for some time, so it was a long overdue job for me to tackle.

A quick look online revealed lots of videos and help, but nothing covering the actual problem in this instance.

The tap spout was leaking from the swivel joint where the spout body is allowed to move approximately 180 degrees to move from sink to sink, in this case.  This is a fairly common problem for taps (faucet if you’re in America) of this design and sooner or later they all seem to suffer.

I was interested to know if the parts were available, but Internet searches revealed nothing.  An email to Reginox UK was answered very quickly and I was referred to Mayfair Brassware Ltd, the manufacturers of the tap in this instance.  The parts were quickly identified and delivered next day. Both companies were very helpful and efficient, useful for a non-plumber, like myself.

The cost of replacing the tap was about £50, so the £5 spent on replacement seals was well worth it.  The whole job was done in 10 minutes using basic tools.


Incontinent Porsche Boxster (986)

An annoying leak, sorted.

A slight departure from my usual ramblings about white goods and other domestic appliances in this entry.  Outside of The Workshop, I’m a keen petrol head who loves to tinker with cars and motorbikes and my own car was suffering from a recent bout of coolant incontinence.

Like me, most owners of these cars dread anything like this happening as it usually means big money.

The leak only happened when the car cooled after it was was run up to temperature and was evident in the area under the oil filter housing.  Luckily, the leak wasn’t serious and was repairable with a 10mm spanner, washing-up bowl and 4000 grit sandpaper.

Here’s a little video which I hope will help other Boxtser owners.