Gaggia Classic machine wakes up to smell the coffee.

A Gaggia Classic Coffee Machine repair…

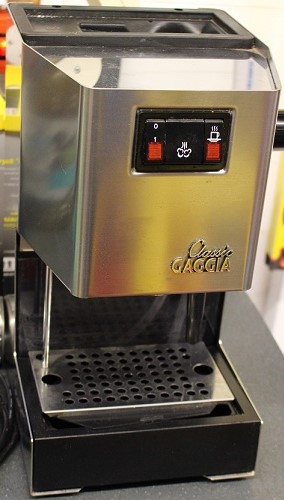
A simple repair…. That’s what I thought when a friend asked if I could look at his Gaggia Classic Coffee Machine, which had developed a nasty little leak when in use.  The coffee wasn’t all that good either, due to the lack of pressure available, caused by the leak.  In short, it needed attention.

IMG_3616
FixItWorkshop, Oct’17, Gaggia Classic Coffee Machine, with a leak.

The owner had already bought a repair kit consisting of the main seals/ gaskets that commonly fail, so I thought no problem, take to pieces, replace seals, happy days.  Er, not quite.

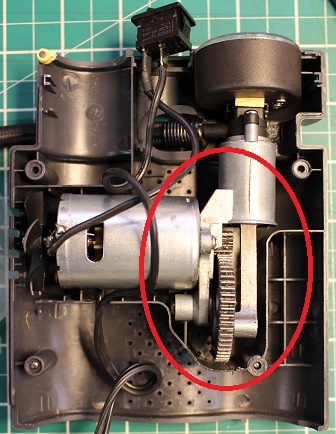
Once I’d stripped the machine down, pretty straightforward on these machines, the bare parts were exposed, which revealed the problem.  After being fired up briefly, not to make coffee I’d like to point out, water could be seen escaping from the boiler unit, a alloy bodied lump of metal, split in two halves, held together by 4 screws.  The boiler, as the name suggests, heats the water up with one heating element  and creates steam for the steam wand, with another element, all part of the same module.

After separating the boiler halves, I traced the leak to a faulty gasket, but crucially, one side of the mating faces was heavily corroded and unlikely to re-seal with a new part fitted on its own.  Remedial action was required.

This model is a few years old and a replacement boiler is still available on a few websites and prices vary from £40 to £60 at the time of writing, so at that price, starts to make the cost of repair unviable.

I decided that the face with the corrosion had enough material to withstand loosing some, so went about sanding the worst of the corrosion away before gradually moving on to  smoother and smoother sandpaper.

Because Gaggia Classics are fairly common, I decided to video this repair process as I suspect the corrosion affects many machines with age and just fitting a repair kit won’t cure the problem on its own.  See below.  I hope it helps anyone else with the same machine facing the same problem.


Once I was happy with the new finish, I fitted a new gasket and reassembled the boiler.  After putting it all back together, I purged several tanks of water through the system to remove debris, before attempting a cup of coffee.  Once filled up with my favourite Lidl coffee, the machine performed well once again with no leaks and the end product tasted great.

Cost of a new machine:  £249.00.  Cost of repair:  £4.50, plus time.


Raucous Kenwood Chef A701a

A noisy Kenwood Chef A701a gets a gearbox rebuild.

This Chef had been sleeping quietly in a kitchen cupboard for some time before being woken up to make cake mixtures once again.  The owner had owned the mixer for many years from new and was sentimentally attached to it.  I fully sympathise, they’re great machines.  It had been used many times in the past and then packed away as new machines came and went.  Having decided that there was still a place for the A701a, it was fired up.

The owner didn’t remember it being quite as noisy and wondered if something was wrong with it.  She got in touch and brought it in to the workshop.   After listening to the mixer at varying speeds, we agreed that perhaps it was a bit noisy and that further investigation was required.

 At this stage I must confess at this repair has been on the bench for a long while..!

I think the A701 is my favourite Kenwood Chef product as it’s very elegant, beautifully proportioned and almost over-engineered.  It comes from a time where built-in obsolescence was a swear word.

White removed
FixItWorkshop, Oct’17, Kenwood Chef, A701a.

On with the problem.  After disconnecting the gearbox by removing the drive belt, I checked the motor for general wear and tear, the brushes and speed control mechanism and I concluded that it all seemed OK and working smoothly.  The gearbox however did seem a bit noisy when turned manually, nothing hideously graunchy, but a little rough.  To be honest, it would have probably survived, but I wanted to open up the gearbox to make sure that it was as it should be.

Whilst removing the Chef’s casing around the gearbox, I’d noticed traces of grease around the joints and various power take-offs.  All models seem to do this to an extent, but this one seemed to be quite bad.  Closer inspection revealed that some of the grease had escaped out of the seal between the two halves of the gearbox casing.  Opening up the casing revealed that the grease that was left had been pushed to the corners of the space within the gearbox and that the gears were a bit dry, this was probably the root cause of the noise.  The planet wheel that drives the beater was also bone dry.

Luckily, there are plenty of suppliers who can supply rebuild kits for Kenwood Chef gearboxes, including new gears and grease.  The gears in this seemed serviceable, but it seemed very sensible to replace the lubricant with the correct 130g of Kenwood gearbox grease, which is food safe.  I used ‘Kenwood Chef Restore’, an eBay seller and the kit was a reasonable £10.99, including P&P.  The kit included the main gearbox grease, white grease for the planet gear and sealant for the gearbox casing.

IMG_4570
FixItWorkshop, Oct’17, Kenwood Chef A701a, repair kit from Kenwood Chef Restore, eBay.

Before replacing anything, the first job was to clean out all traces of the original grease which had gone very sticky and was contaminated with general wear.   The first pass clean involved using paper toweling, followed by water and detergent, before a final clean with brake cleaner, which removed the last few traces of grease and dirt.

With the gearbox refilled and resealed making sure the spacers were re-fitted to the correct parts, the drive belt re-fitted with just enough slack, the gears sounded much sweeter with the final parts of the casing reassembled.  One last point to note is that I used silicone sealant on the blender attachment power take-off plate in replacement to the one fitted, since the original seal was well past it (see below).

As a finishing touch, I replaced the existing machine feet which had turned to mush with replacements from Sussex Spares (eBay shop) for a very reasonable £2.70, delivered.

The Chef was now ready to prepare cake mixtures again.

Cost of new machine: £300 and up.  Cost of replacement parts: £13.69 (plus my time).


Kenwood Chef A901 -a fishy story!

If your Kenwood Chef A901 starts to smell of burning, don’t despair, it can usually be saved.

I had an enquiry via this site from a fisherman who was very upset that his trusty Kenwood Chef A901 had given up the ghost.  Rather than using the Chef to make Victoria sponges, it had been used to prepare fishing bait.  It just demonstrates how versatile these machines are.

Kenwood Chef A901
FixItWorkshop, Oct’17, Kenwood Chef A901 with motor speed control fault.

Whilst it was in use, the owner witnessed a bang then the smell of burning before the machine came to a halt.  The plug was quickly pulled!

Whilst discussing the fault on the phone, I suspected that the fault was probably due to the failure of the motor speed control circuitry, which is known to fail with age.  I had carried out similar repairs to other machines, including my own (in this blog) so agreed to take a look.

I received the machine quickly and upon inspection, the machine had obviously been cared for and considering its age, was in good condition.  The smell of burned-out components was clear, lifting it out of the box.

Dismantling the machine and removing the motor on the A901 is fairly straightforward, providing you allow time and make notes on where things go.  The components that need to be replaced are very accessible and anyone with moderate soldering skills would be OK with this task.

Luckily, the Chef is very well supported by long-term aftermarket suppliers and I bought an off-the-shelf spares kit at £14.10 delivered, from KAParts (www.kaparts.co.uk) via eBay, featuring upgraded components.  This kit is a little dearer, but component technology has moved on since this machine was first on the market, so fitting anything else is a false economy in my opinion.

With the old components removed and replacements fitted, the motor ran smoothly and fully reassembled, the machine is now ready to mix bait mixtures once again.  Lovely.

Cost of a new machine: Circa £300 and up.  Cost of repair:  £44.10 (kit plus my time).

Here’s a little video I made of the repair.

Enjoy.


Lucky Voice Microphone without the X-Factor

Lucky Voice Microphone repaired.

A colleague of mine came in with a broken microphone, which is part of a Lucky Voice karaoke set and retails for about £60.00 on Amazon.  The microphone had worked pretty well, but recently had lost its ‘X-Factor’ somewhat.

The microphone is fairly standard fare and connects to a standard XLR plug and socket arrangement.  As this part is usually under the most stress as the singer moves about, it seemed sensible to have a look at that first.  Upon connection to my amp, there was a huge amount of crackling which seemed to coincide with cable movements at the microphone end.  Swapping the lead for a known good one I had proved that the microphone was fine, but the lead not so fine.

Only one screw holds the plug together and straightaway, the problem presented itself.

IMG_4519
FixItWorkshop, Oct’17, X-Factor microphone, XLR connector.

The main core had detached from the connector, as the outer cable sheathing has come away from the XLR connector body clamp.  Not ideal.

A quick strip back and solder job and the wires were connected back where they needed to be.  A little dab of hot-melt glue on the cable grip and a re-tighten and the cable was not going to move anyway.

With the plug re-assembled and the screw put back, the microphone tested perfectly on the amp, ready for karaoke once more.

Cost of a new similar lead: £10,  Cost of repair: 15 minutes, dab of glue and solder.  Nice.

Porsche Boxster leaky window seal

A little water leak repair on a Boxster.

Not strictly a FixItWorkshop blog article really, but hey!  It’s a cheap fix.

My beloved 2003 Boxster developed puddles in the umbrella holder on the passenger side (RHD car) when it rained hard.

The window was adjusted correctly and the door aligned properly, but when it rained, water ran down near the door mirror, under the seal, down the door card and in to the umbrella holder area.  Water leaks like this, especially on the passenger side (RHD car) are a real problem on the Boxster, since the cars’ ECU is mounted on the floor on that side and is big £££ to replace/ repair if it fails.

Seemingly, the door seal rubber on the car adjacent to the door mirror area had worn and become slightly porous and was allowing water to get in between the glass and seal.

New door seals are very expensive and to prove the issue, I applied a small trace of tap (faucet) silicone grease to the area to restore the wax-like finish, the seal should have to seal properly.

This has fixed the problem for now.  The door seal is worn and will need replacing in the long-term, but for now, this is a very cheap fix.


Blocked Hoover Steam Cleaner

Hoover Steam Cleaner Repaired!

I’ll put money on the fact that many steam cleaners like this one are thrown away needlessly due to blockages which could be easily cleared using everyday items.

This Hoover S2IN1300C hand held steam cleaner appeared to switch on OK (LED lamp on), the pump ran OK, but even with a full tank of water, no steam came out of the steam nozzle.

Off with the cover and after checking the pipes for leaks and pinches, it appeared that all was well.  The pump did indeed run and the boiler appeared to get very hot.

After a fair bit of dismantling, it appeared that the nozzle was blocked by a build-up of chalk.

IMG_3923
Hoover Hand Held Steam Cleaner, July’17, repaired at the FixItWorkshop, Worthing, England.

Cost of replacement; £30-50, cost of repair – some white vinegar.

Have a look at the video…


Slow Fisher-Price Mechanical Music Box Record Player

Repaired Fisher Price record player

Here’s a blast from the past:  A mechanical toy, that’s really cool.  One that brings fond memories from my childhood… I’m 38 as I write this (I’m 40 as I edit this- time goes so fast).

Strictly speaking, this is not a customer’s toy, but a family heirloom which had been festering in the shed for over 20 years.  Consequently, it now wasn’t in great shape.

After dusting it down, we realised that records were playing intermittently and slowly at best and the problem seemed related to the rather cool winding mechanism within.

After dismantling the unit and giving the mechanicals a light service, the turntable platter turned freely once again.  Our two (now three) year old daughter can now play with the record player as her mum did – very cute.


Enjoy!

Cheap Tesco DVD player

This cheap and quite frankly nasty DVD player came in as a dud unit.  No lights on, nothing.  To be frank, not even I thought it would cost in to repair it, since the owner told me it didn’t cost more than £20 in the first place.

Never mind, off with the cover and a quick poke around with the multi-meter revealed no power coming from the transformer within the unit.  This converts high voltage from the mains to lower, safer voltages for the player.  On this DVD player and many others I’m sure, the internal processes are broken up in to ‘cards’.  On this unit, there’s a power card, a logic card for the motor drive and a video card for the picture.  Closer inspection of the (cheap and horrible) power card revealed several faulty components, which had failed catastrophically.  At first glance, I suspected that the cost of replacing individual components wouldn’t cost in and that sadly, this DVD player might be headed for the bin.

Fear not!  With the power of Amazon, I was able to find a generic suitable DVD power card via China that fitted, with a small amount of wiring for £5, delivered.  Job done.

Here’s a video of the fix.


Flimsy Bosch Athlet 25.2V cordless vacuum cleaner

I quite like the idea of this vacuum cleaner in that it’s lightweight, easy to use, highly portable and easy to maintain. All things that make a great product.

The particular vacuum cleaner came in to the workshop, just outside of its warranty period and had been looked after well.  However, it had developed a nasty intermittent cutting-out problem when in use.  I also noticed that the charger’s flex had also cracked near the wall plug, making it dangerous while charging.

First things first and it was off with the rollers and filters to clean any obstructions that might make a device like this overheat.  Nothing obvious there, but all items cleaned and washed as a precaution to allow the roller to move freely and the vacuum to breathe easily.

Closer inspection of the handle area revealed a weakness in the design which had meant that the quick-release mechanism had caused an electrical connection to degrade, causing the cutting out.

The only remedy was to address the handle’s weak point with a mechanical fix and make good the electrical contact.

I hope Bosch take note and make an improvement in this area on an otherwise nicely engineered item.

I also did a small repair to the damaged flex on the charger.

Cost of a new vacuum cleaner, circa £250.  Cost of screw… less than 50p (without my time of course!)

Here’s a little video of the repair…


Pump, ready for the dump

This asthmatic car tyre pump came in to the workshop with little going for it.  The owner had been very close to throwing it away when he came across my website.

This AirMan pump is designed to be plugged in to a car’s cigarette lighter socket and provide quick and convenient car tyre inflation.  This one was dead.

On first inspection, the fuse was OK, the switch seemed to work and all connections seemed sound, when tested with a multi-meter.

IMG_3604.JPG
FixItWorkshop, Worthing, May’17 AirMan Car Tyre Pump, repaired

Off with the cover…

IMG_3598.JPG
FixItWorkshop, Worthing, May’17 AirMan Car Tyre Pump, repaired- cover removed

When the motor was removed from the cam driving the piston, the bit that drives the pump, it spun freely when power was applied, using a battery in the workshop.

IMG_3588.JPG
FixItWorkshop, Worthing, May’17 AirMan Car Tyre Pump, repaired- gear wheel

Seemingly, the centre spindle was protruding far beyond it’s specified reach, causing the pump connection rod to it it during rotation.  Why?  To be frank, I wasn’t sure. I can only surmise that the vibration and heat had caused the flywheel/ toothed drive to slide outside of specification.

IMG_3596.JPG
FixItWorkshop, Worthing, May’17 AirMan Car Tyre Pump, repaired- washer

There appeared to be room for a small washer to take up the excess space, so I fitted one I had lying around.

IMG_3597.JPG
FixItWorkshop, Worthing, May’17 AirMan Car Tyre Pump, repaired- pump now in line with washer

The washer, once fitted, allowed the flywheel/ toothed drive to sit ‘square’ in-line with the pump.

Once resembled, the pump ran freely and was ready to inflate, once more.

Cost of a new pump, circa £20.  Cost of the washer, circa 5p.