A bit of 70’s fun: Sona J996 Coffee Percolator

An office find, escapes the scrap yard.

Despite the 1970’s kitsch-ness of the electric percolator, they are very good at making coffee and the delightful coffee smell you get when brewing-up is sublime.  Here’s an advert from the time.

Top tips for keeping your coffee percolator in good order:

  • Descale using a kettle descaling solution as needed
  • Keep the coffee strainer clear of debris
  • Make sure the lid always fits between the strainer and the percolator body

A colleague found this percolator while clearing out an abandoned office cupboard.  I suspect that this one might have been bought as a wedding present way back and had ended up in the office when someone had decided play the role of barista at work.

It was missing its power lead and was headed for the recycle bin, when I intervened.

The power lead needed was an obsolete design used on British appliances of the era and was similar in design to the more modern and current, IEC C13 or ‘kettle lead’.  However, modern kettle leads did not fit this percolator.

More drastic action was needed.  Luckily, I had an old appliance I no longer needed, so I scavenged a board mounted IEC C13 socket from it and replaced the one originally fitted.

After some soldering and a bit of jiggery-pokery, this Sona Percolator now brews coffee using an up-to-date power lead.

This slideshow requires JavaScript.

Cost of replacement:  £40.  Cost of upgrade: £0.

Dyson DC40 missing a beat

A small repair on a Dyson DC40 leads to a big improvement.

A powerful, easy to manoeuvre vacuum cleaner, that gets into every nook and cranny.  But not this one.

IMG_8891
FixItWorkshop, Worthing, May’19, Dyson DC40.

Three top tips for keeping your Dyson DC40 in rude health:

  • Keep all filters clean (wash or replace frequently)
  • Clean all rubber seals with a damp cloth to remove dust build-up
  • Occasionally lubricate moving parts of jockey wheel mechanism (springs and lever) with silicone spray

Do these things and your Dyson will love you forever.

I’m a bit of a sucker for Dyson products.  They are well engineered products from the school of function over form and in my opinion, objects of art.

This Dyson wasn’t very well when it was admitted to the workshop.  The owner had complained that the vacuum cleaner wasn’t picking up dirt and dust properly.  The beaters were not spinning either.

IMG_8890
FixItWorkshop, Worthing, May’19, Dyson DC40 beater head.

The beater ‘head’ is attached to the main body of the vacuum cleaner and is held in place with a sliding clip.  The head can rotate and move to allow maximum control.  The beater roller is driven not via a belt from the main motor, but from its own smaller motor in the head unit.  So, there is an electrical connector between the main body and head unit.  As the beaters were not spinning, it seemed sensible to test the electrical connection.  Upon testing, it was not working.

The mechanism on this vacuum cleaner is quite complicated and relies on levers and joints working in harmony.  Dismantling the wheels, filters, brackets and covers around the motor revealed the problem.  The supply that feeds power to the beater head is routed around the motor and sliding lever mechanism and a broken cable was to blame for the beaters not spinning.

Access was difficult due to the design so rather than completely tearing down the body to replace the supply loom, I reattached the broken wire with some soldering and heat shrink to make a robust repair.

After carefully rerouting the cables and reassembling the body, wheels and beater head, the beaters spun once more.  Result.

This slideshow requires JavaScript.

After a new set of filters were fitted and a light service, the machine was as good as new.

Cost of replacement machine:  £000’s.  Cost of repair parts: £11.69 plus my time and two teas.

Kenwood Chef repair: Real time video

A Chef repair gets it’s own video!

I carry out a few Kenwood Chef repairs a year and usually, they can be brought back to full health with simple tools and repair components.  I’ve not had a faulty Chef brought in to the workshop which hasn’t left ready for service.  Yet.

img_7876
Fixitworkshop, March’19, Kenwood Chef A901 with a repaired motor.

One common theme with all older machines is that the motor speed control circuitry can fail which either manifests itself with symptoms including, but not restricted to; electrical burning smells and smoke, the motor not running smoothly or not running at all.  While the failure of a Kenwood Chef may look spectacular when it happens, the repair is fairly straightforward, if you have some basic skills, tools and some patience.

This particular A901 came in with four faults; poor feet condition, cracked cowling, the speed control knob was loose and once I opened up the motor unit to look further, burned-out capacitors.

To some, this list of faults might seem a bit daunting, but it’s standard fare on a Chef of this age and to be expected after thirty plus years service.  Due to the excellent design of the product, the faults are all repairable with commonly available parts.

After about an hours’ work, the feet were replaced, the motor circuitry repaired and the replacement cowling refitted.  The speed control knob had come away from the motor body and only required the pin that held it in place ‘pressing’ back in to the housing, resulting in one happy mixer.

One of my aims on this website is to share my experience and best practice so for the first time, I made a video of the complete motor repair in real-time.  So, if you have a Chef to repair and twenty minutes, grab yourself some popcorn, a notepad and pen and enjoy.

Cost of replacement:  £150.00 and up.  Cost of repair: £30 plus my time and tea.

Leave the light on…

A Philips outdoor wall lamp with a major case of built-in obsolescence, gets a cheap fix.

A mate of mine mentioned that his outdoor wall light had given-up-the-ghost, despite not being more than three years old.  He’d put them up around his house as part of an extension and exterior restoration project.  The trouble was that despite only being a few years old, the product now seemed to be discontinued.  This meant that, should the lamp need to be replaced, he would need to replace all of them (three in this case) to keep them matching.  Annoying quite frankly.

IMG_20181112_194358.jpg
FixItWorkshop, March’19, Philips outdoor wall light, working.

He’d read that the bulb within the Philips lamp was not replaceable, in which case a faulty lamp would render the whole thing broken, which seemed very daft to me.  Items made in such a way that prevents even the most basic of repair get me very annoyed.  Sometimes an item is developed in such a way for safety reasons but I suspect that most of the time, the motive is just pure greed.  It’s such a shame.

At my mate’s house, over a cup of tea, I removed the lamp from the wall to take back to the workshop, to see what Philips had been getting up to.

Opening up the casing was straightforward, just a few simple screws and retaining nuts holding the casing together, before finally revealing the bulb itself, under a lamp diffuser.

IMG_7609
FixItWorkshop, March’19, Philips outdoor wall light, lamp unit.

The bulb/ lamp unit itself appeared to be a custom/ bespoke disc light, that wasn’t user serviceable.  It had blown and there was evidence of scorching on a few of the LEDs, linked in series, indicating the failure of the entire circuit.

I couldn’t find any replacement disc LEDs suitable for the lamp from any of the usual sources, which I expected.  It could be that Philips can supply a replacement disc, but this was not evident on their website.

Not wanting to be beaten by a bespoke part, I thought about what else might work, within the lamp’s enclosure, to have the same effect.  I had a spare GU9 LED bulb, about the same brightness, sitting on the shelf, left over from another project which was going spare, so I set about fitting it in the space.

The generic GU9 bulb, available from most hardware shops, fitted in the existing disc mounting bracket, with a small modification and once connected to the lamp’s circuitry, worked well, albeit with a slightly warmer glow.

In case anyone else has the same problem, I made a little video of the repair.  I hope it gives others inspiration if faced with a similar problem.

Cost of replacement (with something similar): £50.00.  Cost of repair:  £1.50 for the bulb and a couple of Belgian beers for my time.


Karcher WV50 avoids the bin, just

An alternative, cheaper, motor fix.

My dad donated a rather sick Karcher WV50 window vacuum, water sucky-uppy-thing which he’d taken half way to the bin before thinking, I know, I’ll give it to Matt.

How thoughtful.

IMG_5930
FixItWorkshop, March’19, Karcher WV50 Window Vac, in bits.

The vacuum sucky-uppy-thing worked of sorts, but when operated, made a noise not to dissimilar to a distressed cat riding a trolley with wobbly wheels, if you get what I mean.  I wish I’d recorded it.

Anyway, opening up the WV50 was pretty straightforward.  Just several crossed-head screws held the two plastic halves of the unit together, revealing a simple electronic board, battery, switch, motor and fan with exhaust.

The principle of the WV50 is the same as any other domestic vacuum cleaner.  A fan drives air in one direction through a smaller hole (exhaust) creating a vacuum, in this case at a small wiper blade for glass cleaning.  Water is then drawn towards the fan, with the vacuum created and then diverted to a holding tank, for emptying later.

The tank on this product is quite crude and I suspect that should it be knocked over, the water within the tank could spill over in to the exhaust and in to the motor.  This is what I suspected had happened and caused the motor bearing on this device to wear excessively, causing the noise.

The cost of a motor and fan replacement on the WV50 was about £30.00 (where I saw them listed) but this would make the repair un-economical.  After an email conversation with Mabuchi, the makers of the motor, the original equipment K-280SA-3525, unique to the WV50, was no longer being made.

I don’t like being ‘beaten’, but having spent far too much time with batteries, bulbs and motors as a child than is entirely healthy, I realised that the casing and bearing on the K-280SA-3525 was pretty standard fare and if the spindle on our motor was OK, then all that would be required would be a new bearing.  It turned out that the spindle and motor brushes were OK, so I ordered a same size motor from eBay, via a very efficient and friendly Chinese electronics specialist with the intention of swapping the motor body and bearing over.

The motor arrived quickly and the transplant only took a few minutes.  Once reassembled, the motor and fan sounded like new once again.  A nice cheap fix, to keep this vacuum cleaning windows for another day.

I even made a short video, showing what I did.  Enjoy.

Cost of replacement: £50.00 (equivalent model)  Cost of repair: £1.50, some international emails and a couple of cuppas.  Nice.


The heat is on…

Dimplex DX300T heater gets repaired in the workshop.

I acquired this Dimplex heater as the previous owner had reported that it had tripped their electrics and smelled of burning, it was perfect material for the workshop.  The owner had given up on it and I felt like I could give it a second chance.  This is the usual way we end up with much of the stuff in our home.
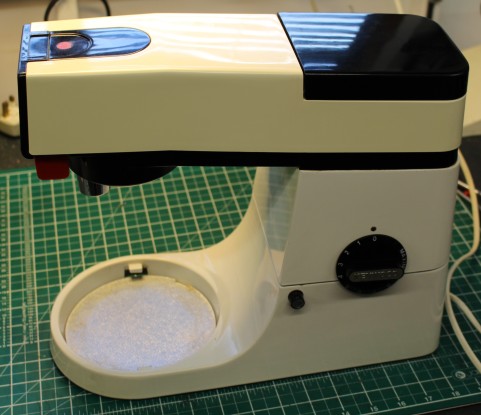
Now, this heater is only a few years old and on the face of it, it looked in reasonable condition, with just a couple of scratches, so it would be a shame if I couldn’t get it working.

With electrical faults like this, I always check the basics; the condition of the flex and mains plug etc.  I then measure for resistance to earth from either live or neutral to see if there has been any electrical shorts, that would have triggered the reported fuse incident.  All clear.

Through the top heat vent, I had a quick look at the inside of the heater to see if any stray paperclips or other metallic item had found its way to the heating element or wiring creating an electrical problem, again, all clear.

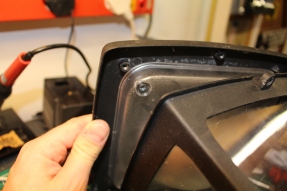
Upon checking the mains plug again, something didn’t seem quite right.  It felt a little ‘warped’.  I’d already checked the fuse for continuity via the live and neutral (there was resistance), but it was time to take it out to have a proper look.  The plug on this heater was a ‘moulded-on’ type, with no screws and the fuse carrier was accessible from the outside, should it need replacing.  Upon levering the fuse holder out, the plastic carrier sheared off, revealing burned plastic and signs of melting.  The plug was toast.

I decided to break the plug cover off and see what was going on.  The plug had ‘run hot’ for some time causing the casing to melt and smoulder and the excess heat had probably caused excess resistance, exacerbating the problem, making the previous owners’ electrics to go pop.

This slideshow requires JavaScript.

With the cover ‘broken off’ the plug, I was then able to cut back the internal connections and remove the cable from the mouldings, without sacrificing the cable length, which was a good job as the flex was quite short anyway.

I always keep a few replacement ‘quality’ mains plugs in the workshop for occasions like this, as not all moulded plugs are terribly well made and the melted one I had here was a good example of what can happen when the quality of the plug can’t match the potential current flow required.  The heater is rated at 3K Watts (max), which would mean a current of 12.5 Amps, which is close to the 13 Amps fuse fitted.  Poor quality materials and connectors would generate excess resistance and therefore heat.  The resistance was probably detected by the sophisticated minature circuit breaker in the previous owners’ electrics board, which was a good job as who knows what could have happend if the plug had been next to something flamable.

With a new plug fitted, the old fuse re-fitted, the heater sprung to life and didn’t seem to draw excess current when checked.  A nice cheap fix and I didn’t even have to take the heater apart.

Cost of a replacement heater:  £50 (circa)  Cost of repair:  One cup of tea.

Dyson DC14 with no vacuum

Another Dyson repair…

As covered a few times on my blog already, I do like Dyson products.  They’re engineer and tinker-friendly.

IMG_8360
Fixitworkshop, March’19, Dyson DC14 (PS, I did clean the old paint off later).

A colleague got in touch with a poorly DC14 which had worked well.  She’d kept the filters clean and generally looked after the appliance with care, which makes a nice change. However, despite all this, nothing was being collected with the floor beaters.  The hose worked OK, but that was it.

Time to do some screwdriver wealding.  Despite the filters being in good condition, I washed and dried them anyway, just in case.

Up ending the vacuum cleaner revealed the problem straight away.  The bottom foot hose had become disconnected from the interference fit compression joint and was flapping in the breeze.  Usually when this happens, it’s because the hose has split, but this one was in good condition.  What seemed to have happened was that the hose had become untwisted from the joint, so all that was required was careful reassembly.

While the cleaner was in pieces, I gave it a thorough service, paying attention to all of the machine’s seals and moving parts, especially where the cylinder joins the vacuum pipes from the motor as these can leak with age.

Once spruced-up, the cleaner was back to full health once again.  Another Dyson saved from the tip.

This slideshow requires JavaScript.

Cost of replacement:  £150 and up.  Cost of repair: Time, tea and biscuits and silicone spray, a bit of washing-up liquid.

Morphy Richards smoky heater

A heater with a broken motor gets a clean up…

I like the classic, function-over-form design of this heater.  Simple, clear, chunky controls and nothing included that isn’t needed.  Less is usually more.

This 1980s heater, although very well made and clearly designed with longevity and repair in mind was a little bit, er smoky.

IMG_8365
Fixitworkshop, February’19, Morphy Richards fan heater.

It appeared that the fan wasn’t running and the smoke was coming from old dust which had settled inside the machine.  I don’t think that the heater had been used in many years.

The heater came apart very easily, just three self-tapping screws holding the sides together to the main shell.

On first examination that the shell was out of shape and that it had come in to contact with the fan itself, forcing it to far down the motor shaft on to the motor body.  So, all that would be needed would be reposition the fan and re-shape the outer heater shell, a simple fix then.  Not quite.

The motor did not spin easily and even with a little penetrating oil on it, it was turning slowly, with the mains applied.

The motor was an induction type, with no brushes and didn’t obviously have anything restricting the motor’s spin.  I know that even apparently clean motor parts can have deposits of unseen oil and muck that can stop an otherwise good motor from working properly.  In situations like this, I tend to use brake cleaner or similar to break down the dirt.  Once cleaned, just a couple of drops of sewing machine oil on the moving parts and that usually cures things.  I was in luck and after performing a mild service on the motor, it was spinning at full speed once again.  Quite literally warming.

This slideshow requires JavaScript.

With the parts all back together, the heater was ready to run for many years to come.

Cost of replacement:  £15.00    Cost of repair:  £0.00, one cup of tea and a Bourbon.

Tommee Tippee (not so) Perfect Prep

A formula machine is repaired in the workshop.

This fix was actually carried out during the summer, 2018.

A friend of mine brought over a broken formula making machine for me to look at.  It had been stored after their first child had out-grown it and since having another baby, it was now needed again, urgently.  Following a couple of years in storage, it was brought out, plugged in and after briefly coming on, it failed.  No lights, no hope.

These machines save time and effort by allowing water to be heated rapidly and mixed exactly with the formula powder, to produce consistent results every time, perfect for new exhausted parents in the middle of the night. So it was important that I got this working quickly.

IMG_6428
FixItWorkshop, Jan’19, Worthing, Tommee Tippee Perfect Prep machine

After removing the back, I was presented with an electronic control unit, some solenoid valves and a heater, plus some other environmental sensors such as thermostats.  The plug fuse was OK, so it was time to check if power was getting to the machine.  It wasn’t.

This machine features a couple of power control devices; two  thermal aluminium ‘can-style’ fuses in-line with the heater, plus a thermostat on the output of the heater itself (to regulate heat).  After testing for continuity, it appeared that one of the can fuses had failed.

These fuses are common across a wide range of appliances, such as coffee machines, fans etc and are cheap, just a few pounds.  It could be that a temporary air-lock in the heater caused a hot-spot and therefore that excess heat caused the 172 degree fuse to pop.  It was worth a try to replace it and see what happened.

I replaced the fuse and re-assembled.  After filling with water and powering it up, normal service was resumed.

Since I replaced the fuse, the machine has been in continuous service for many months, so I can conclude that it was probable that the over heating was temporary.

I created a short video to help others who may have similar problems with their machine.

Cost of a new machine:  £90.  Cost of repair: a few quid and a few beers.


Hotpoint ‘Rumble’ Tumble Dryer VTD01

A noisy tumble dryer gets fixed cheaply

Strange noises from machines play on my mind.  None more so than when that niggling noise starts to get worse.  Noises like that usually mean two things.  Catastrophic failure and expense.

Time to disconnect from the mains and fetch the tool box.

The patient in the surgery this week is our own Hotpoint tumble dryer.  We avoid using it at all costs, but with miserable English weather and two children, getting washing turned around efficiently, ready for use is mandatory.  To be frank, I’d noticed the excess whinning bearing noise coming from the dryer for a few uses, but it was getting to the point where it was hard to ignore.

Electric hot air tumble dryers are pretty simple things.  They work by sucking cool air in, heating it up under thermostatic control and then blowing it in to a rotating drum.  The moist air is then expelled via a filter and then hose, to atmosphere.  Tumble dryer models of this kind will have the following:  A motor, heater, thermostat circuitry, timer and a drum.  There isn’t much to go wrong and many parts for UK tumble dryers are available, cheaply from places like eSpares.co.uk.  Usually, no special tools are required if you want to have a go at fixing your machine and I recommend you do of course.

IMG_7419
FixItWorkshop, Worthing, December’18, Hotpoint VTD01 Tumble Dryer.

After opening up the cabinet, access to the drum and motor was available by the side panel which was held in position with several self-tapping screws and hooks.  Care must be taken if you attempt something similar on your machine since there are plenty of sharp edges to watch out for.  This dryer features an AC induction motor (which has no motor brushes).  It has a spindle which runs through the motor with a pully one side to drive the drum via the belt and a fan the other to blow the hot air.  Removing the belt and spinning the motor by hand revealed the problem.  The spindle spun OK, but sounded rough.

Replacement motors are available at a reasonable £90 or so, but you know me by now, I don’t like spending that kind of money, unless I have to.

The motor is attached to the appliance with simple bolts and is removed easily.  The motor is held together with self-tapping screws, which are easily accessible.  Just two bearings feature in this motor; one at each end to support the load.  Both bearings sounded rough, but seemed not to be worn too much.  The bearings are standard items and it would be easy to find exact replacements from a bearing supplier (rather than replacing the whole motor), for under £20.  However, as this was my own machine, I went for cheaper fix, to squeeze more life out of what I already had.  With the dust cover popped off from both bearings, I cleaned both with isopropyl alcohol cleaner and then re-greased with quality high-melt point bearing grease.  Much better.

This slideshow requires JavaScript.

The motor re-assembled, re-installed back in the machine and it was time to switch on.  It now sounded as sweat as a nut.

If and when the bearings get noisy again (and they will eventually), I’ll replace the bearings with new ones.

Cost of replacement:  circa £200.  Cost of repair:  My time, two cups of tea, one custard cream, a bit of grease.  Not in that order.