Inside The Real Repair Shop 14

Find out what skips, parking wars and fondue all have in common.

It’s that time of year again, and I know what you’re thinking; Matt’s going to have a Christmas-themed moan about buying new things you don’t need, broken items too good to throw away and if you’ve been paying attention to my monologues these past few months, rubbish items that shouldn’t have been made in the first place. I’m just so predictable! Well, it is the season to be jolly, so in addition to all that, I’m going to spread a bit of much-needed festive cheer which could make you just about the best present giver… ever!

Campaigns telling us to ‘stock up in time for the big day’ and ‘show you care by buying something glittery and expensive for a loved one’ seem to start in summer, and while it’s lovely to give someone close a meaningful gift, don’t be sucked-in by the fluffy, snowy adverts. All the big retailers, even M&S, are really only interested in the bottom line, not you. And anyway, a lot of things we buy will be headed for landfill soon after the big day so, instead of following the crowd this year, follow my top 5 tips for a more eco-friendly, cheaper and cheerier Christmas.

Top Tip One

I’m no stranger to skip-surfing and neither should you be.  West Worthing isn’t dripping in money, yet I regularly see good quality toys, bikes, lamps, (I could go on), left in skips, in front of driveways and by the sides of bins. If it’s left out, obviously for rubbish collection, then surely, it’s fair gain?  One should be careful though as sane people don’t always chuck out items in mint condition, so choose your gold carefully and if you’re in any doubt about just taking something, please do seek permission first.  No letters of complaint, please.

Top Tip Two

Our little street in is full of (mainly) lovely people and there is the almost obligatory WhatsApp group keeping a weather eye on things. We’re quite a tame old bunch really and generally, the chatter is about offers of and requests for help, shared produce and old things no longer needed.  I’ve lost count of the items we’ve given away or have accepted through a mutual swap-shop on this forum.  Yes, like almost all of modern Britain, parking wars occasionally break out on the chat, but it soon reverts to more helpful conversation! The point here is that that book, painting or scarf no longer needed, may just make an ideal gift.  So, stay tuned in to the items right under your nose but remember, the system only works best, when you pay back in.  De-clutter after you’ve received your pressies this year and get posting on your local group.

Top Tip Three

Talking of clutter, with the weather on the turn and the days getting shorter at this time of year, it’s a great time to re-discover what you already have.  Many reading this, including me, will have forgotten about some of the things at the backs of cupboards, in attics and under the stairs – delete as appropriate. So, dig out those classic games, clothes, books and pictures gathering dust and spiders’ webs, and either use them again, sell them, or give them to someone who will enjoy them.  I’m actually really guilty of this and tend to hang on to things, just in case. But, in reality, I’m only causing more of a headache for the others around me, if I’m snuffed out by the No.9 bus in an untimely manner. If you don’t use it, move it on.

Top Tip Four

Make it yourself. Everyone loves a home-made gift that’s, well, good. I don’t have the confidence to make baked gifts to give as presents, but I do know someone at work who makes the finest biscuits I’ve ever tasted. I’m sure you do too, so instead of buying the usual Christmas assortment, why not reuse an old Quality Street tin, fill it with home-baked goodies and give it as a gift.  And if you’re a rubbish baker, contract the task out and bung someone you know a few quid to make some for you. You’ll be glad you did.

Top Tip Five

Home-knitted, crocheted and stitched items of clothing and decoration make personal gifts to be enjoyed for years.  Old-fashioned maybe, but important, certainly.  Making things yourself this way improves skills, promotes re-use and discourages waste, and the experience gained can be passed down through the generations.  I’ve always loved sewing machines (all those knobs, dials and lights) and I learned how to drive one from my mum, who learned from my nan. Indeed, my 8-year-old daughter is currently learning how to use a sewing machine, and is already churning-out all manor of creations on an almost industrial level. I can’t wait to see what she’s made us all for the big day.

The news is all doom and gloom, the economy’s going for a burton and the climate is on the blink, and we’re told to ‘just stop oil’ and think about our warming world.  In reality, unless we all want to live like we did when Henry VIII was on the throne, it’s going to be quite hard to balance all of the above without having some kind of negative impact.  I’m not going to give up central heating, my car or roast turkey just yet, but what I am doing is taking control of the things I can do by making the most of the items that have already been made.

Going around in circles!

We hear about a circular economy which combines production, consumption, recycling and repair and in an ideal world, it sounds great.  But, to make that all that work relies on perfect production processes, a high-level of education in the population and political consensus with a 50-year plan.  Back in reality, if you really want to do your bit keep it simple, buy less rubbish, re-use and re-gift where you can.

On a funnier note, I wanted to share with you that I have a mental bucket list of things I’d like to own.  A sort of ‘fantasy design-classic’ wish list that I am either too stingy to part with actual money for or I am waiting for a broken one to appear out of thin air, for me to breathe life into. 

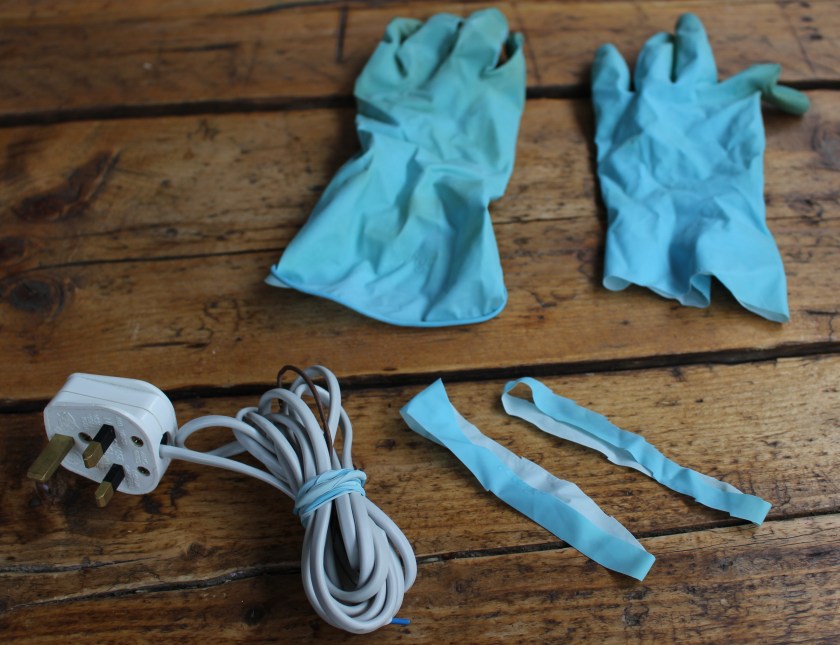
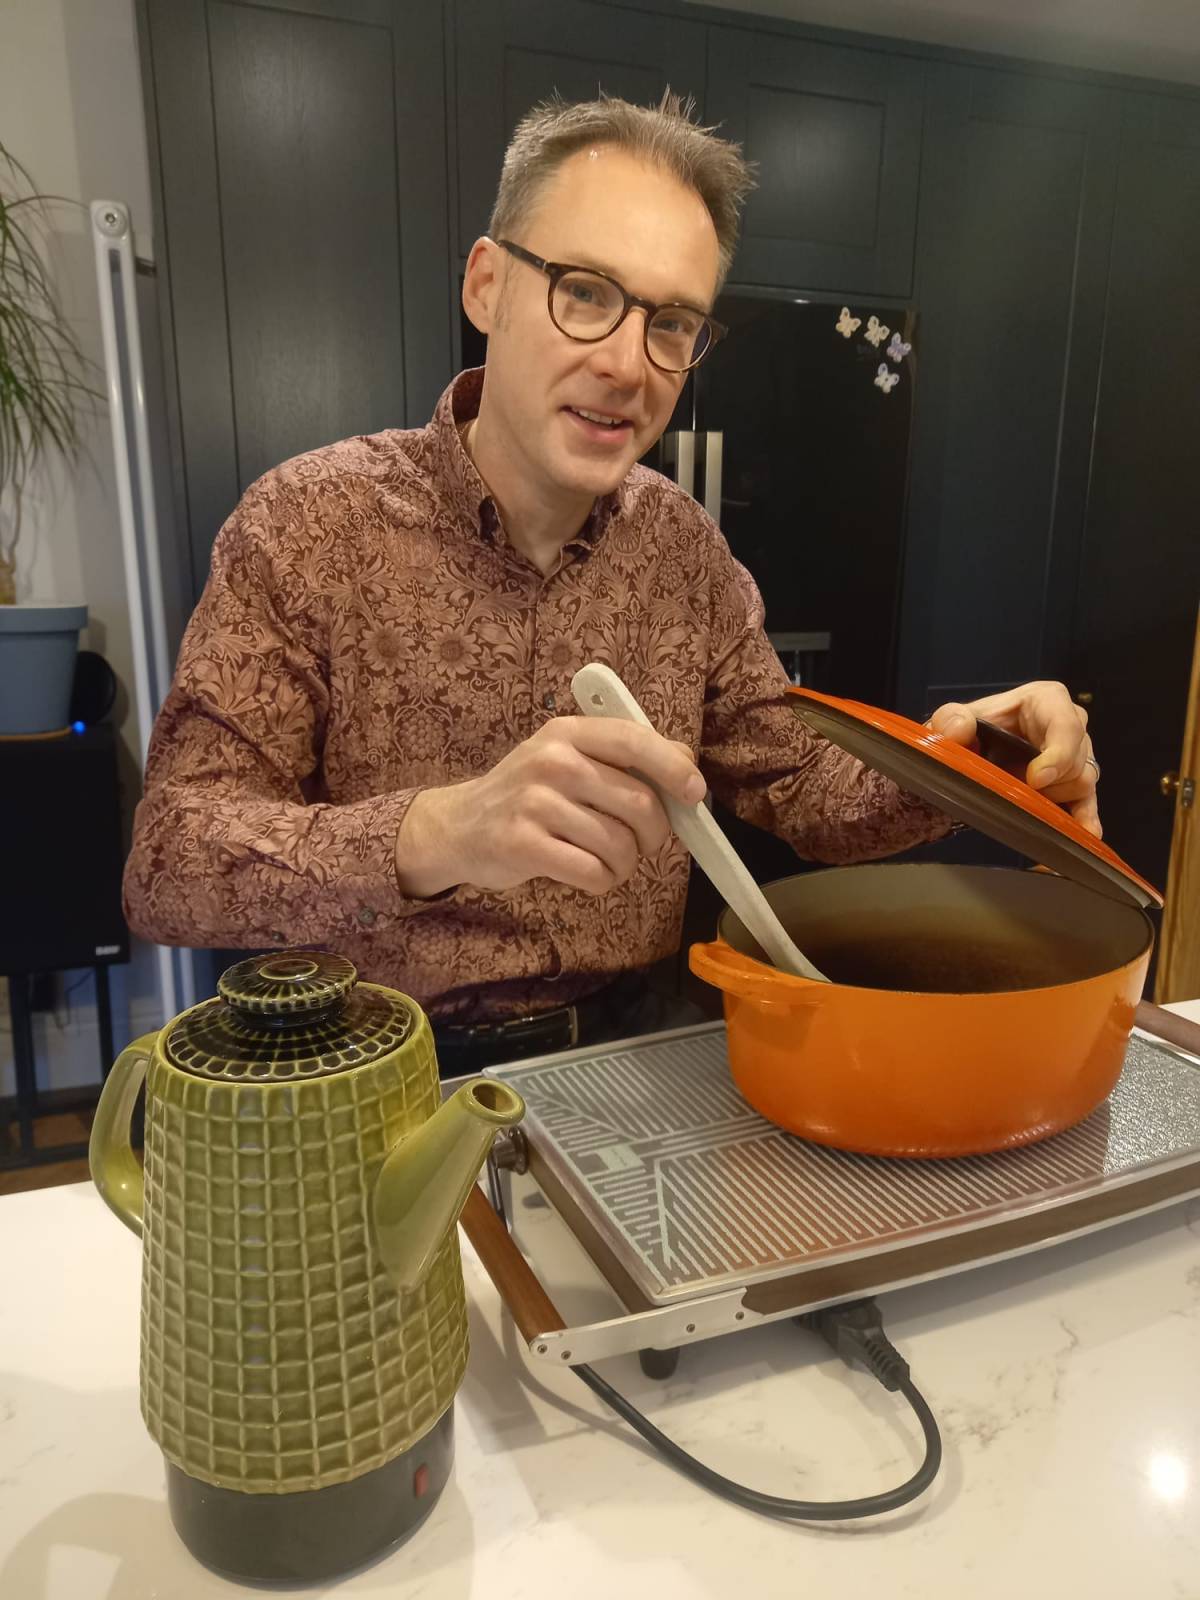
There’s probably a named syndrome for what I have, but recently I ticked-off one such item. Christmas and birthday all at once. Let me explain. There I was, waking past a skip, when I saw a little bit of brushed aluminium poking out between a load of wires. It’s funny how these things catch my eye. And there it was, a 1970s table-top Salton Hot Plate, with a metal frame, wooden handles and a glass top.  Safety first, you know back then.  It was like seeing a diamond in a coal mine.  I can only assume that the previous owner didn’t know what it was or didn’t care. Anyway, I did the right thing and brought it home to the workshop.  Turns out, that there wasn’t anything really wrong with it and all it needed was a clean-up and a new flex. It could have been crushed, but instead, this quality English-made kitchen appliance will live to see another day.  The trouble is, that it only works for fondue and quiche Lorraine!

PS, don’t forget to check out Retro Electro Workshop on UKTV Play.

Inside The Real Repair Shop 10: Storm in a Teacup

With the cost of energy soaring, people are suggesting ways to save money. This time in the Workshop, Matt compares three ways to boil-up to make a brew, a subject close to his heart!

In readiness for a winter of discontent, I’ve already removed the thermostat’s wiring and have prepared thick jumpers for the whole family, made with the added warmth that only loft insulation can bring.  I impressed myself with this stroke of genius and wonder why no-one else has ever tried this before? Can’t imagine why.

There’s a lot of talk about ways to save money on social media at the moment. One only has to do a bit of Googling to learn what we should stop doing or unplug next to save money.  There’s an old saying though that usually stands true: Don’t sweat the small stuff. 

Anyway, where was I? Back in the summer, I had an-over-the-wall conversation with my neighbour, Liz. It started off in the usual light-hearted manner, talking about this and that, when I heard a whistle coming from Liz’s kitchen, a noise which took me back to sometime in the dim and distant past.

Liz had switched to boiling water using a gas stove kettle and reliably informed me that it was ‘cheaper and greener’ to brew-up this way, rather than use her trusty modern kettle.  I very nearly lost my balance, leaning against our diving wall as I laughed and said, “that’s a load of old cobblers” – did I use cobblers, well something like that anyway.  With a slight frown of veiled raged from Liz, we both went off to carry on our evenings, but there was a piece of me worried that I’d offended dear Liz somehow.  What to do?  I’d almost forgotten about the whole thing until it came up again in conversation recently, but this time via another friend of the family.  Rather than scoff this time, I decided to investigate in a shed-like manner to work out who was right, me or Liz.

What is the most efficient way to boil water at the moment?

I decided to see just how much one cup (see photo) or three cups of water would take to boil using a modern 2500W electric kettle, a gas stove kettle (hob rated at 1500W) and a jug in an E rated 800W microwave.  Just for kicks.  Hasn’t everyone done this?  I used the same cup for the whole experiment.  Water was taken from the cold tap at room temperature.  I used the stopwatch on my phone and used a base rate of 29.48p/Kwh for electricity and 7.32p/kWh for gas. We’re with Eon and these rates seem to be ubiquitous at the moment. I timed how long either one cup or three cups would take to boil using each boiling vessel.  I started the test from the ‘on’ switch on the kettle, the gas ignited on the hob or the ‘on’ button on the microwave.  The test ended when the kettle switch turned off, the stove kettle first whistled and boiling bubbles were observed in the microwave.  By now, I’m sure you’re on the edge of your seats.

Everyone’s an expert these days and while I’ve done my best to make this a real-world test using a moderately scientific approach, I’m sure someone out there will drive a coach and horses through my method, but don’t bother, the results are astounding.

THE RESULTS ARE IN

Time matters

If you’re always in a rush and need your cuppa in a flash, then the only way to go is to use a modern electric disc-element kettle, like the one in the photo.  Using a microwave was second fastest, but not much faster than the very slow (by comparison) gas stove kettle.  One, nil, nil to the electric kettle then.

The real boiling issue – what did it cost?

Gas is cheaper than electricity on my energy tariff, which is a similar story for many other domestic customers at the moment. The microwave proved to be the cheapest method to boil one cup of water followed by gas in this test, but the results changed dramatically when three cups were boiled – a complete reversal in fortunes in fact. Three-way tie.

Environmental impact

What about the CO2 emitted? Perhaps the trickiest measure to nail down, but using Defra* approved conversions, based on the kWh for both fuels, it stands to reason that the electric kettle emitted the least CO2 as it was on for the least amount of time. The electric kettle triumphs overall.

*UK Department for Environment, Food & Rural Affairs

So, in conclusion, a gas stove may be cheaper to make a brew for one (at the moment), but one must be careful to measure the water required carefully and a slight increase in the tariff could see all savings easily eroded. The microwave was the wild card entry (my mate Paul’s suggestion) and it proved that it’s a reliable and cheap way of heating, if compared to the stove – for some forms of cooking. 

The bottom line is that a modern electric kettle will do the job faster, usually cheaper and cleaner than its rivals.  Time for a brew? Go on, treat yourself.

Inside the Real Repair Shop 6

If it looks like it might come in handy, then it probably will…

Rubber bands, toothbrushes and cat food

This time in the workshop, I thought I’d give you a behind the scenes glimpse into just some of my repair world, by sharing some of the shed-tastic-things that I do regularly to save things from the dump.

Before we start and without meaning to sound pompous, repair is sometimes a bit of an art.  When manufacturers no longer make something, or the part you need never existed in the first place, it can sometimes mean getting creative in order to make something function again.  This takes time of course and can even lead nowhere, but it ain’t half-satisfying when it all works out.  Google a problem and there’ll be a link, video or picture explaining an appliances’ issue and maybe a quick-hack repair (if you’re lucky), but it’s often the humble tricks of the trade, which breathe new life back into something. 

Hanging on to ‘useful’ repair nick-nacks also requires almost concerning levels of organisation, which can mean more expense on things like containers and storage. I’m allergic to more cost.  But by using ‘free’ packaging that comes with many everyday consumables, one can save cash by repurposing. Still with me, thought so.

As you might have guessed by now, I dislike waste immensely and will always do my best to avoid it.  So, here is my random, if not weird, top five cash-saving, waste-busting, possibly ingenious ideas even, that might just serve you well too.  And remember, if you don’t use any of the following suggestions for repair, there’s nothing like doing a bit of junk modelling to pass the time on a cold winters’ night.

Five – old toothbrushes

We all (hopefully) use them, but I fear that far too many only hang around in bathrooms. So, stop throwing them in the dustbin, when it’s time for replacement.  Why?  Well, where do I start, quite frankly.  Dirt and corrosion are the curse of many a broken lamp, bike and dust sucker. Toothbrushes make excellent cleaning tools by using the brush in small crevices, on bike chains, on electrical switches, or on vacuum cleaners.  I could go on.  Cut the brush bit off, and you have an excellent scraper, again, ideal for cleaning. Toothbrushes are usually made from high-grade plastics and have excellent properties. Many a time have I fashioned a plastic part from an old toothbrush handle.

It’s not just me finding new life in old toothbrushes. My good friends and fixing supremos, Danny and Karen Ellis (aka @menditaussie) in Oz, have also come up with some very useful re-purposing ideas. See video below. Give them a follow.

FixItWorkshop, Worthing, January 2022 – Featuring MendItAussie’s handiwork, with kind permission.
FixItWorkshop, Worthing, January 2022, Don’t forget your toothbrush.

Four – torn washing-up gloves

Stop sniggering at the back, old rubber gloves (the Marigold type) can be re-purposed for many useful things, where elasticity and waterproofness are two qualities needed.  I favour making rubber bands from them.  Yes, you heard correctly. The next time your favourite flowery rubber gloves spring a leak, why not cut the arm bit down into slices, and you have a healthy supply of rubber bands. I use rubber bands to neatly store appliance flexes, before customer hand-over, it’s just more professional. Neat eh?

FixItWorkshop, Worthing, January 2022, making rubber bands from old rubber gloves.

Three – take away pots and lids

Endless possibilities for these!  The plastic ones make excellent batch cooking meal containers for the freezer as many will know, but what you might not have considered is that plastic lids also make a really good base to cut out small plastic templates, brackets and covers for all sorts of small repair jobs.  Low-tech it may seem, but I’ve lost count of the times that I’ve made pretty decent replacement parts from old pots this way.  I’ve even made lamp shade brackets from shampoo bottles and cosmetic pots, which tend to be a bit thicker and can be used when a superior finish or strength is required.

Two – empty coffee tins

We’re all coffee aficionados these days, and manufacturers have responded to the market’s expertise and perhaps snobbiness with some very funky packaging. I love funky packaging and really enjoy the artwork and logos manufacturers have now put on these colourful tins.  They’re far to good to go in your recycling bin and can easily be rinsed out to make a handy storage container for all of those useful shed-trinkets. Many lids from Kenco and some of the supermarket-own coffee tins also fit regular tins of baked beans, tomatoes and cat food too, so save those lids to preserve a half-consumed tin of moggy grub. Waste packaging like this can even be educational! Coffee tins make excellent old-school string telephones for kids, teaching them how sound can be transmitted.  Cool eh?

One – a drinks can

Hopefully you’re not disappointed by the number one slot. I have been known to walk the streets in search of an old beer can if I have non in stock, for a repair, they’re that good! They’re usually made from aluminum, so won’t rust, are strong, abundant and effectively free. 

Using a pair of scissors or sharp knife, spacers (shims) and washers can easily be fabricated on your kitchen table, but do take care as the metal edges are always sharp. I’ve often used a can in this way to make a scooter steer correctly or a lawn mower switch on again. Material is sometimes lost as moving parts wear.  Sounds familiar right?  Sometimes, a small trimming of can metal, in the right spot on a broken item, is all you need to make the difference between bin or box fresh.

FixItWorkshop, Worthing, January 2022, old tins can come on handy when repairing things like scooters.

Just remember: Cutting things out involved knives, scalpels and scissors and any sharp implement that might come to mind. Once the item you need is cut out, that might be sharp too. So, take care and take your time.

Right to repair or despair‽

Right to repair laws are a good thing on the face of it, but don’t go anywhere near far enough to give the public back control over their appliances.

As you might expect, I’ve been keeping a weather eye on our neighbours in France over the last couple of years and was pleasantly surprised when they announced a Repairability Index scheme, on the 1st of January 2021, the first European country to do so.

The scheme in France will make it easier for consumers to assess the longevity of some products on the market. But I nearly choked on my custard cream, when the UK Government announced a Right to Repair bill for UK consumers, which came into force on the 1st of July 2021.  The news report made it sound as if a magic wand had been waved by the Brits, and that all our gadget maladies had vanished.  Sadly not.

There’s always a backstory to any announcement like this, and the new UK ‘right to repair’ laws, are on the face of it, a good thing. However, don’t for one minute that the new laws passed will help the public directly.

The laws will make it compulsory for manufacturers to provide spare parts and documentation to professionals, whoever they are, for at least ten years. Consumer items such as TVs, fridges and washing machines, will in theory, be given the opportunity to last longer.  But there are problems, and here’s why. The legislation doesn’t specifically cover planned obsolescence, parts prices and consumer accessibility or product durability. These are all issues generally accepted as the main barriers to repair. Let me explain.

During the many years I’ve spent locked away securely in the workshop, I’ve regularly been presented with items which were designed, made and sold with no attempt on the manufacturers’ or retailers’ part to design-in repair. In other words, many items that I see are not meant to be repaired at all, and there’s usually no support network in place, when the product is out there in circulation. Sometimes I can fix these things, sometimes I can’t and many-a-time, I’m working without certainty. Over the years, I’ve built-up knowledge on certain products and have a working knowledge of various spares providers for many items, but this trainspotter knowledge, isn’t easy to acquire. It takes many shed-years and a limited social life.

Items such as complicated coffee machines and toasters do have some spare parts available, sometimes long after they’ve gone out of production, but prices for spares are often so high that repair might not be cost-effective.  I once attempted to repair my own UK made Triton shower as the heater inside had failed.  The shower was 10 years old and parts, were available here in the UK, for delivery next working day.  Price of a replacement boiler £80.  Price of the same brand-new complete shower from Screwfix, £50 with a new warranty.  Now, as much as I’m passionate about repair, I’m not daft.  I had a bath instead.

The new legislation, which is regarded by me and others in repair circles, is a step in the right direction and certainly highlights the current issues around our throwaway society. But it doesn’t scratch the surface of the problem. Not even close.

A true Right to Repair would enforce proportionate parts prices, sensible repair accessibility, free documentation and accessible repair support from manufactures and retailers directly to consumers and independent repairers.  Luckily though, there is good news.  Repair initiatives such as therestartproject.org, repair.eu and the Repair Café movement are actively campaigning, organising petitions and actively lobbying governments for change, and you can get involved. Repair Cafés operate in my own area of Adur and Worthing (Sussex, UK) and are home to dedicated repairers and tinkerers.

And there’s more good news. Over the last 20 years or so, eBay has revolutionised the second hand domestic goods parts market. If you need a cost-effective part for your vacuum cleaner, coffee machine or washing machine, you might just find the part you need online from parts breaker, on eBay. I’ve saved many a vacuum cleaner using a second-hand motor for a tenner and recommend it, if you know what you’re looking for and have the nerve. If the government is serious about right to repair, the circular economy and its goal of reaching net-zero carbon emissions, the process needs to include all stakeholders. Honest and transparent consultation with robust legislation that includes the second hand parts market and the home repairer is the only way to truly gain back control of our appliances.

Matt, July 2021.

KONGMAN lives again!

A classic 1980s Tomy Kongman game pays a visit to the workshop, for some much-needed TLC.

Every now and again, a little gem drops right into my inbox and I think; Christmas has come early. My eyes light-up! It’s nice to get something different to work on, and hopefully repair, especially when it involves motors, batteries, ball bearings and a gorilla.

A customer contacted me after rediscovering Kongman in his attic, not literally you understand, but the 1980s hit toy from Tomy. The toy was in wonderful condition, despite being a little dusty. A new battery had been installed, but upon switching it on, nothing happened. Not even a peep.

FixItWorkshop, Worthing, June’21, Kongman box

I should really kick this thing off by saying what Kongman (the game) is. Kongman is an animated vertical game with the objective of getting a small metal ball bearing from the bottom of the wall to the top. The player must defy gravity and move the ball up-stairs, across a bridge, along several steps to a magnetic swing and then into a lift. The zenith of the game is reached with a quick flick of the ball on to Kongman’s magnet hand, which then gets dropped down a hole, ringing a bell on the way down. Fun really doesn’t get any better. If you’ve ever played Screwball Scramble, you’ll have a pretty good idea of what I am talking about. Did I mention that this infuriating game can be set against the clock too? Bonkers!

Tomy’s Kongman comes from a time just before kids games started to contain many electronic gizmos and wizmos within, parts that when kaput, render a toy useless, forever. Luckily, Kongman uses an electro-mechanical animation movement; elegant and clever. Old, but good.

Kongman is powered by a single D-cell, 1.5V battery and the motion of the toy is actuated with a reassuringly simple little motor, connected to a compact gearbox driving a series of levers and rods, which make up the games’ animation. On a slightly different note; are D-cell batteries an endangered species? I mean, really, ‘what the 1980s torch’ takes D-cell batteries any more?!

Make and model: Tomy Kongman, circa 1981

Fault reported: Not working

Cost of replacement machine: £40.00 if you can find one working

Manufacturer support (in the UK): 0/10

Cost of parts (for this repair): £0.99p

My time spent on the repair: 1 hour

Tools needed: Small knife, pliers, small screwdriver

Sundry items: None

Cleaning materials: Silicone spray, contact cleaner

Repair difficulty: 5/10 (fiddly)

Beverages: 2 teas

Biscuits: 2 custard creams

So, on to the repair.

The toy wouldn’t run and after checking the basics like battery contacts and proving that the local wiring from the battery compartment to the main gubbins was OK, it was time to dive in.

One of the things that makes this already difficult game to complete, is the fact that as a player, you’re up against the clock. This seemed to be the next logical place to check.

The timer seemed to be part of the gearbox which is responsible for driving the rest of the game’s motion. I found this a most practical application of sound and efficient design. You can trace the DNA of this toy back to early pinball machines and jukeboxes, something I also love. Anyway, I seem to be getting romantic, not the workshop way.

The gearbox was easy to remove, just a few screws, and it was out. The timer’s switch contacts were situated within the ‘box and came apart with a gentle prod of a small screwdriver. This allowed me to apply a small amount of additional tension to the switch’s spring and to clean the contacts with cleaner. Reassembling was pretty much the reversal of the disassembly.

With the gearbox back in, it was time to turn some attention to the mechanism, to ensure smooth, reliable performance. With nearly 40 years’ worth of dust to contend with, it was time to clean all of the game’s nooks and crannies with a small brush and treat some of the sliding parts to a little silicone, plastic-friendly, lube.

With the D-Cell battery installed, a deft twist of the timer’s knob, and the game sprang to life.

I’ll be honest with you now. I tried several times to get the ball the whole course to ring the bell, against the clock, but alas, I failed. I did complete the game, but only with the timer set to ‘auto’… which provides as much time as you need, or at least until the battery runs out.

Until the next time…

Inside The Real Repair Shop 3

Save time and money with a multimeter and a quick look at alkaline versus rechargeable batteries.

Batteries are needed for all kinds of toys, remote controls and the latest gadgets. With a smattering of basic awareness, a tool like a multimeter can be used by anyone, saving one time, cash and help to save waste and who wouldn’t want to do that?

For under £10 (GBP), a decent multimeter can be bought online and, armed with a few YouTube videos on your phone, you’ll be able to test batteries to see if they’re still up to scratch, test domestic fuses in plugs when the lights go out and prove that power adaptors are OK before buying new.  And that’s just the start, exciting eh?

FixItWorkshop, Worthing, January’21, a basic multimeter, batteries, bulb and fuse. Many uses!

I’m not going explain every function on a general purpose multimeter, but I do want to dispel one myth: Multimeters are difficult to use. They simply are not. Assuming you can turn a dial and read a number display, then all you have to do is put the test probes on the right part and then voilà, you’ll be ready to measure things.

Take a standard 1.5V AA battery. It has a + (positive) end and a (negative) end. The red probe should touch the positive end and the black lead should touch the negative end, it’s that simple. Assuming that you’ve selected the DC voltage (10’s) range, a good AA (alkaline) battery will show between 1.5V and 1.68V when new. Anything less and the battery is starting to fade and may need to be replaced.

It’s worth noting at this point that some things are capable of running on less battery juice, for longer. Take a quartz clock with one AA battery. Chances are that it will run for years on a battery, even though over time, the voltage will fall below 1.5V. If you put that same aged battery from the clock into a toy car for example, the chances are that the toy wouldn’t work properly or even at all. To some things, battery voltage is critical, others not so much.

What about normal alkaline batteries versus rechargeable ones, I hear you say faintly, are they worth it?  As with all things, it depends.  Not all battery specifications are the same, so check details carefully when making a purchase.  It’s easier than you think.  Based on detailed shed-based experiments, I generally use rechargeable types in items that tend to use-up batteries quickly, such as radio control car toys and so on.  For something like a clock or a TV remote control handset, where batteries tend to last longer, I recommend conventional types as these items are sometimes more sensitive to voltage differences.  The aim overall is to buy fewer batteries and by using rechargeable ones, which are generally more expensive to get started with, in things that ‘eat batteries faster’, they begin to make economic sense.

Image left: Rechargeable batteries and conventional ones can look similar.  Image right:  Check battery specifications carefully, before deciding that something doesn’t work correctly.

Here’s something you’ll be familiar with.  You go to use something that takes batteries that you haven’t used for ages, only to find that it won’t work.  Upon opening up the little battery door, you’re then greeted with an unpleasant mass of rusty, acidic battery leftovers which have been festering since last Christmas.  In situations like this, many will simply throw away, but often, all that’s required is light restoration with contact cleaner, maybe some wire wool and something like kitchen roll.  More serious battery contact damage can often be solved with new battery contacts, which are available on eBay for small change.  Remember, remove batteries when something’s not in use.

FixItWorkshop, Worthing, January’21, battery leakage has caused corrosion damage to the battery connections (repairable).

If you don’t already own one, make sure you add a digital multimeter to your birthday list this year. Now go and recharge your own batteries with a nice cup of tea.

Inside The Real Repair Shop 1

They do make them like they used to. You just have to know where to look.

Think back 30 years, and if you can’t, ask anyone over the age of 42. In the place you grew up, how old was the kettle? It might seem a strange question, but as a (slightly odd) child, I noticed stuff like that. I can fondly remember my parents’ own Russell Hobbs K2 kettle, which had been given to them as a wedding gift and was still going strong after they divorced, 25 years later. Unlike their marriage, the kettle was well engineered, robust and easy to mend.

Russell Hobbs advert for the seminal K2 kettle, familiar to many. Image taken from Google Images, FixItWorkshop is not the copyright owner.

Not long ago, long service was expected from appliances and my friends and relatives had similar experiences. Trust me, I’ve asked them. Buying spare parts was also a thing. You could easily repair kettles of that vintage with basic tools and without the need of a yet-to-be-invented online video. Hardware shops would stock cost-effective spare parts like elements and rubber seals to keep your kettle running for longer, but over time, this type of thing has become the reserve of nerds like myself.

During the last 40 years, the market for small appliances such as vacuum cleaners, toasters, kettles and much more has become congested with laughably cheap goods, and while the prices can make items accessible, it’s usually a case of ‘buy cheap, buy twice’. 

Manufacturers have perfected built-in obsolescence to such a degree that they can time your product to fail, just after the warranty expires. Bad for many reasons, but the main thing is that a £15 toaster thrown out after two years will probably end up as landfill. There are free, environmentally kinder disposal routes available from your local council in the UK, but many people just don’t bother.  Sad, but true.

It’s still possible to buy something well-designed and robust that will be supported by a responsible manufacturer, you just need to know what to look for.

Do you really need it?

Just because your friend has a kettle with an interactive disco display controlled by their iPhone, do you need one?  Probably not.  No one does. Google ‘the best kettle’ and you’ll find products that have more knobs and whistles than a power station.  This makes them more complicated and likely to go wrong in the future and contain more precious metals, increasing their environmental impact.  Remember what you need the product to do. Keep it simple.

How long will it last, will it be any good?

This is a tricky one to quantify as lots of things affect that.  But ask yourself, is a kettle costing a tenner going to be a family heirloom to hand-down?  Probably not.  It will boil water, it will make a lot of noise, it will be inefficient.  Take  customer reviews on Amazon with a pinch of salt. Trust organisations such as ‘Which’ to guide you on matters of performance and longevity before handing over your hard-earned wedge.

Can I get help when I need it?

Many retailers and manufacturers are not set up to take care of your product once it’s in your hands.  At the end of your twelve-month warranty, is there a local agent or are there spares available to fix your product, when you need it?  Before making a purchase, do some online research on your chosen toaster manufacturer.  Do they have a help desk, can they supply reasonably priced parts, are there engineers out there who can help repair your item? Responsible manufacturers are out there…

Russell Hobbs K65, Henry HVR160 vacuum cleaner, Kenwood Kmix KMX750 Dualit classic toaster. What do they all have in common? All have reasonable support from the manufacturer, after purchase.

Give yourself time to work this stuff out, and you’ll end up replacing your appliance less often.  Better still, you’ll be able to fix it when it goes wrong, saving it from becoming waste. You’ll also be able to pass it on when the time comes, which is a far better thing to do.  If buying new isn’t an option, don’t be afraid to buy quality appliances second-hand from places like eBay, Facebook and Gumtree.  It might not come in a new box with a receipt, but it’ll still be decent, without costing the earth.

Matt or Fixitworkshop is not affiliated with any of the products shown in this article.  The items displayed are for illustration only, but were chosen with care based on Matt’s own repair knowledge and experiences.

Wall-E gets back on track

A simple cable tie comes to the rescue again.

Cast your minds back to 2008, and you might remember Wall-E, a Disney Pixar animated film set in the 29th century, where mass consumerism and environmental disregard have turned Earth into a literal wasteland. I’ll let you Google the rest of the plot yourself, but suffice to say that the film’s protagonist, Wall-E or Waste Allocation Load-Lifter; Earth class, is one of the cutest robots on the big screen. While the film’s environmental messages are extreme, there are clear warnings about the way our species generally looks after its home which were provoking twelve years ago, but are now ever more poignant in 2021.

No one does cinema merchandise quite like Disney, and it’s not without a slight sense of irony that the company produced many Wall-E related products to accompany the film’s release, all around the world. I wonder what proportion of those items are now in landfill? Something to ponder over a cup of tea or two.

Wall-E and I have quite a bit in common as we both have a penchant to collect discarded items. It’s not unheard of for me to collect broken objects from skips and from the side of the road, but that’s a blog entry for another day.

A local Worthing lady got in touch to ask if I would repair her much beloved Wall-E robot. How could I resist? A broken toy robot in need of some TLC, what’s not to like.

Make and model: Mattel Remote Control Wall-E

Fault reported: No drive on one side/ track

Cost of replacement machine: £75.00 (Amazon.co.uk, December 2020)

Manufacturer support: 0/10

Cost of parts (for this repair): 1p

My time spent on the repair: 1 hour

Tools needed: Screw drivers, pliers, cutters

Sundry items: None

Cleaning materials: Silicone spray, damp cloth

Repair difficulty: 5/10 (fiddly)

Beverages: 1 X tea

Biscuits consumed: 1 ginger nut (and maybe a slice of cake)

Just to warm you up, here’s a cool little slideshow

Being frank with you, I had my doubts with this one. Toys like this contain lots of small, fragile parts with little in the way of easy service access. My chances of success were 50/50, so I was going to need a bit of luck.

Wall-E’s tracks allow for movement forward (straight along) and also degrees of clockwork rotation. Wall-E isn’t supposed to turn left and right, strangely enough.

The problem with this Wall-E was that ‘he’ (I think) would only move around in circles and would not move forwards. Dizzy stuff. This was because one of the tracks wouldn’t move when operated by the remote control. Time to dig out the screwdrivers.

Mattel’s Wall-E comes apart in a fairly modular fashion. Things like the battery cover, main base cover, motor, gearbox and electronics are all neatly housed within the toy’s chassis, and it’s all held together with simple self-tapping screws. This meant that I at least stood a decent chance of getting the robot apart, without causing more damage. Often with toys like this, parts are clipped or glued together, making disassembly a fairly destructive affair. Dismantling this toy was fairly routine, luckily. Despite this luck, I knew that no spares would be available from the manufacturer, so extra care and tea were still needed.

The reason the track wouldn’t rotate was because whatever it was inside that was meant to drive it, was no longer doing its job. The motor was whirring when the ‘forward’ button was operated, so one could assume that the issue was likely to be mechanical. Things were looking up.

Two gearboxes operated by a single motor, propel the toy along or around in a circle. Depending on the direction of the motor’s spin, one or both gearboxes engage to drive the robot’s tracks. Upon inspection, this ‘motor-gearbox action’ was working well, but the output from one side was not turning, the side with the faulty track. Bingo!

The affected gearbox was simply held together with small self-tapping screws, which meant easy dismantling. At this stage I was wondering what I’d find inside. A shredded gear, pieces of plastic all over the place? Any of those things would have spelled disaster, so I was pleasantly surprised when all I saw was a small crack in the main output cog, which drives the track. Getting a small cog to match the damaged one might have been possible, but would have taken time and a lot of patience. I mean I’m fairly patient, but even I have my limits. As the cog hadn’t totally split in half, I simply put a small cable tie tightly around the cog’s shank. I’m sure you would have done the same.

After a little cog-fettling and a little trim of the cable tie with a sharp knife, I returned the repaired cog to the gearbox, with my fingers crossed.

Reassembling the gearboxes, motor and other gubbins to Wall-E’s interior was pretty much the reverse of what I’d done so far, taking care to lubricate things like track belts and sliding parts with a little silicone to ensure smooth service.

There was some evidence of previous battery leakage damage to a couple of the battery contacts, so a little battery compartment spring-cleaning with contact cleaner and an old toothbrush was required before new power was installed. Never throw away your old brush, they’re just so handy for cleaning in those hard-to-reach nooks and crannies.

I had all fingers and toes crossed before firing up Wall-E with fresh batteries for the first time. There were a lot of small fragile parts in Wall-E, and it wouldn’t have been inconceivable for me to have broken a wire by mistake. Fortunately, Wall-E sprang to life, and for the first time on my watch, went along in a straight line. How long would my cable tie fix last? Well, all I can say is that I gave the toy a thorough testing around the kitchen floor maybe once or twice before handing it back to the owner.

Time for a celebratory cuppa and ginger nut.

FixItWorkshop, Worthing, January’21, Wall-E running well!

A much-needed lift for a… Vax Airlift

A Vax gets airlifted to safety

Back in the 1980s, VAX were famous for making bright orange, usually very robust, carpet washers. The products were premium priced at the time, and the sort of thing that ‘someone else had’. It was the sort of thing you borrowed when someone had spilled wine or worse on the floor in a last ditch attempt before condemning the carpet. I’ve only used one a few times, but I can remember that very distinct carpet shampoo smell.

Fast-forward to now and it seems that the VAX badge is owned by someone else and the name is applied to many vacuum cleaner designs. In my own recent experience, the products are a bit flimsy and parts are not easy to obtain. Indeed, on a recent repair, I tried and failed to get hold of a replacement motor for an 18-month-old machine only to be told by VAX that they don’t supply it, but that’s another story. Such a shame.

Anyway, on with a more positive story I think. The owner of this vacuum cleaner (not carpet washer) got in touch to tell me that they would like me to repair their VAX Airlift. As the name suggests, the machine is lightweight and slim, which makes lifting and manoeuvrability easier. However, lightweight in this case meant limited lifespan.

Make and model: VAX Airlift

Fault reported: Split hose

Cost of replacement machine: £200

Manufacturer support: 0/10

Cost of parts (for this repair): £1.00

My time spent on the repair: 1 hour

Tools needed: Screw drivers, pliers, cutters

Sundry items: None

Cleaning materials: Silicone spray, damp cloth

Repair difficulty: 3/10

Beverages: 1 X tea

Biscuits consumed: None, 1 slice of cheese on toast instead, must have been lunchtime

This model carries all dust sucking tools, brushes and other ‘extendibles’ onboard, for convenience. It’s neat and tidy and considering the amount of stuff onboard, it’s still amazingly light, hence the name. To be frank, I wish that I’d weighed it, but that might be going a bit far…

The problem with this machine was that the flexible hose from the brush head to the main machine had split. This caused air to rush into the hose’s hole when the vacuum was in use, which in turn meant that the vacuum simply wouldn’t suck up. The owner had attempted several previous repairs with electrical tape. These repairs had worked for a while, but after several hoovering sessions, the tape repair had failed and the machine was back to square one.

I took on the job and realised quite quickly that VAX’s sporadic spares listings on various websites neglected our poor friend and only certain consumables like filters were still available. Terrible really as the machine was only a few years old. The part I needed certainly wasn’t anywhere and looked unique to this model. When a situation like this confronts me, I do what any other sensible person does. Put the kettle on.

It’s often situations like this that will condemn a machine to waste, even when the rest of it is in serviceable condition. I can see why some may simply throw in the towel.

It soon dawned on me that I’d saved various bits of hose from old Dyson and Numatic vacuum cleaner repairs and that maybe something I’d salvaged might do the trick. That’s the power of a strong cup of Yorkshire Tea.

This was turning out to be my lucky day as some old grey Dyson vacuum hose that I’d salvaged from a knackered Dyson DC25 (if memory serves) looked like it would do the job.

The first task was to remove the bespoke Airlift connectors from the old hose and peel off the metres of horrible hairy electrical tape. Yuk. I needed the old hose, so that I could measure the correct length to allow a good fit in every position the machine would be used in. The hose end connectors were screwed on and bonded with impact adhesive, which just needed brute force to remove.

The Dyson hose was a gnats-whisker wider, but it still fitted the old hose connectors OK, with a little impact adhesive applied. The new-old hose with old connectors simply fitted back on the machine and I think you’ll agree, the new/old part looks like original equipment.

While I had the machine, I took the liberty to clean the seals, dust container and drive belts to the brush head as these were all clogged up. As filters were readily available, I also replaced these as they were only a few quid.

So, for small beans and using some old salvaged parts I already had, this VAX was ready to see another day. Most satisfactory.

Swan tea urn off the boil

A cheap fix gets this essential tea making machine back in business…

I admit it. I do get some satisfaction when I divert an appliance, on a journey to the bin, to my workshop for repair.  I have been known to collect the odd item from skips or just dumped on the pavement while supposed to be doing something more productive. I think I just feel sorry for things. Weird, but true.

Make and model: Swan Hot Water Tea 20L Urn

Fault reported: Not staying hot

Cost of replacement: £80ish

Manufacturer support:  3/10

Cost of parts: £1.70

Hours spent on repair: 45 minutes

Tools needed: Screwdrivers, test meter etc

Sundry items: Cleaning materials, heat transfer solution

Repair difficulty: 2/10

Cups of tea: X1

Biscuits: Malted Milk X1

This Swan hot water tea urn was one of those items.  Spotted during an office reorganisation in the ‘scrap pile’, it had been put there as it wasn’t working properly and a new one had now been ordered.

IMG_20200621_214203
FixItWorkshop, Worthing, July’20, Swan Hot Water Urn… shiny!


Being fairly light-fingered, I spirited the urn away to the workshop for some tinker time.  Not strictly staff policy, but you know, seek forgiveness after etc.

An urn is really just a big kettle.  This one has an all metal 20 litre tank with bar-style tap to brew up, when needed.  There are no real controls as such; just an on/off switch with neon light and two tell-tail lights to indicate boil and keep warm.  Keep warm is usually on all the time when switched on.

The fault seemed to be that the urn reached boiling temperature when switched on, but then switched off totally, allowing the water to cool again excessively.  Timing the switching intervals of the thermostat, 20 minutes or so, and a 15-200 hysteresis confirmed a fault. There was also no ‘keep warm’ green light on, when in use.  To push the thermostat further, I poured cold water into the urn to see if that sped up switching between hot and cold, it didn’t.

Opening up the urn’s base involved just three screws, allowing access to all components.  Such a nice change to not have layers of covers and things to move out of the way first!

Checking the wiring out for logic revealed that someone had been here before! The wiring was incorrect and the ‘keep hot’ element was not wired up correctly and effectively not in circuit with the power source. A small wiring change corrected this and meant that the ‘keep warm’ element was now working again.

The thermal reset fuse/ button seemed to be working OK- proved with a test meter and the thermostat did seem to switch on and off, albeit with excessive hysteresis.  Time to fit another one! Luckily, these thermostats are very common and I managed to get one from eBay, rated at 1000 (a couple of degrees over the one fitted) for less than £2. Fitting a new thermostat only involved a couple of screws, a light smear of heat transfer solution and reconnecting back into the wiring harness.

This slideshow requires JavaScript.

With all wiring back in place and the cover refitted, it was time to test and brew up.  This time, the urn boiled, switched off and then stayed warm on the secondary ‘keep warm’ circuit.  To prove that the new thermostat was an improvement, I then topped up the urn with cold water and within 5 seconds, the thermostat clicked in and the boiling process started again.

Time for a brew.

(PS, the urn has now returned to its normal place of work)