Hooray for Henry!

A Numatic Henry vacuum cleaner gets the kiss of life…

IMG_1545
FixItWorkshop, Worthing, March’20, Numatic ‘Henry’ vacuum cleaner HVA200a (to be exact).

There are times when only no-nonsense suck will do.  Other vacuum cleaners offer the moon on a stick, but rarely live up to the repeated abuse of everyday life.  Henry on the other hand is tough, no-nonsense and above all, reliable.

Reviewers of this kind of thing, seem to agree.

Make and model: Numatic International ‘Henry’ vacuum cleaner HVA200a

Fault reported: Dead/ not running

Cost of replacement: About £130, give or take

Cost of parts: £17.25

Hours spent on repair: 1

Tools needed: Cleaning tools/ cross-head screwdriver

Sundry items: Silicone spray/ cleaning rags

Repair difficulty: 2/10

Cups of tea: 1

Biscuits: 1 bourbon, I think

I have friends in trades who will only buy and use Henry ‘hoovers’ as they last, always work and are easy to use. And above all, who doesn’t like an appliance with a smiley face?

The example in the picture above had been used by a local Worthing taxi driver everyday for the last 15 years without any problems and was in pretty good nick.  The filter was clean and apart from some wear and tear scratches, still looked like the current model.

One day, Henry failed to switch on and after the owner had checked the fuse in the plug, he decided to get in touch with the workshop.

IMG_1546
FixItWorkshop, Worthing, March’20, Henry’s on switch.

The HVA200a has two speed settings, one at 600 Watts power and one at 1200 Watts power, selectable by a red switch and indicated in a red tell-tail lamp.  When plugged in, nothing was happening.

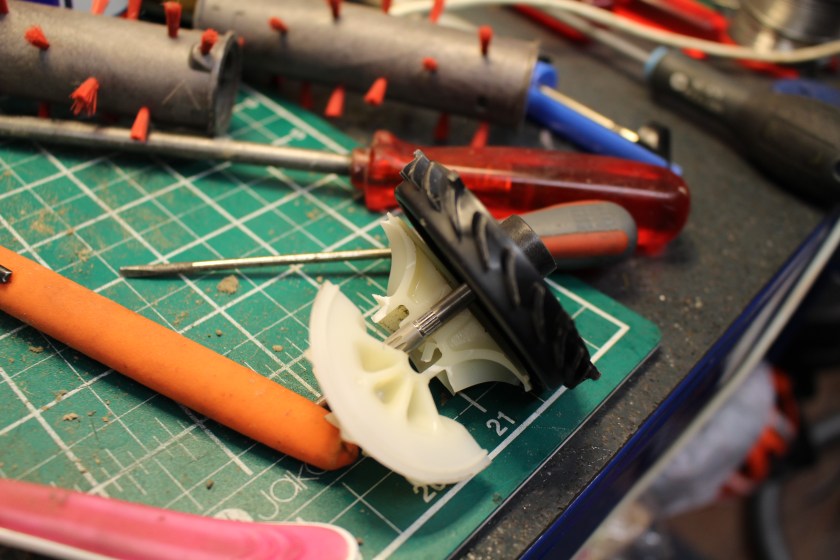
Time to perform surgery.

Opening up Henry’s casing was straightforward and top marks to the designers for creating sensible parts that fit together logically.  Henry is designed to last and be repaired.  All very pleasing.

This slideshow requires JavaScript.

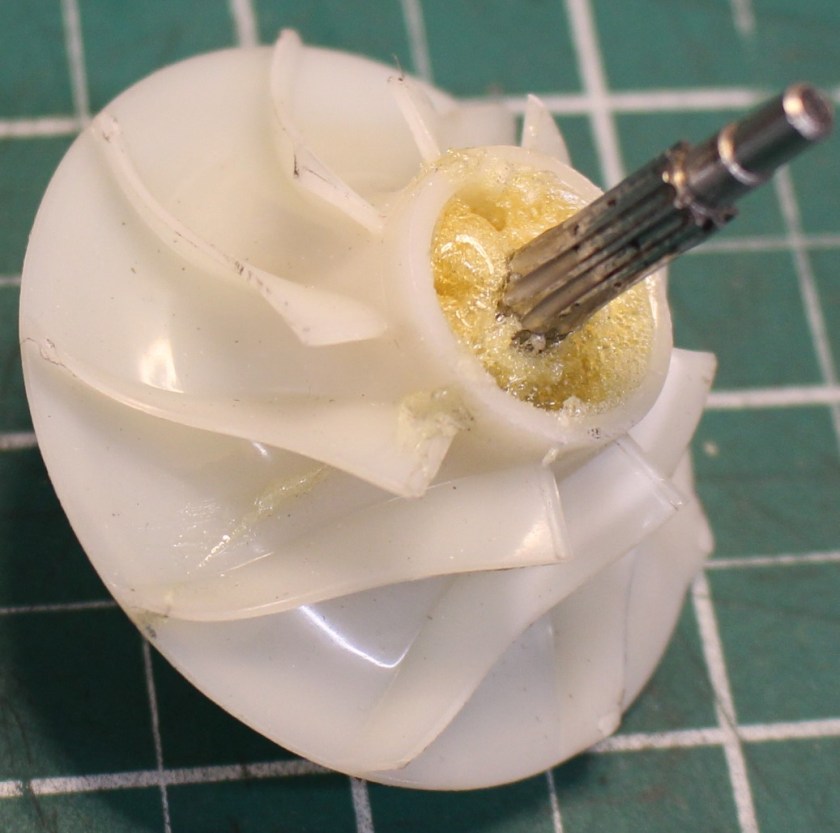
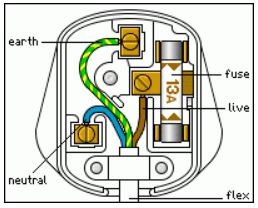
With the lid removed, all electrical checks were made from the plug to the end of the flex, down to the motor.  The flex was in good condition with no snags, shorts or earth faults.  The cable winder on this model is a simple handle operating spindle and was a bit sticky.  The contacts inside the gubbins were also tarnished, so while it was all in pieces, I decided to clean all of the electrical contacts with cleaner and make sure all the sliding parts of the cable winder were clean and had a small dab of silicone spray for smoothness.

Testing for current around the circuit revealed that the speed control board was where things stopped.  The speed control board was dead and required replacing.

To prove this fact, I was able to temporarily by-pass the controller and connect the mains switch to the motor, which revealed that the motor was strong.

A quick bit of shopping with my favourite parts suppliers yielded a replacement (updated) speed control PCB for under £20, which seemed like good value to me.  After making a note of the wiring (see slideshow), the new PCB was connected up, the casing back together and Henry was ready to run, once more.

I also decided to give Henry a little polish too, just because.


Dyson: Please sell me the part I need

A DC32 Animal Vacuum Cleaner gets a second chance

One of these please, Dyson…


IMG_0558
FixItWorkshop, Worthing, December 2019, broken turbine/ fan.

All things made, will eventually break.  Things that are made eventually wear out and either must be replaced or repaired.  However, some things wear out a little faster than others.

Planned obsolescence and manufacturing budgets mean that parts within products can wear out faster than reasonably expected and fail totally, rendering the rest of a perfectly working item, useless.

This is where us repair folk come in.  We refuse to accept this problem and work away tirelessly in sheds and lockups everywhere, working on solutions to problems such as this, keeping things going, a little longer.

A friend’s DC32 Animal cylinder vacuum cleaner’s roller beaters had stopped turning and made nothing but a horrible noise, when the cleaner was in use.  Not cool.

The roller beaters on this model are literally vacuum operated by a turbine/ fan which spins fast when air passes across it, driving the beaters by a toothed belt and gear.  There is no separate motor to drive the roller beaters, which is quite an elegant solution to a complex problem.

Fast forward to the issue and despite identifying the broken part and then contacting Dyson directly for a replacement, they would not sell what I needed, a part that would probably cost no more than £10 to supply.  Such a shame.

Website
FixItWorkshop, Worthing, December 2019, Dyson website screenshot 22/12/19.
Copy head
FixItWorkshop, Worthing, December 2019, a copy item on eBay for under £20, screenshot 22/12/19.

The price of the (original equipment quality) complete Dyson Turbine Head, suitable for the DC32 vacuum cleaner, is £60.00 as a direct replacement from Dyson, but the part is now copied by other manufacturers.  A pattern part design is available for under £20 and if this was my machine, I’d be tempted at that price.  Pattern parts have their place, but I suspect that at this price, performance won’t be quiet as good as the original.

So, a choice:

  • Replace the part with a brand new Dyson part – too expensive
  • Replace with a non-original part, that will probably do the job – unknown outcomes, unsatisfying
  • Attempt a repair on the original part.  Of course it’s what I’m going to do!

On with the repair.  The Turbine Head is screwed together using Torx head screws and the side vents that secure the main drive unit, pop-off the main casing, with some encouragement.

This slideshow requires JavaScript.

A picture paints a thousand words and the above slide shows the dismantling and reassembly process for the Turbine Head.  If attempting this kind of thing yourself, remember to keep all components free of dirt and grime.

In the absence of a replacement, I attempted a repair to the existing fan and since it was made of plastic (some kind of nylon derivative I think) it was going to be difficult.  Not many glues will stick this type of plastic well, so my choice was going to be ‘make or break’, literally.  I considered an epoxy resin, but opted for Gorilla Glue, since it expands slightly in use, to all of the microscopic gaps.  I also used it to modify the fan by filling-in around the spindle to try and prevent slippage, when spinning.  When dry, I lightly sanded any high spots of glue away.

IMG_0655
FixItWorkshop, Worthing, December 2019, glued turbine/ fan.

Once the whole unit was back together and reconnected to the main vacuum cleaner, the head roller beaters spun once again without a horrible noise.  Question is, how long will it run for?  If anyone thinks they can make a replacement using 3D printing, please let me know!

Check your plug! A simple Miele PowerLine Vacuum Cleaner repair

Mains plugs lead a hard life, make sure yours are safe. If they are damaged, replace!

Before and after…

A quick 15-minute job, with a satisfying result.

Sometimes, it’s not a complicated fault preventing an otherwise good machine from working.  It’s just a case of taking the plunge and getting stuck in as the owner of this vacuum cleaner had proved.

Make and model: Miele PowerLine Vacuum Cleaner

Fault reported: Not running/ occasional sparks(!)

Cost of replacement: About £139.99

Cost of parts: £0.00

Hours spent on repair: ¼

Tools needed: Cutters, screwdriver and soldering iron

Sundry items: Silicone spray, T-Cut

Repair difficulty: 1/10

Cups of tea: 1

Biscuits: 1 Ginger Nut


IMG_0300
FixItWorkshop, Worthing, November ’19, Miele S5211 Vacuum Cleaner.

Sometimes the simplest things are the best.  This machine had been working well when sparks began coming from the mains plug.  The owner had reacted quickly by turning off the power and then removing the plug from the wall socket.  Good job.

The owner then bought a new plug from a local hardware shop to replace the damaged (cracked) plastic plug fitted.  She then fitted the new plug to the vacuum cleaners’ flex but nothing happened when she switched it back on.  Frustrating!  It’s reassuring to hear that folk still bother to get screwdrivers out and attempt a repair.  It makes it all worthwhile.

When I saw the vacuum cleaner and heard the back story, I immediately inspected the plug wiring and spotted that a bit of insulation was still trapped on the live connecter, preventing the electrical connection.  30 seconds with a pair of cutters and a small flat blade screw driver and the machine was working again.

Me being me, I then decided to give the Miele’s plastic casing a quick polish with T-Cut and wax, to bring it up to the correct standard.

It made me think:  How often do people change plugs these days?  Not often.  So, if you’re wondering what the correct position of the wires should be, it’s this (UK specification).

Capture
FixItWorkshop, November’19, UK plug – not my image.

General hints

  • Make sure all screws are tight
  • Ensure the cable grip clamps the cable insulation
  • Don’t trap wires in between the casing

If in any doubt, consult a friendly shed-dweller or spanner spinner.

Genuine or pattern parts? A Dyson DC40 gets a little tune-up.

Genuine or pattern parts? What to do!?

Article 100!

It’s a dilemma sometimes.  Should you always fit genuine replacement parts or is it OK to fit quality aftermarket or pattern parts.  My answer:  It depends.

Make and model: Dyson DC40

Fault reported: Torn hose and loss of suction

Cost of replacement: About £200.00

Cost of parts: £16.53 (hose and filters)

Hours spent on repair: 1

Tools needed: Screwdrivers

Sundry items: Silicone spray, PTFE spray, rag

Repair difficulty: 2/10

Cups of tea: 2

Biscuits: 1 McVities Gold Bar

A mate of mine contacted me to ask if it was worth fixing his 6 year old Dyson DC40 and as always, I said yes it was.  A couple of days later, it was working again, like new.

IMG_0446
FixItWorkshop, November’19, Dyson DC40.

The DC40 is still supported by Dyson and parts are readily available direct from them.  Problem is that, as my mate did, the price of some spares (although quite reasonable actually) can put some people off, which means that serviceable machinery can end up at the local dump, prematurely.  Which is a shame.

This is where pattern parts can help.  Often, aftermarket manufacturers will make spares for popular models and the advantage of these is that they are often much cheaper than the original part.  However, it’s not as simple as that.

I’ve fixed 100s if not 1000s of things and have used and continue to use a mixture of genuine original (often called OE or Original Equipment) and pattern parts for different reasons.  Assuming original equipment parts are the best, here are my thoughts, in no particular order, to help you if facing a similar dilemma.

In favour of pattern parts:

  • They can make a repair viable, financially
  • Parts can be available, long after original parts become obsolete
  • They can provide enhanced features that were not part of the original design

In favour of genuine/ original equipment parts:

  • They will fit exactly as the specification will be to the original design
  • They maintain manufacturers warranties, where applicable
  • They normally last well and perform as expected

As a further example, I will only fit genuine water pumps (on car engines) but will fit pattern air filters.  Water pumps must work within very exact performance tolerances whereas air filters, although important, don’t so much.  It’s a personal thing at the end of the day.

Back to the repair.  This Dyson wasn’t picking up dirt and the extension hose was torn, so a new hose was ordered from a supplier on eBay for under £10, a genuine part was over £25.  The hose just clicks out and in, so all that was required was a small flat bladed screwdriver to remove and refit the hose.  Nice and easy.

The next job was to sort out the lack of suction.  As with all Dysons with a problem like this, I always check filters.  As suspected, both filters were expired and needed to be replaced as they were too far gone to be washed.  Again, pattern part filters were available on eBay for under £7, genuine ones were much dearer.  All new parts fitted well and soon the vacuum cleaner was breathing easily again.

Another issue with the DC40 is the switch lever which diverts suction from the beater head to the hose, which was sticking on this machine.  A quick clean up and a small spray of silicone spray on all the moving parts had it all working again.

This slideshow requires JavaScript.

I always clean-up the beaters on any vacuum cleaner in for a service and this one seemed to have half a head of hair stuck in it, which would have impeded performance.  The hair was so bad, I had to remove the beaters (just one screw) and cut off the hair with a knife.

With all the remedial work completed, the Dyson ran well proving once again that it’s usually worth repairing, rather than replacing.


Is 12 years too long to keep a toothbrush?

A Braun Oral-B electric toothbrush gets a new lease of life.

Let’s just clarify one thing straightaway; I’m talking about an electric toothbrush with changeable brush heads.

I was given an Oral-B/ Braun electric toothbrush as a birthday present years ago, which when you think about it, is a bit of a strange thing to receive as a gift.  Maybe the gift contained a hint?  Back then, these toothbrushes were not cheap, starting at about £60.00 if I remember correctly.  Today, a new equivalent is quite a bit cheaper.

In the time I’ve owned it, it’s had about 40 new brush heads and it’s just about to start it’s third non-replaceable battery.

Make and model:  Oral-B/ Braun 3756 931 41306

Fault reported: Battery won’t hold charge

Cost of replacement:  About £20.00

Cost of parts:  £6.60

Hours spent on repair:  1

Tools needed:  Small flat-bladed screwdriver, soldering iron

Sundry items: None

Repair difficulty:  5/10

Cups of tea:  2

Biscuits:  2 Gingernuts

Electrical items with non-replaceable batteries are so annoying.

A message to manufacturers:  There’s simply no excuse for it as all batteries are replaceable.

In my experience, items with ‘non-replaceable batteries’ contain entirely replaceable items.  The batteries might not be standard ‘AA’ items, but there’s a host of online suppliers that are ready to supply just about any power cell for any application, you name it, usually for a reasonable price that costs-in for the repair process.

This slideshow requires JavaScript.

Now, I don’t know how long one of these toothbrushes is meant to last, but as a long-term test, I thought it would be interesting to find out.  After the first battery died, I decided to take the toothbrush apart, to see what was going on inside.

As you can see from the photos, there’s more within than one might think.  There’s a switch, charging circuit, timer circuit, over-pressure circuit, gearbox, motor, mini crankshafts and a battery.  Not to mention all of the tiny connecting parts all neatly engineered to work together, reliably.  It’s a small work of art really.

It makes me very sad that most of these toothbrushes will end up in landfill, after a few years.

The designers had clearly designed this toothbrush as a disposable item as the battery, despite being readily available from spares suppliers, was hidden, out of sight, under all of the gubbins.

To extract the battery (a simple nickel cadmium item) a full dismantle was required, in this order.

  • Prise off the top collar
  • Prise off the bottom cap
  • Pull out the main mechanism
  • De-solder the main pressure switch, charging coil, LED, and some other joints,
  • Take PCB off of battery carrier,
  • Split battery barrier from the main motor area
  • Remember the polarity of the battery, negative near the coil (a misleading ‘+’ there)
  • Reassembly, with the new battery is the same in reverse.  See pictures for hints.

Twelve years down the line and now on its third battery cell, the toothbrush is still going strong which proves that with a little tinkering, disposable items can be repaired and made to last longer.

It’s just a shame that Braun, the manufacturer, decided to ignore any notion of consumer maintenance.


Why are some spare parts more expensive than a complete product?!

I struggle to buy a replacement part for a reasonable price.

I’ve been meaning to do a little article on this problem for a while and I apologise in advance if (you’re still reading) this seems like a rant.

Why-o-why-o-why are manufacturers still allowed to price spare parts dearer than a complete product?

IMG_20190810_102348
FixItWorkshop, Worthing, Aug’19, Triton Cara and Enrich Showers.

Recently our electric wall shower gave up the ghost and tripped the electrical breaker in the fuse cupboard.  Not great when it happens mid-wash.

The shower was a few years old and registered with the manufacturer for support for things like recalls and so on.  I had fitted the shower myself and it it had been a reliable product until this point.

Out with the screwdrivers and multimeter.

The 8.5kW heating element is split into two circuits, one for half-power and one for full.  Most people would use full power, but you might be able to get away with using it on half or economy mode in summer, when the water feed is generally warmer.

All micro switches seemed to be working OK, which was a bit of a shame actually as it meant that the heater can was probably faulty.  It was.  Half the heater can tested OK, the other half was dead.  Oh dear.

IMG_20190810_102404
FixItWorkshop, Worthing, Aug’19, Triton Cara heater can.

After visiting some shower spares suppliers and the manufacturers’ own website, I discovered that the spare part I needed wasn’t cheap at over £50 delivered.  I saw some advertised for £70 on some third-party sites.

Price of part
FixItWorkshop, Worthing, Aug’19, Triton Cara replacement heater can spare part.  Price sourced from triton.co.uk, correct 10/08/19.

I was fuming.  Why so expensive?  I mean, you’d have to be out of your mind to part with your hard-earned cash on a spare part like this when you can buy the whole unit for less.  See below.

price new
FixItWorkshop, Worthing, Aug’19, Triton Enrich/ Cara – new price listing.  Price sourced from Screwfix.com, correct 10/08/19.

The Cara shower has been replaced by the Enrich and is basically the same product, by another name.  Therefore, the high price of the spare part in this instance cannot be blamed on low manufacturing volumes as the showers are still made, are widely available and have been in production for a long time.   Something is ethically wrong with Triton’s spare parts pricing policies.

Now, I don’t want to beat-up Triton, they’re not alone and many manufacturers do the same, but there are now many forward-thinking companies out there getting it right.  Maybe Triton will revisit their spares listings.

Despite my natural leaning to repair and recondition, I had to admit that simple logic won the day and I bought a whole new unit from Screwfix.  The Enrich shower fitted exactly where the Cara had been and worked perfectly.

I thought about this situation long and hard and decided that for this type of appliance, a spare part should not cost more than 30% of the current retail price.  In this instance, I would have been prepared to pay about £15.00 for a spare part. 

In a world where we need to encourage people to repair appliances (and anything else) manufacturers need to facilitate a reasonable and proportionate spares back up service.  It’s as simple as that.

Still, there is a bright side to this tale.  The old shower’s solenoid, mixer, control knobs and switches all work fine and I’ll keep those as spares to be used again in a shower or something else that comes along.

Dyson DC25 with various problems

Another Dyson dodges the dump

An email dropped into my inbox about a poorly Dyson DC25, that needed a bit of a clean up.  I said no problem, I’ll take a look.  What turned up was a vacuum cleaner that needed a bit more than a quick clean up with a J-Cloth.

Make and model:  Dyson DC25 (blue/ grey)

Cost of replacement:  £N/A, price when new £300

Cost of parts:  £6.89 (plus my time)

Hours spent on repair:  2.5 (plus testing)

Repair difficulty:  5/10

It soon became apparent, that the Dyson was quite ill.

Here’s a summary of the problems:

  1. The mains cable flex was split, exposing the internal cables risking electric shock
  2. The roller beaters would not spin
  3. Suction was limited

None of these features were useful in vacuum cleaner, so out came the screw drivers.

The mains flex damage was about 90 cms from the handle end, so rather than replacing the whole cable at about £30, I decided to shorten the one already fitted on the Dyson.  This involved removing three screws on the reverse of the handle to expose the wiring.  From there, the broken flex could be cut-out and the sound part of the flex, reattached to the Dyson’s wiring.  See below.

This slideshow requires JavaScript.

The DC25 features a roller-ball, enabling the beater head to twist and turn in to tight spots on the floor.  This means that mains power must navigate the various joints and hinges on the way from the main body to the roller beaters.  A quick test revealed that the power was not getting through.  After removing one of the side covers, there was evidence of a previous repair.  One of the mains cables had broken and had then been twisted back together.  Clearly, an improvement was needed.  Using a section of repair cable, a small joint was soldered back in to place with some mains-rated heat shrink around the connection for insulation and reinforcement.  See below.

This slideshow requires JavaScript.

The beater head also needed a good clean, which meant a strip-down and re-build.  All parts were cleaned, inspected and reassembled.  During that process, a small break in the beater head wiring was found, repaired and put back together.  See below.

This slideshow requires JavaScript.

Finally, the machine needed a good clean up.  The main cylinder was washed, the filters washed (although I later decided to replace these) and the main seals on the vacuum system, cleaned and silicone sealed.  See below.

This slideshow requires JavaScript.

During clean up, the spigot-yoke that holds the roller ball in place on one side was found to be missing.  Luckily the owner had kept this and dropped it back to me to re-fit.

This Dyson was on the brink, but with a little bit of spanner-time, it’s now ready to serve many more years.


Cold GHD hair straighteners

GHD 4.2b hair straighteners with a new fuse.

Someone got in touch with a set of GHD 4.2B hair straighteners, which wouldn’t warm up.  Not even the light would come on.

Make and model:  GHD 4.2b hair straighteners

Cost of replacement:  £85.00

Cost of parts:  £2.89 (plus my time)

Hours spent on repair:  1 (plus testing)

Repair difficulty:  5/10

IMG_9120

 These older hair straighteners are well supported with spare parts and their design means that, with a systematic approach and basic test gear, the fault can be identified and parts replaced, fairly easily.

The thermal fuse on these straighteners can fail, even though the heating elements and associated wiring and circuitry is just fine.  A combination of age and accidental rough handling can affect the life of the fuse, so it was the first thing I checked on these straighteners.

It was first time lucky in this case.  The fuse tested open-circuit.  To prove that the rest of the circuit was working, I made a temporary short circuit to the fuse connection and the straighteners powered up OK.

Time to order a new fuse.  Using an eBay shop (SiriusHairUK), a fuse was ordered and it arrived very quickly, great service.

This slideshow requires JavaScript.

With the fuse re-fitted and the heating element re-installed the rest of the hair straighteners were ready for reassembly.  Using basic tools, the straighteners went back together well and after final testing, they were ready for use again.

Tommee Tippee Perfect Prep Problems

The right formula for a poorly Tommee Tippee Perfect Prep Machine

The owner of this Perfect Prep machine had reported that it had not been used for a while, then filled with water, powered up and … nothing.

Make and model:  Tommee Tippee Perfect Prep

Cost of replacement:  £70

Cost of parts:  £3.69 (plus my time)

Hours spent on repair:  1 (plus testing)

Repair difficulty:  6/10

IMG_8972
FixItWorkshop, Worthing, June’18, Tommee Tippee Perfect Prep.

I’ve repaired a machine like this before and I already had a theory about the problem, which went like this:

  • Machine not used for a while; watery scale deposits built-up in machine
  • Machine filled with water, with possible air-lock present
  • Air-lock causes bubble in heater, causing it to temporarily over-heat, safety thermal fuses blow

Dead machine.

At this stage, it was only a theory, so the only thing to do was to start wielding screwdrivers.

A few quick checks revealed that mains power was not getting to the main controller in the machine, which indicated that the safety thermal cut-out fuses had failed.  There are two on this machine.  A quick test with the multi-meter confirmed that both had failed.

After some dismantling, both fuses could be removed from the wiring harness.  Fuses like these are not available from the high street usually, but they are readily available online.  The manufacturer had used crimps to attach the fuses to the wiring, but I decided to solder the new ones back in place.  Care had to be taken as the melting point of solder is very close to the thermal rating of the fuses, so I came up with the idea of using a damp cloth wrapped around the fuse while doing the soldering.  A bit tricky!

Both fuses replaced meant that the unit powered-up and worked.  Great.

However, I wasn’t totally convinced that an air-lock wouldn’t happen again so I looked deeper at the machine’s plumbing.  There appeared to be a kink in one of the boiler tube feed pipes, so I decided to cut some material away, to prevent the pipe restricting water flow in future.

This slideshow requires JavaScript.

All back together, the machine worked well once again.


Gaggia Espresso Machine with a nasty blockage

A Gaggia Espresso machine gets a rebuild.

Home coffee machines are very cool.  Home espresso machines are even better as they’re the closest you can get to a coffee shop brew, in my opinion.  Due to heat, water and coffee mixing up on a regular basis, they need ownership with care for long life.

IMG_9039
FixItWorkshop, Worthing, May’19, Gaggia Espresso Machine.

Top tips for longer coffee machine life:

  • Use filtered water, especially if you live in a hard water area
  • Clean the tank regularly
  • Keep all rubber seals, especially those around the main coffee making area, clean with a damp cloth

Someone got in touch with a machine that was a few years old, but had once made a lovely cup of coffee.  The owner had used it daily but recently it had begun to leak and not perform at its best.  The machine had also been to a UK repair specialist, but sadly, they couldn’t solve the problems.  I always test appliances when they arrive to confirm the fault and as expected, water came out of places it wasn’t supposed to.

I’ve worked on a few of these machines, so I know the drill.  Remove the lid, make a note of the wiring connectors, the pipes and remove the bolts holding the main boiler in place.  I also ordered a service kit (new seals) for a reasonable £7.99.

The main boiler separates into two halves which reveals the main boiler chamber and exit for hot water.

This boiler was in poor condition and years of corrosion and scale had built up and was probably blocking the main group head, the bit where you attach the group handle/ filter bit to make coffee.

Time for more dismantling.  The group head is held in position with a couple of screws, but years of corrosion had taken their toll and this head was going nowhere.  Great care was needed as the soft metal is easily damaged.

Thinking about this a bit more, I decided to cut a screw thread into one of the water holes in the head and use a bolt to lever the group head apart.  It worked.  Once off the head revealed loads of debris and scale.

The next job was to give all parts a thorough clean, re-faced with wet and dry paper as needed and use new seals as part of the reassembly.

Once back together, the boiler was reinstalled and reconnected.  After a few blasts of fresh water through the machine, it was ready to make its first proper brew.

This slideshow requires JavaScript.

Cost of replacement:  £100-300.  Cost of repair:  £7.99, my time, one tin of elbow grease, one cup of coffee and a ginger nut.