Dyson DC25 with various problems

Another Dyson dodges the dump

An email dropped into my inbox about a poorly Dyson DC25, that needed a bit of a clean up.  I said no problem, I’ll take a look.  What turned up was a vacuum cleaner that needed a bit more than a quick clean up with a J-Cloth.

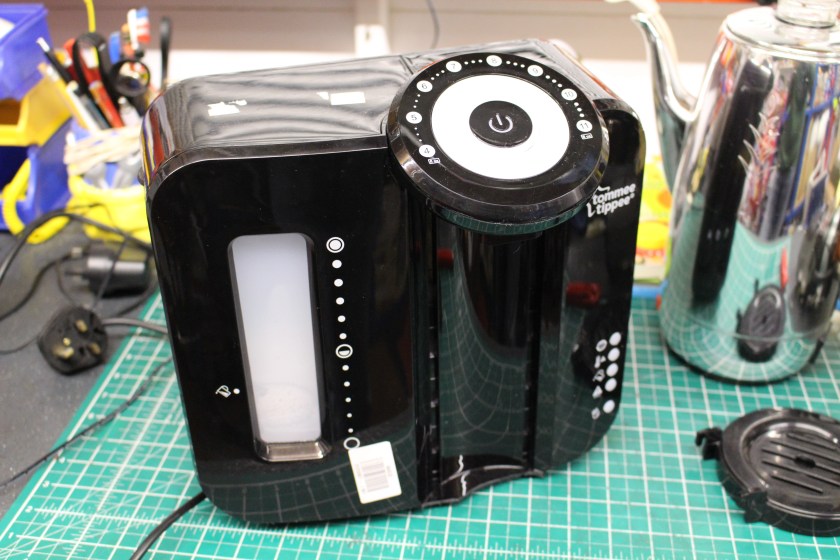
Make and model:  Dyson DC25 (blue/ grey)

Cost of replacement:  £N/A, price when new £300

Cost of parts:  £6.89 (plus my time)

Hours spent on repair:  2.5 (plus testing)

Repair difficulty:  5/10

It soon became apparent, that the Dyson was quite ill.

Here’s a summary of the problems:

  1. The mains cable flex was split, exposing the internal cables risking electric shock
  2. The roller beaters would not spin
  3. Suction was limited

None of these features were useful in vacuum cleaner, so out came the screw drivers.

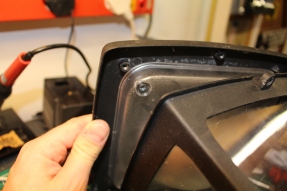
The mains flex damage was about 90 cms from the handle end, so rather than replacing the whole cable at about £30, I decided to shorten the one already fitted on the Dyson.  This involved removing three screws on the reverse of the handle to expose the wiring.  From there, the broken flex could be cut-out and the sound part of the flex, reattached to the Dyson’s wiring.  See below.

This slideshow requires JavaScript.

The DC25 features a roller-ball, enabling the beater head to twist and turn in to tight spots on the floor.  This means that mains power must navigate the various joints and hinges on the way from the main body to the roller beaters.  A quick test revealed that the power was not getting through.  After removing one of the side covers, there was evidence of a previous repair.  One of the mains cables had broken and had then been twisted back together.  Clearly, an improvement was needed.  Using a section of repair cable, a small joint was soldered back in to place with some mains-rated heat shrink around the connection for insulation and reinforcement.  See below.

This slideshow requires JavaScript.

The beater head also needed a good clean, which meant a strip-down and re-build.  All parts were cleaned, inspected and reassembled.  During that process, a small break in the beater head wiring was found, repaired and put back together.  See below.

This slideshow requires JavaScript.

Finally, the machine needed a good clean up.  The main cylinder was washed, the filters washed (although I later decided to replace these) and the main seals on the vacuum system, cleaned and silicone sealed.  See below.

This slideshow requires JavaScript.

During clean up, the spigot-yoke that holds the roller ball in place on one side was found to be missing.  Luckily the owner had kept this and dropped it back to me to re-fit.

This Dyson was on the brink, but with a little bit of spanner-time, it’s now ready to serve many more years.


Tommee Tippee Perfect Prep Problems

The right formula for a poorly Tommee Tippee Perfect Prep Machine

The owner of this Perfect Prep machine had reported that it had not been used for a while, then filled with water, powered up and … nothing.

Make and model:  Tommee Tippee Perfect Prep

Cost of replacement:  £70

Cost of parts:  £3.69 (plus my time)

Hours spent on repair:  1 (plus testing)

Repair difficulty:  6/10

IMG_8972
FixItWorkshop, Worthing, June’18, Tommee Tippee Perfect Prep.

I’ve repaired a machine like this before and I already had a theory about the problem, which went like this:

  • Machine not used for a while; watery scale deposits built-up in machine
  • Machine filled with water, with possible air-lock present
  • Air-lock causes bubble in heater, causing it to temporarily over-heat, safety thermal fuses blow

Dead machine.

At this stage, it was only a theory, so the only thing to do was to start wielding screwdrivers.

A few quick checks revealed that mains power was not getting to the main controller in the machine, which indicated that the safety thermal cut-out fuses had failed.  There are two on this machine.  A quick test with the multi-meter confirmed that both had failed.

After some dismantling, both fuses could be removed from the wiring harness.  Fuses like these are not available from the high street usually, but they are readily available online.  The manufacturer had used crimps to attach the fuses to the wiring, but I decided to solder the new ones back in place.  Care had to be taken as the melting point of solder is very close to the thermal rating of the fuses, so I came up with the idea of using a damp cloth wrapped around the fuse while doing the soldering.  A bit tricky!

Both fuses replaced meant that the unit powered-up and worked.  Great.

However, I wasn’t totally convinced that an air-lock wouldn’t happen again so I looked deeper at the machine’s plumbing.  There appeared to be a kink in one of the boiler tube feed pipes, so I decided to cut some material away, to prevent the pipe restricting water flow in future.

This slideshow requires JavaScript.

All back together, the machine worked well once again.


Qualcast strimmer issues

Always keep your garden tidy.

Top tips for keeping your petrol strimmer running like a ‘Rolls Royce’

  • Make sure the fuel you have in the tank is fresh and not from three years ago (it goes off)
  • Keep the spark plug gap set within the manufacturer’s tolerances
  • Lubricate all moving parts lightly with a generic spray oil each time you use the strimmer
Strimmer
FixItWorkshop, Worthing, May’19, Qualcast Petrol Strimmer.

Someone got in touch with a strimmer that would not start.  Anything that involves moving parts and petrol always gets my attention, so I accepted the challenge.  Once in the workshop, I tried to start it using the pull cord and as predicted, it wouldn’t run, not even a cough.  A little bit of carb cleaner sprayed in to the barrel, a pull of the starter cord and the engine did fire, suggesting that the engine could run.  More analysis was required.

The strimmer had not been started for many years, so the first job was to remove the old fuel from the tank as old fuel goes off after a while. The engine on this strimmer is a two-stroke design, so the special two-stroke oil must be pre-mixed with the fuel in the right proportion before re-filling the tank.

While sorting the fuel out, I noticed the first fault.  Both flow and return fuel pipes were cracked and one had come apart in the fuel tank, meaning that no fuel would flow to the carburettor.  No fuel, no work.

To start most petrol strimmers, mowers and chainsaws from cold, a petrol primer pump is usually used to fill the carburettor with the right amount of fuel and this one was no different, but in this case, the pump was cracked.

After fitting some new fuel lines, a fuel filter and primer pump, the engine fired up and ran well again, ready for more garden work.  See slide show.

This slideshow requires JavaScript.

Cost of replacement:  £80 and up.  Cost of repair:  £7.53 plus my time and custard creams.


Dyson DC40 missing a beat

A small repair on a Dyson DC40 leads to a big improvement.

A powerful, easy to manoeuvre vacuum cleaner, that gets into every nook and cranny.  But not this one.

IMG_8891
FixItWorkshop, Worthing, May’19, Dyson DC40.

Three top tips for keeping your Dyson DC40 in rude health:

  • Keep all filters clean (wash or replace frequently)
  • Clean all rubber seals with a damp cloth to remove dust build-up
  • Occasionally lubricate moving parts of jockey wheel mechanism (springs and lever) with silicone spray

Do these things and your Dyson will love you forever.

I’m a bit of a sucker for Dyson products.  They are well engineered products from the school of function over form and in my opinion, objects of art.

This Dyson wasn’t very well when it was admitted to the workshop.  The owner had complained that the vacuum cleaner wasn’t picking up dirt and dust properly.  The beaters were not spinning either.

IMG_8890
FixItWorkshop, Worthing, May’19, Dyson DC40 beater head.

The beater ‘head’ is attached to the main body of the vacuum cleaner and is held in place with a sliding clip.  The head can rotate and move to allow maximum control.  The beater roller is driven not via a belt from the main motor, but from its own smaller motor in the head unit.  So, there is an electrical connector between the main body and head unit.  As the beaters were not spinning, it seemed sensible to test the electrical connection.  Upon testing, it was not working.

The mechanism on this vacuum cleaner is quite complicated and relies on levers and joints working in harmony.  Dismantling the wheels, filters, brackets and covers around the motor revealed the problem.  The supply that feeds power to the beater head is routed around the motor and sliding lever mechanism and a broken cable was to blame for the beaters not spinning.

Access was difficult due to the design so rather than completely tearing down the body to replace the supply loom, I reattached the broken wire with some soldering and heat shrink to make a robust repair.

After carefully rerouting the cables and reassembling the body, wheels and beater head, the beaters spun once more.  Result.

This slideshow requires JavaScript.

After a new set of filters were fitted and a light service, the machine was as good as new.

Cost of replacement machine:  £000’s.  Cost of repair parts: £11.69 plus my time and two teas.

Leave the light on…

A Philips outdoor wall lamp with a major case of built-in obsolescence, gets a cheap fix.

A mate of mine mentioned that his outdoor wall light had given-up-the-ghost, despite not being more than three years old.  He’d put them up around his house as part of an extension and exterior restoration project.  The trouble was that despite only being a few years old, the product now seemed to be discontinued.  This meant that, should the lamp need to be replaced, he would need to replace all of them (three in this case) to keep them matching.  Annoying quite frankly.

IMG_20181112_194358.jpg
FixItWorkshop, March’19, Philips outdoor wall light, working.

He’d read that the bulb within the Philips lamp was not replaceable, in which case a faulty lamp would render the whole thing broken, which seemed very daft to me.  Items made in such a way that prevents even the most basic of repair get me very annoyed.  Sometimes an item is developed in such a way for safety reasons but I suspect that most of the time, the motive is just pure greed.  It’s such a shame.

At my mate’s house, over a cup of tea, I removed the lamp from the wall to take back to the workshop, to see what Philips had been getting up to.

Opening up the casing was straightforward, just a few simple screws and retaining nuts holding the casing together, before finally revealing the bulb itself, under a lamp diffuser.

IMG_7609
FixItWorkshop, March’19, Philips outdoor wall light, lamp unit.

The bulb/ lamp unit itself appeared to be a custom/ bespoke disc light, that wasn’t user serviceable.  It had blown and there was evidence of scorching on a few of the LEDs, linked in series, indicating the failure of the entire circuit.

I couldn’t find any replacement disc LEDs suitable for the lamp from any of the usual sources, which I expected.  It could be that Philips can supply a replacement disc, but this was not evident on their website.

Not wanting to be beaten by a bespoke part, I thought about what else might work, within the lamp’s enclosure, to have the same effect.  I had a spare GU9 LED bulb, about the same brightness, sitting on the shelf, left over from another project which was going spare, so I set about fitting it in the space.

The generic GU9 bulb, available from most hardware shops, fitted in the existing disc mounting bracket, with a small modification and once connected to the lamp’s circuitry, worked well, albeit with a slightly warmer glow.

In case anyone else has the same problem, I made a little video of the repair.  I hope it gives others inspiration if faced with a similar problem.

Cost of replacement (with something similar): £50.00.  Cost of repair:  £1.50 for the bulb and a couple of Belgian beers for my time.


Dyson DC14 with no vacuum

Another Dyson repair…

As covered a few times on my blog already, I do like Dyson products.  They’re engineer and tinker-friendly.

IMG_8360
Fixitworkshop, March’19, Dyson DC14 (PS, I did clean the old paint off later).

A colleague got in touch with a poorly DC14 which had worked well.  She’d kept the filters clean and generally looked after the appliance with care, which makes a nice change. However, despite all this, nothing was being collected with the floor beaters.  The hose worked OK, but that was it.

Time to do some screwdriver wealding.  Despite the filters being in good condition, I washed and dried them anyway, just in case.

Up ending the vacuum cleaner revealed the problem straight away.  The bottom foot hose had become disconnected from the interference fit compression joint and was flapping in the breeze.  Usually when this happens, it’s because the hose has split, but this one was in good condition.  What seemed to have happened was that the hose had become untwisted from the joint, so all that was required was careful reassembly.

While the cleaner was in pieces, I gave it a thorough service, paying attention to all of the machine’s seals and moving parts, especially where the cylinder joins the vacuum pipes from the motor as these can leak with age.

Once spruced-up, the cleaner was back to full health once again.  Another Dyson saved from the tip.

This slideshow requires JavaScript.

Cost of replacement:  £150 and up.  Cost of repair: Time, tea and biscuits and silicone spray, a bit of washing-up liquid.

Tommee Tippee (not so) Perfect Prep

A formula machine is repaired in the workshop.

This fix was actually carried out during the summer, 2018.

A friend of mine brought over a broken formula making machine for me to look at.  It had been stored after their first child had out-grown it and since having another baby, it was now needed again, urgently.  Following a couple of years in storage, it was brought out, plugged in and after briefly coming on, it failed.  No lights, no hope.

These machines save time and effort by allowing water to be heated rapidly and mixed exactly with the formula powder, to produce consistent results every time, perfect for new exhausted parents in the middle of the night. So it was important that I got this working quickly.

IMG_6428
FixItWorkshop, Jan’19, Worthing, Tommee Tippee Perfect Prep machine

After removing the back, I was presented with an electronic control unit, some solenoid valves and a heater, plus some other environmental sensors such as thermostats.  The plug fuse was OK, so it was time to check if power was getting to the machine.  It wasn’t.

This machine features a couple of power control devices; two  thermal aluminium ‘can-style’ fuses in-line with the heater, plus a thermostat on the output of the heater itself (to regulate heat).  After testing for continuity, it appeared that one of the can fuses had failed.

These fuses are common across a wide range of appliances, such as coffee machines, fans etc and are cheap, just a few pounds.  It could be that a temporary air-lock in the heater caused a hot-spot and therefore that excess heat caused the 172 degree fuse to pop.  It was worth a try to replace it and see what happened.

I replaced the fuse and re-assembled.  After filling with water and powering it up, normal service was resumed.

Since I replaced the fuse, the machine has been in continuous service for many months, so I can conclude that it was probable that the over heating was temporary.

I created a short video to help others who may have similar problems with their machine.

Cost of a new machine:  £90.  Cost of repair: a few quid and a few beers.


Alesis (DM Lite) Drum kit without kick

Alesis Drum Kit gets a cheap repair.

A neighbour of mine is a talented musician in a local band and also teaches school children various instruments.  Some of his students learn the drums, which is most parent’s nightmare as any notion of a peaceful evening is shattered.  Luckily, electronic drum kits are an excellent way to learn with headphones, while keeping happy parents and neighbours.

IMG_5963
FixItWorkshop, Worthing, November’18, Alesis DM Lite Electronic Drum Kit
IMG_5964
FixItWorkshop,  Worthing, November’18, Alexis DM Lite main drum module

This kit was missing several beats and was hampering learning, so time for a visit to the workshop.  I’m no musical instrument repair specialist, but I thought that the drum kit must use electrical contacts, switches and rudimentary electrical components and I was right.

Two faults were reported; The kick/ foot pedal was intermittently not working and one of the drum pads was hardly working at all, unless you hit it with a sledge-hammer.  Time to see what was going wrong.

First up was the faulty drum pad.  Opening up the back of the pad was simplicity itself, just a few screws held the back to the pad.  Sandwiched between two halves was a sensor, a bit like a piezo flat speaker, similar to the type found in many toys with sounds.  I guess the principle here is that vibration detected by the piezo sensor is converted to analogue variable voltages by the drum kit’s circuitry.  While apart, I noticed that some of the copper detail tracks on the printed circuit board which had a standard 3.5mm jack socket (to allow a connection back to the rest of the kit) had cracked.  Looking again through my magnifying glass revealed quite a bit of damage, probably as a result of many Keith Moon wannabes.  Testing these tracks with my meter confirmed an intermittent fault, so out with the soldering iron, to repair the connection.  Plugging the pad back in, it was ready once again for more drum solos.

This slideshow requires JavaScript.

Next up was the dodgy kick/foot pedal.  As the with the drum pad, the pedal would cut out intermittently.  A few screws held the pedal together, so only basic tools required.  See the slide show below for an idea of the construction.

This slideshow requires JavaScript.

The fault with the pedal was similar to the drum pad.  Some of the copper detailing around the 3.5mm jack socket had failed and required some careful soldering.  I say careful, as applying too much heat at once would, likely as not, melt the casing of the socket.  One had to take care.

Once soldered, the pedal was much better.  I didn’t get a full 10/10 repair with the pedal since I think there was wear on the kick sensor, but it was an improvement none the less.

Cost of replacement:  £lots.  Cost of repair, my time, two cups of tea and some solder.


Ultimate Speed Battery Charger from Lidl, on standby

Battery charger repaired at the workshop

My in-laws have an ornament on their drive, in the shape of a 2001 MGF roadster.  I say ornament because it’s fairly stationery, all of the time.  Even so, it’s battery gets topped up once in a while and the engine turned over when the urge presents itself.  Because the car isn’t used, the battery’s only means of charge is via a plug-in charger, my father-in-law occasionally hooks up.

IMG_5316.JPG
FixItWorkshop, March’18, Ultimate Speed (Lidl) Battery Charger.

The battery charger in question is an Ultimate Speed (Lidl brand) universal battery charger.  They’ve been on sale in the UK for a number of years at the £15 (approx.) mark.  They’re really good value as they allow ‘smart charging’ of car and motorcycle batteries without the risk of damage at a fraction of the price of the ‘big brands’ or a replacement battery.

However, this charger decided that it wasn’t playing anymore and refused to offer it’s charging services when recently connected to the MG’s flat battery.  On it’s way to the great bin in the sky, I managed to divert the charger via the workshop.

Once connected to the mains, the standby light illuminated, indicating something was actually happening, but upon connecting the low voltage side to a battery, making a charge selection via the single push-button switch, nothing changed and the whole unit remained on standby.  Pretty annoying.

Luckily, I have the triangular screwdriver required to undo the six screws that hold the (IP) ingress protected casing together.  Triangular screw heads are annoying and pointless as they prevent, in my opinion, people with a basic tool set having a go at a repair like this.  If you do fancy getting one of these tools, they are easily available on Amazon and eBay.

On with the fix.  With the casing opened up, my first port of call was with the switch itself.  Past experience has taught me to 1; start with the easy stuff and 2; these push to make switches fail all the time.  They’re in everything from door bells to cookers at the moment and when faulty, make the most expensive item and expensive paper weight in the blink of an eye.

To test the switch, I connected the charger to the mains and hooked up the low voltage end to a battery and simulated the button push switch by shorting out the switches connections on the circuit board.  Hey presto, the charger worked perfectly, every time.  The switch either needed repairing or replacing.

Because I’m a skin-flint, I opted to see what could be done with the present switch.  With care, these switches can be prised apart, using a sharp knife and the insides cleaned.  I took the switch apart which revealed nothing more than slightly corroded switch surfaces.  I can only assume that the product’s bold IP rated claim is a little over exaggerated and that some damp had wriggled its way to the switch and mucked it up.  With a cotton bud and switch cleaner, the switch surfaces scrubbed up like new and I re-assembled the switch lever and securing plat using a soldering iron to re-melt the plastic nubs holding the switch together.  No one would ever know it had been in bits.

With the circuit board returned to the housing, all six screws done up, the charger was back to rude health once more and ready to tend to the stranded MGF.

Hubble bubble toy’s in trouble.

This bubble machine needed more huff and puff.

About a year ago, we bought an Early Learning Centre Freddy the Fish Bubble Machine for our daughter and it’s been a great addition to summer garden fun, as it unleashes thousands of bubbles per minute.  It’s been truly bubble-tastic.

However, it’s decided to become a little temperamental of late when switched on.  With good batteries and a full tank of bubble fuel, the machine would sometimes cough and sputter and generally be a disappointment in the bubble-making department.

The toy is shaped like a fish, like the name suggests and has a small reservoir for the bubble mix and a carousel of bubble wands operated by a motor which is ‘blown’ by a small fan inside, to inflate the bubbles to the optimal size.

The fault:  The fan would sometimes, by itself, vary in speed, reducing the speed of the air though the bubble wand carousel, which would limit the quantity and quality of bubbles produced.  Most disappointing.

The toy is held together by small Pozi-drive screws and the whole things comes apart in two halves.  It gets a bit tricky inside as there are a few small components held in place using the internal plastic parts.  After testing the batteries, I thought I’d start by testing the action of the on/off switch which seemed to click on/ off OK, but I wondered what the quality of the electrical mechanism was like.  A quick test with the multi-meter revealed slightly variable resistances, indicating either damp or dirt had entered the switch, highly likely considering what the toy does.

IMG_4091.JPG
FixItWorkshop, Sept’17, Early Learning Centre Freddy Fish Bubble Machine

The switch is reasonably well protected from the elements, but I suspect it had become immersed in water, not really what the switch or toy is meant to handle.  It’s not Ingress Protected Rated (IP).

The switch isn’t really designed to be repaired, but after a few minutes bending the small tabs holding it together, I revealed the switch contacts.  A quick clean with switch cleaner and blue towel and the switch was working as it should once more.  Once reassembled, the toy performed well once again and was soon filling the garden with bubbly magic.