Economically unviable, virtually no manufacturer support, practically zero second hand value. I’ve had worse machines through the workshop.
It’s not always about the cash…Better crack on.
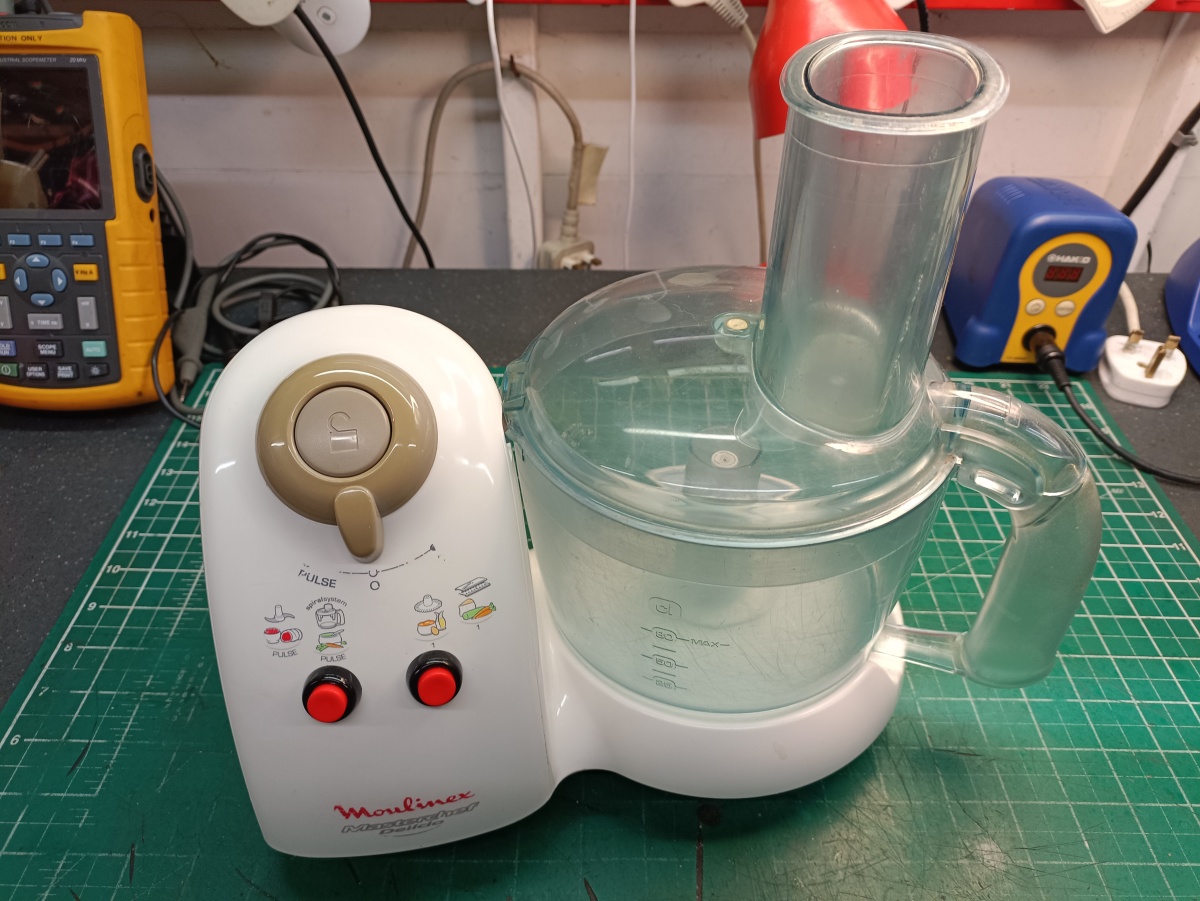
Make and model: Moulinex Delicio (food processor)
Fault reported: Broken switch
Cost of replacement machine: £40.00 – £50.00 for an equivalent
Manufacturer support (in the UK): 0/10
Cost of parts (for this repair): £ under a tenner, including all parts, but not labour
My time spent on the repair: 1 hour
Tools needed: Small knife, pliers, small screwdrivers, soldering iron
Sundry items: Cable, heat shrink
Cleaning materials: Silicone spray, contact cleaner, wipes
Repair difficulty: 5/10 (fiddly)
Beverages: 1 tea
Biscuits: 2 ginger nuts
Bad language: 2/10
It must start early. An attachment to inanimate objects, a personification if you will, of machines and their mechanical feelings. Maybe it starts with teddy bears, Lego people or Matchbox cars. Of course, deep down I know that machines do not have feelings, but I do sometimes find it hard to simply give in with something, and throw it away.
I don’t think that it’s a coincidence that many classic cars, rescued from the crushers’ teeth, tend to have a ‘face’. Indeed, designers can often hit on a million-seller, if they get the ‘face’ right. Think VW Beetle, Morris Minor and Mini. Perhaps these shapes bring back childhood memories of a favourite cuddly toy, which might translate to them being taken care of better and cherished for longer.
Anthropomorphism, the attribution of human traits and tendencies, is something many of us experience, but us repair nerds seem to take it to another level. I’ll have to think of a catchy name for it.
All this has reminded me about a recent such situation where my mum asked me if I could fix her broken Moulinex Delicio food processor, if it wasn’t too much trouble.
The condition I ‘suffer’ from certainly doesn’t run in families and my mum was at first, ready to recycle the thing. But remembering all the cakes made with it over the years, especially ones made with my two daughters, seemed to put a different complexion on matters. So, I took the mixer away with me and put it on the workshop shelves, awaiting some attention. At least there were other machines alongside, to keep it company.
Many food mixers tend to be large, heavy and bulky affairs which is OK for many, most of the time, but if you can’t manage the weight of something like an eleven kilo Kitchenaid Artisan every time homemade brownies are called for, something like this little light-weight Moulinex is ideal. So, two compelling reasons to keep the mixer; it’s lack of weight and some fond memories.
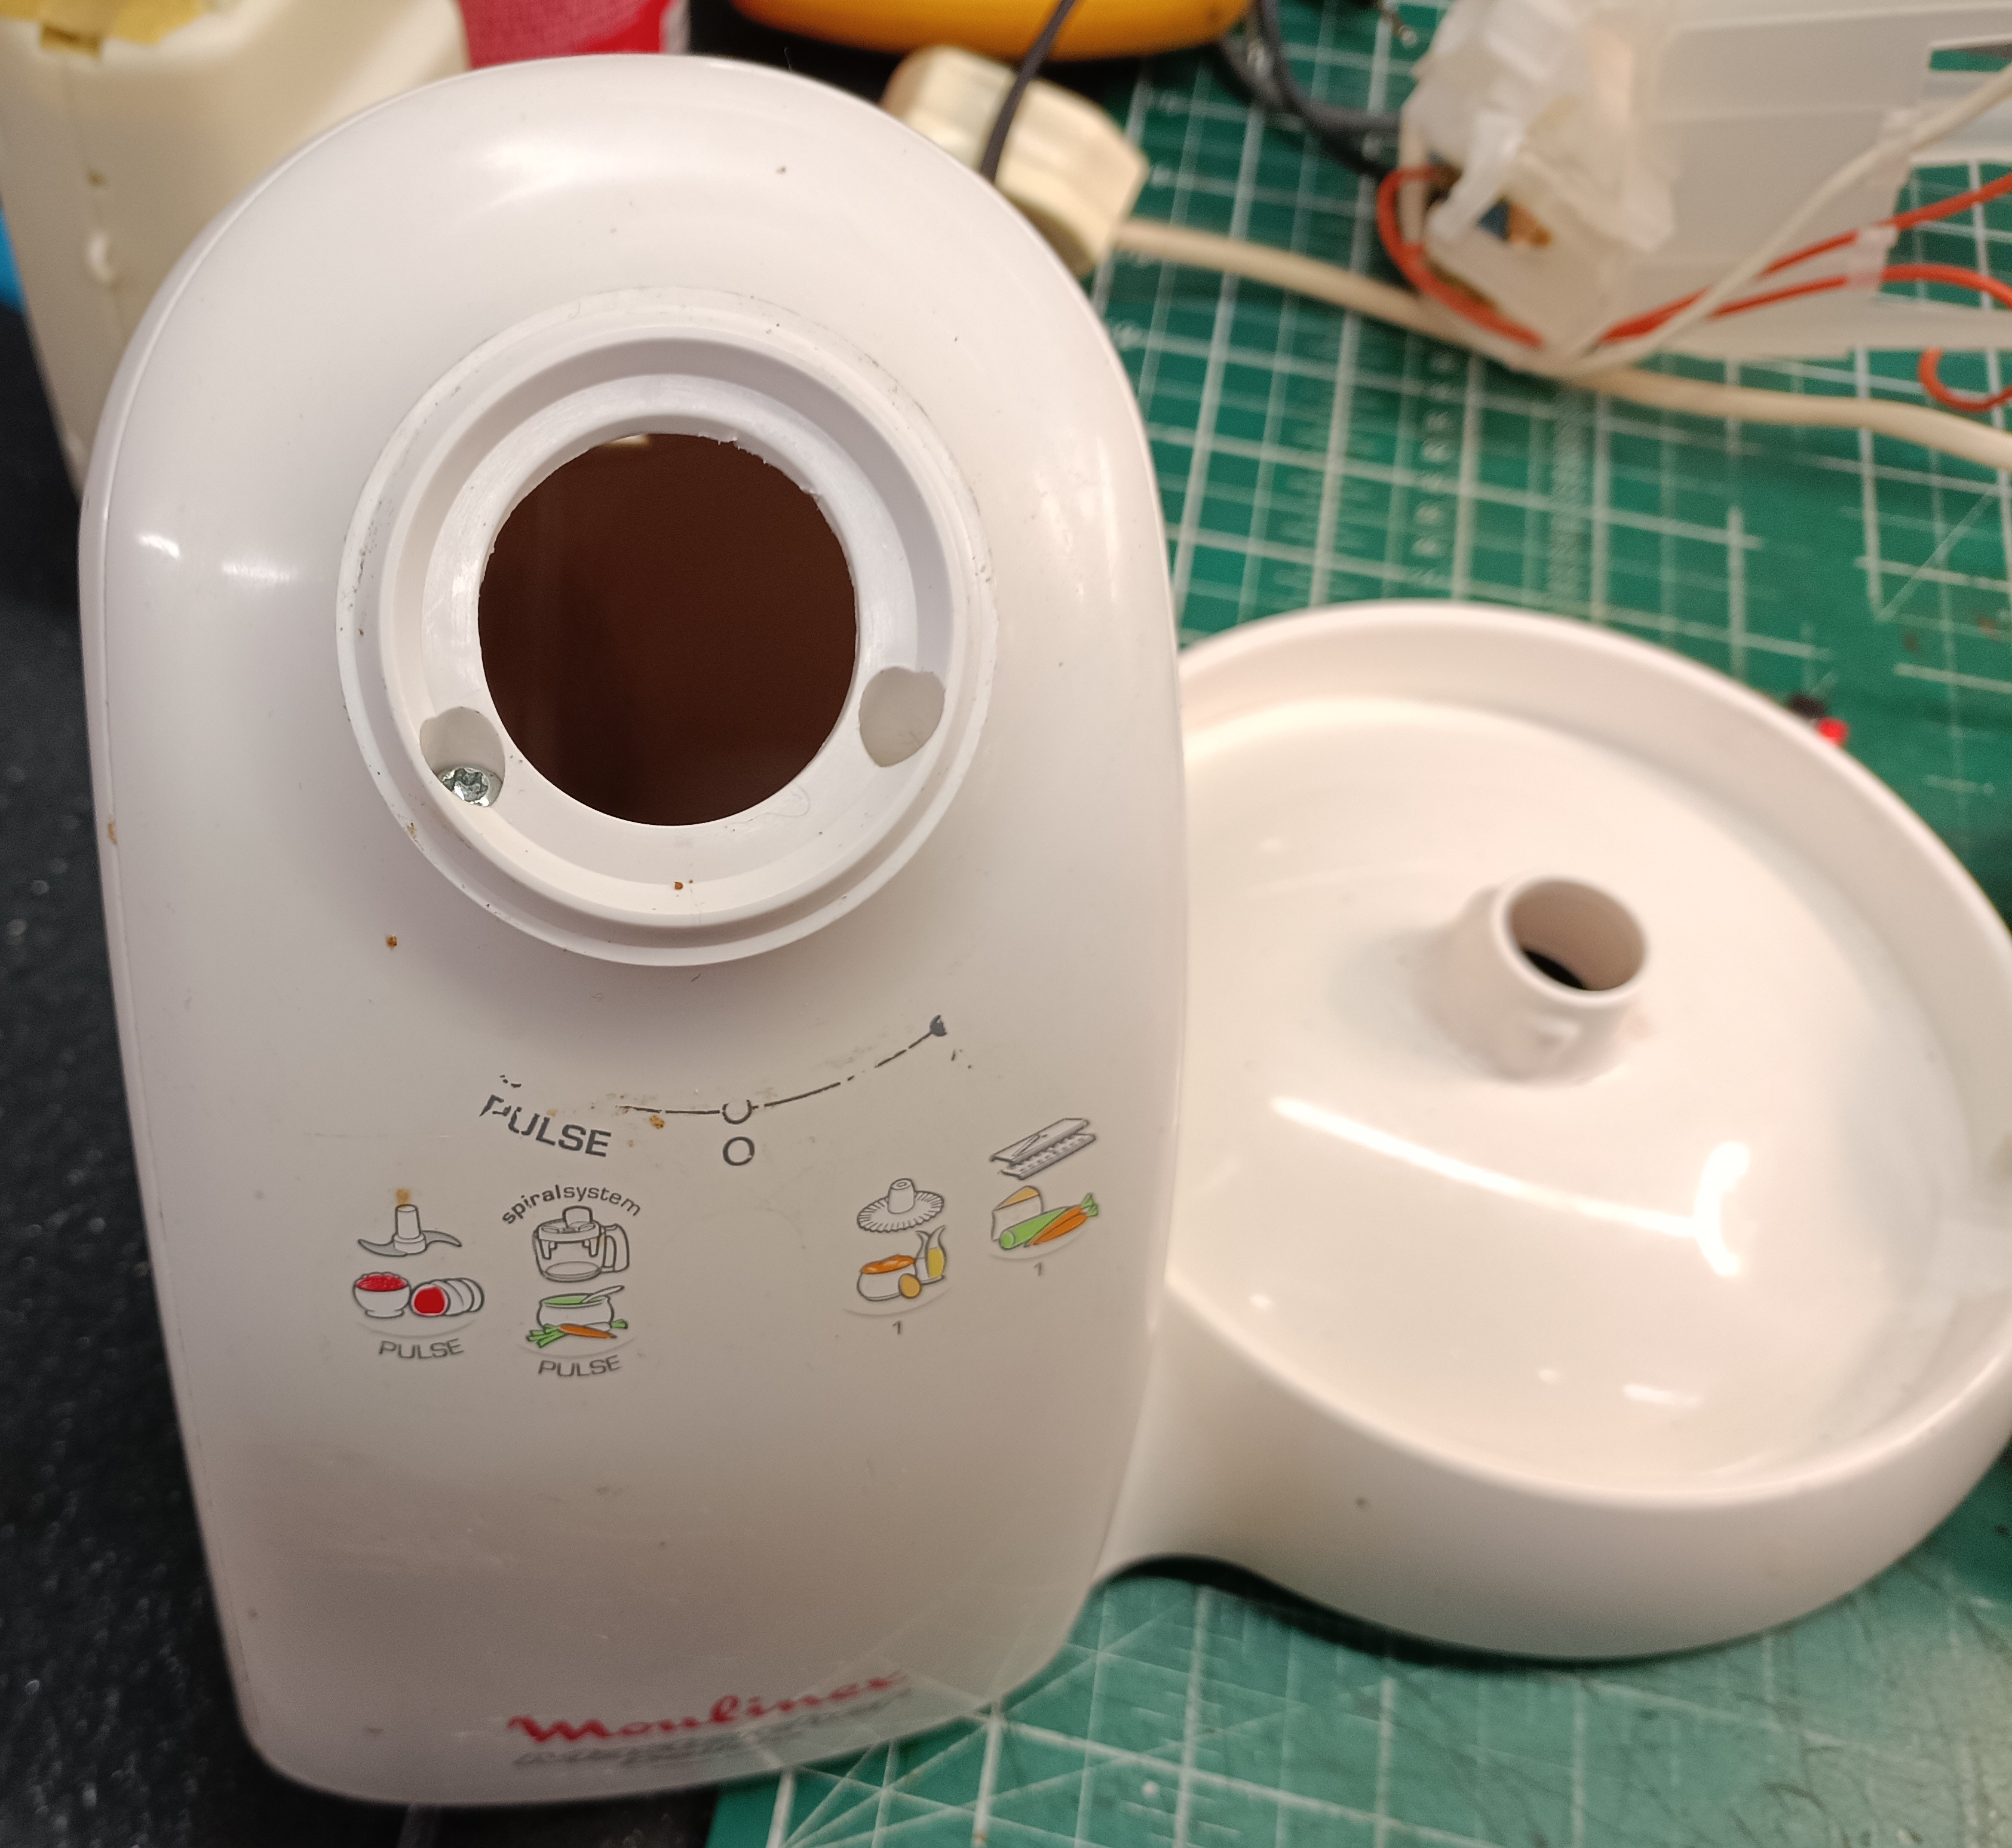
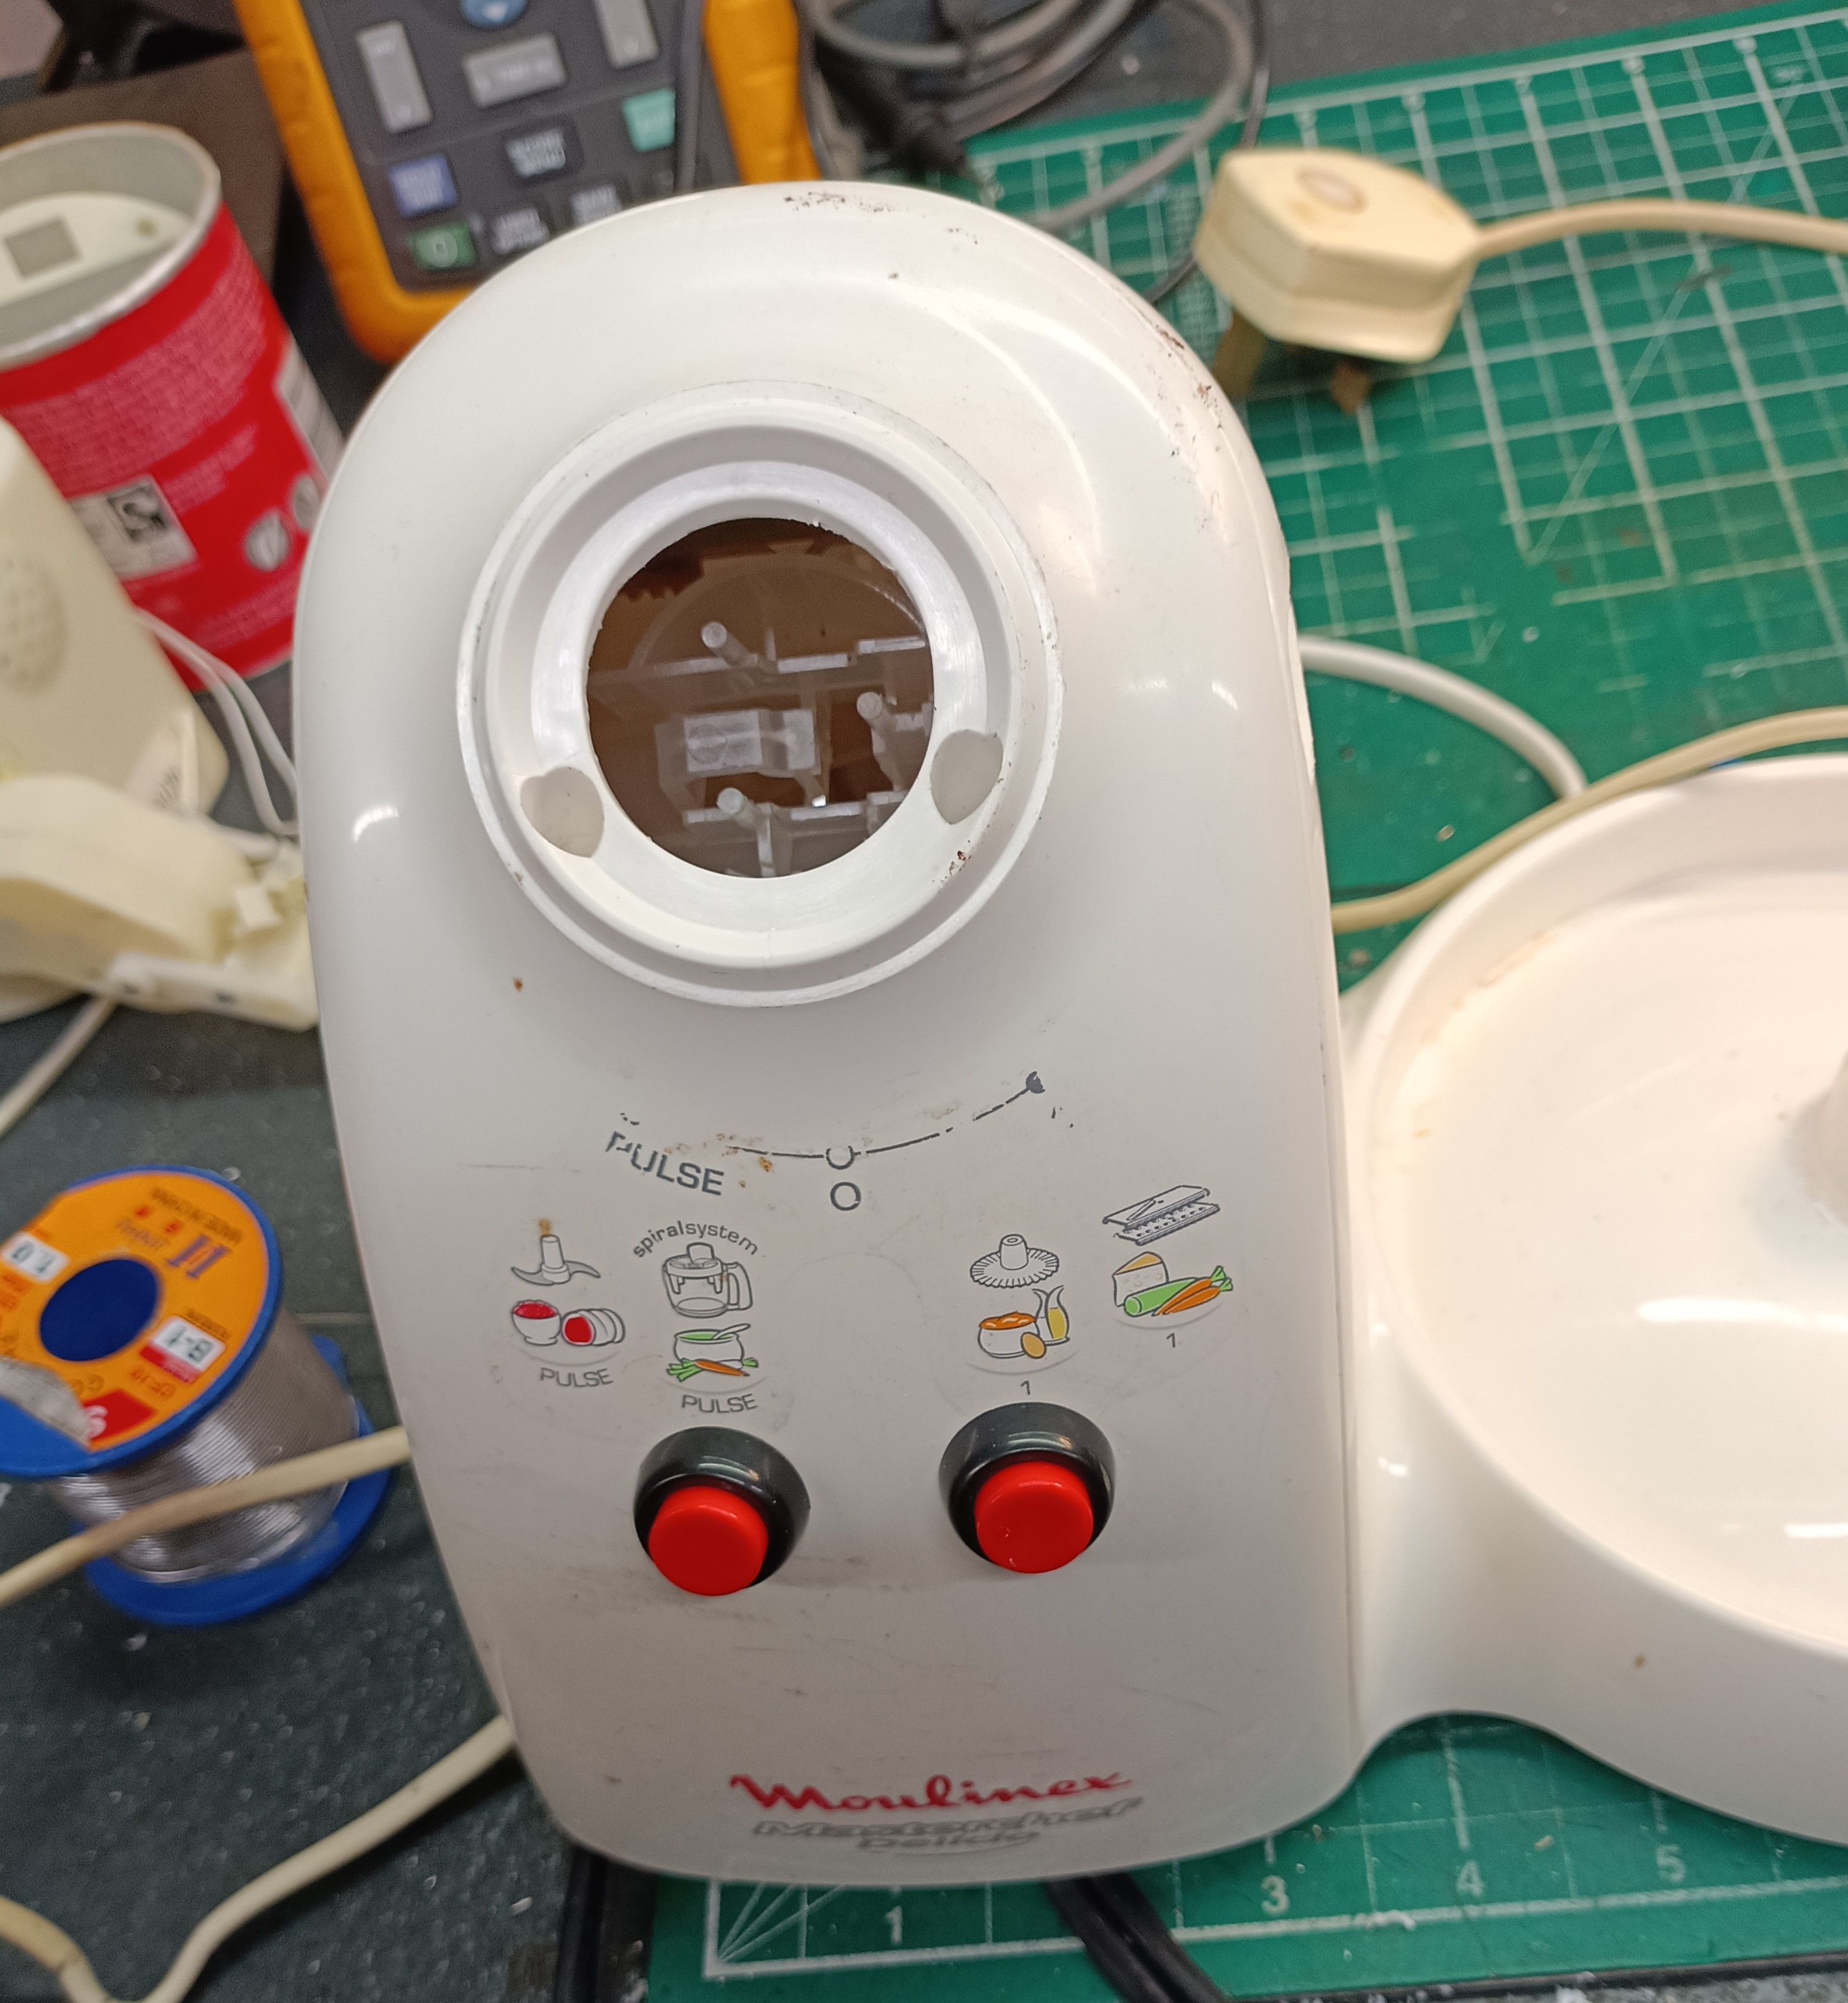
The problem was that the main on/off switch didn’t seem connected with the rest of the machine and to make things more complicated, the integral lid-lock was operated with the same button. This part is therefore quite important since it might prevent one from shortening their fingers, by not allowing the spinning blades to ever come in to contact with wondering digits.
Now, I’m sure that this all seemed rather lovely in Moulinex HQ at the time, but small plastic switches connected with several thin moving parts combined with knocks and scrapes in a kitchen, is not going to end well. As a matter of fact, Moulinex offered the offending switch assembly as a spare part until recently, so they must have known that the design was a bit iffy. Sadly, I missed the boat and despite several attempts, I couldn’t find a replacement part anywhere. eBay revealed a couple of similar machines with faults, so it was back to the drawing board.
3D scanning and printing makes low-volume, but high-quality production a reality, and it’s really something that I need to get into, as I often have the need to copy rare, obsolete parts. In time, I will.
In this case, I did consider using one of the many online UK companies now specialising in this kind of thing, but the costs did not warrant it in this instance, so a new strategy was required. I’ve spent many hours of my life browsing parts like this in catalogues, so I decided that a repair should be possible for under £10.00, using readily available, generic switches. Yes, that should be my budget challenge then, do the whole job for a tenner or under and since it was a family affair, no charges for labour!
The Delicio is a simple machine; no variable speed controller, just a single speed operation controlled either by latching or push-to-make switch. It gets the job done quickly and without fuss. After a quick trawl of eBay, I opted for two small round, red button in black bezel switches with solder tags. The switch series I opted for was available in push-to-make and latching, bingo! And at £5.98 delivered, a total bargain.
There’s something quite satisfying in selecting an item, taking it apart and then modifying it by way of repair, improvements or both, in such a way that differs little from its original design. Subtle modifications or improvements, that the casual observer will never notice. If you look closely at the photos, I managed to line up the new buttons with the old printed text, to match the operation. Lucky.


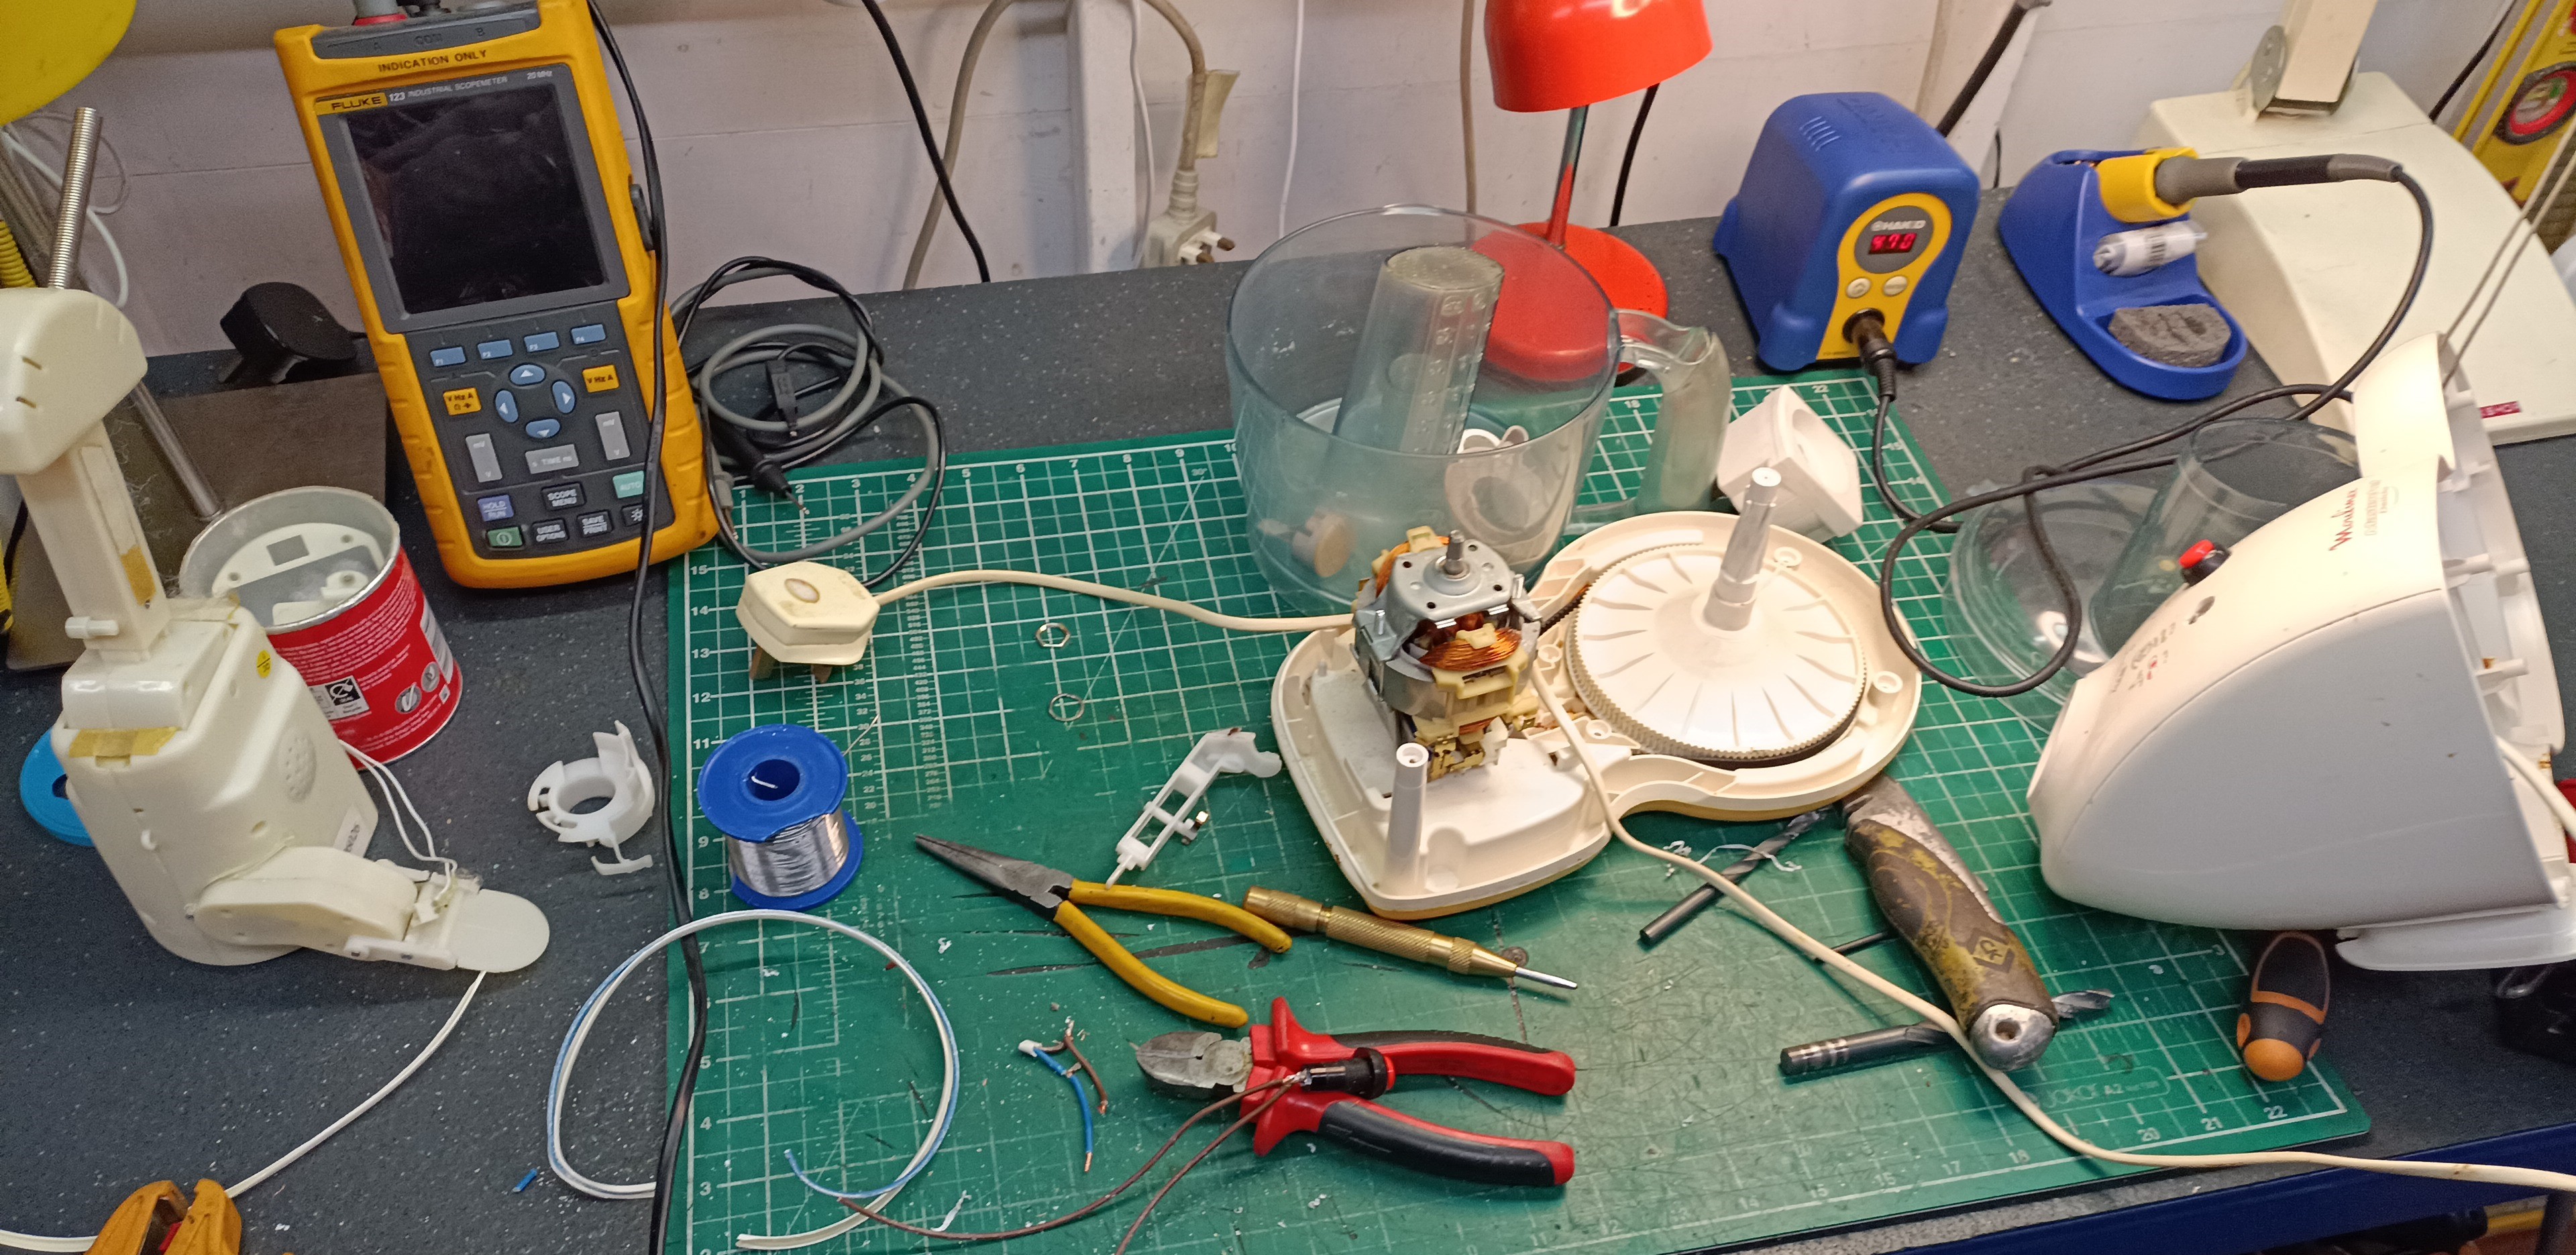
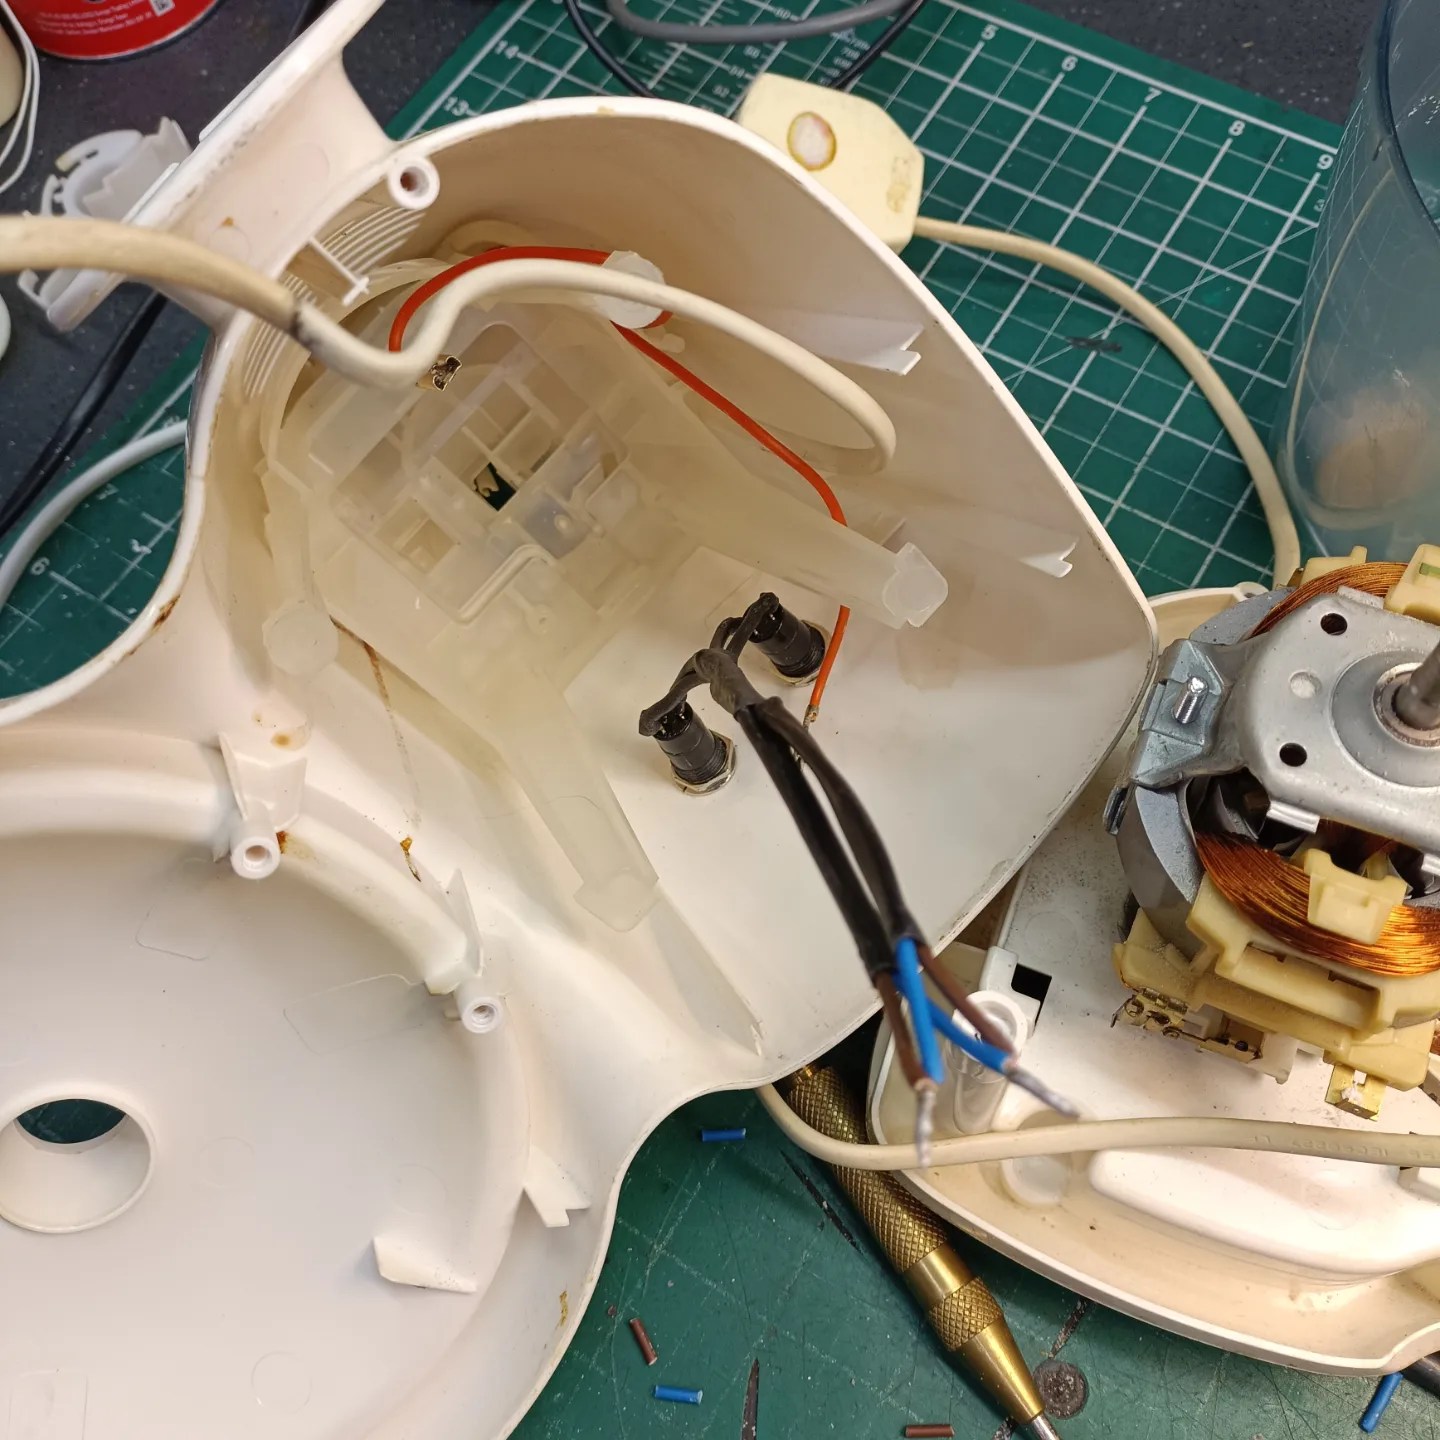
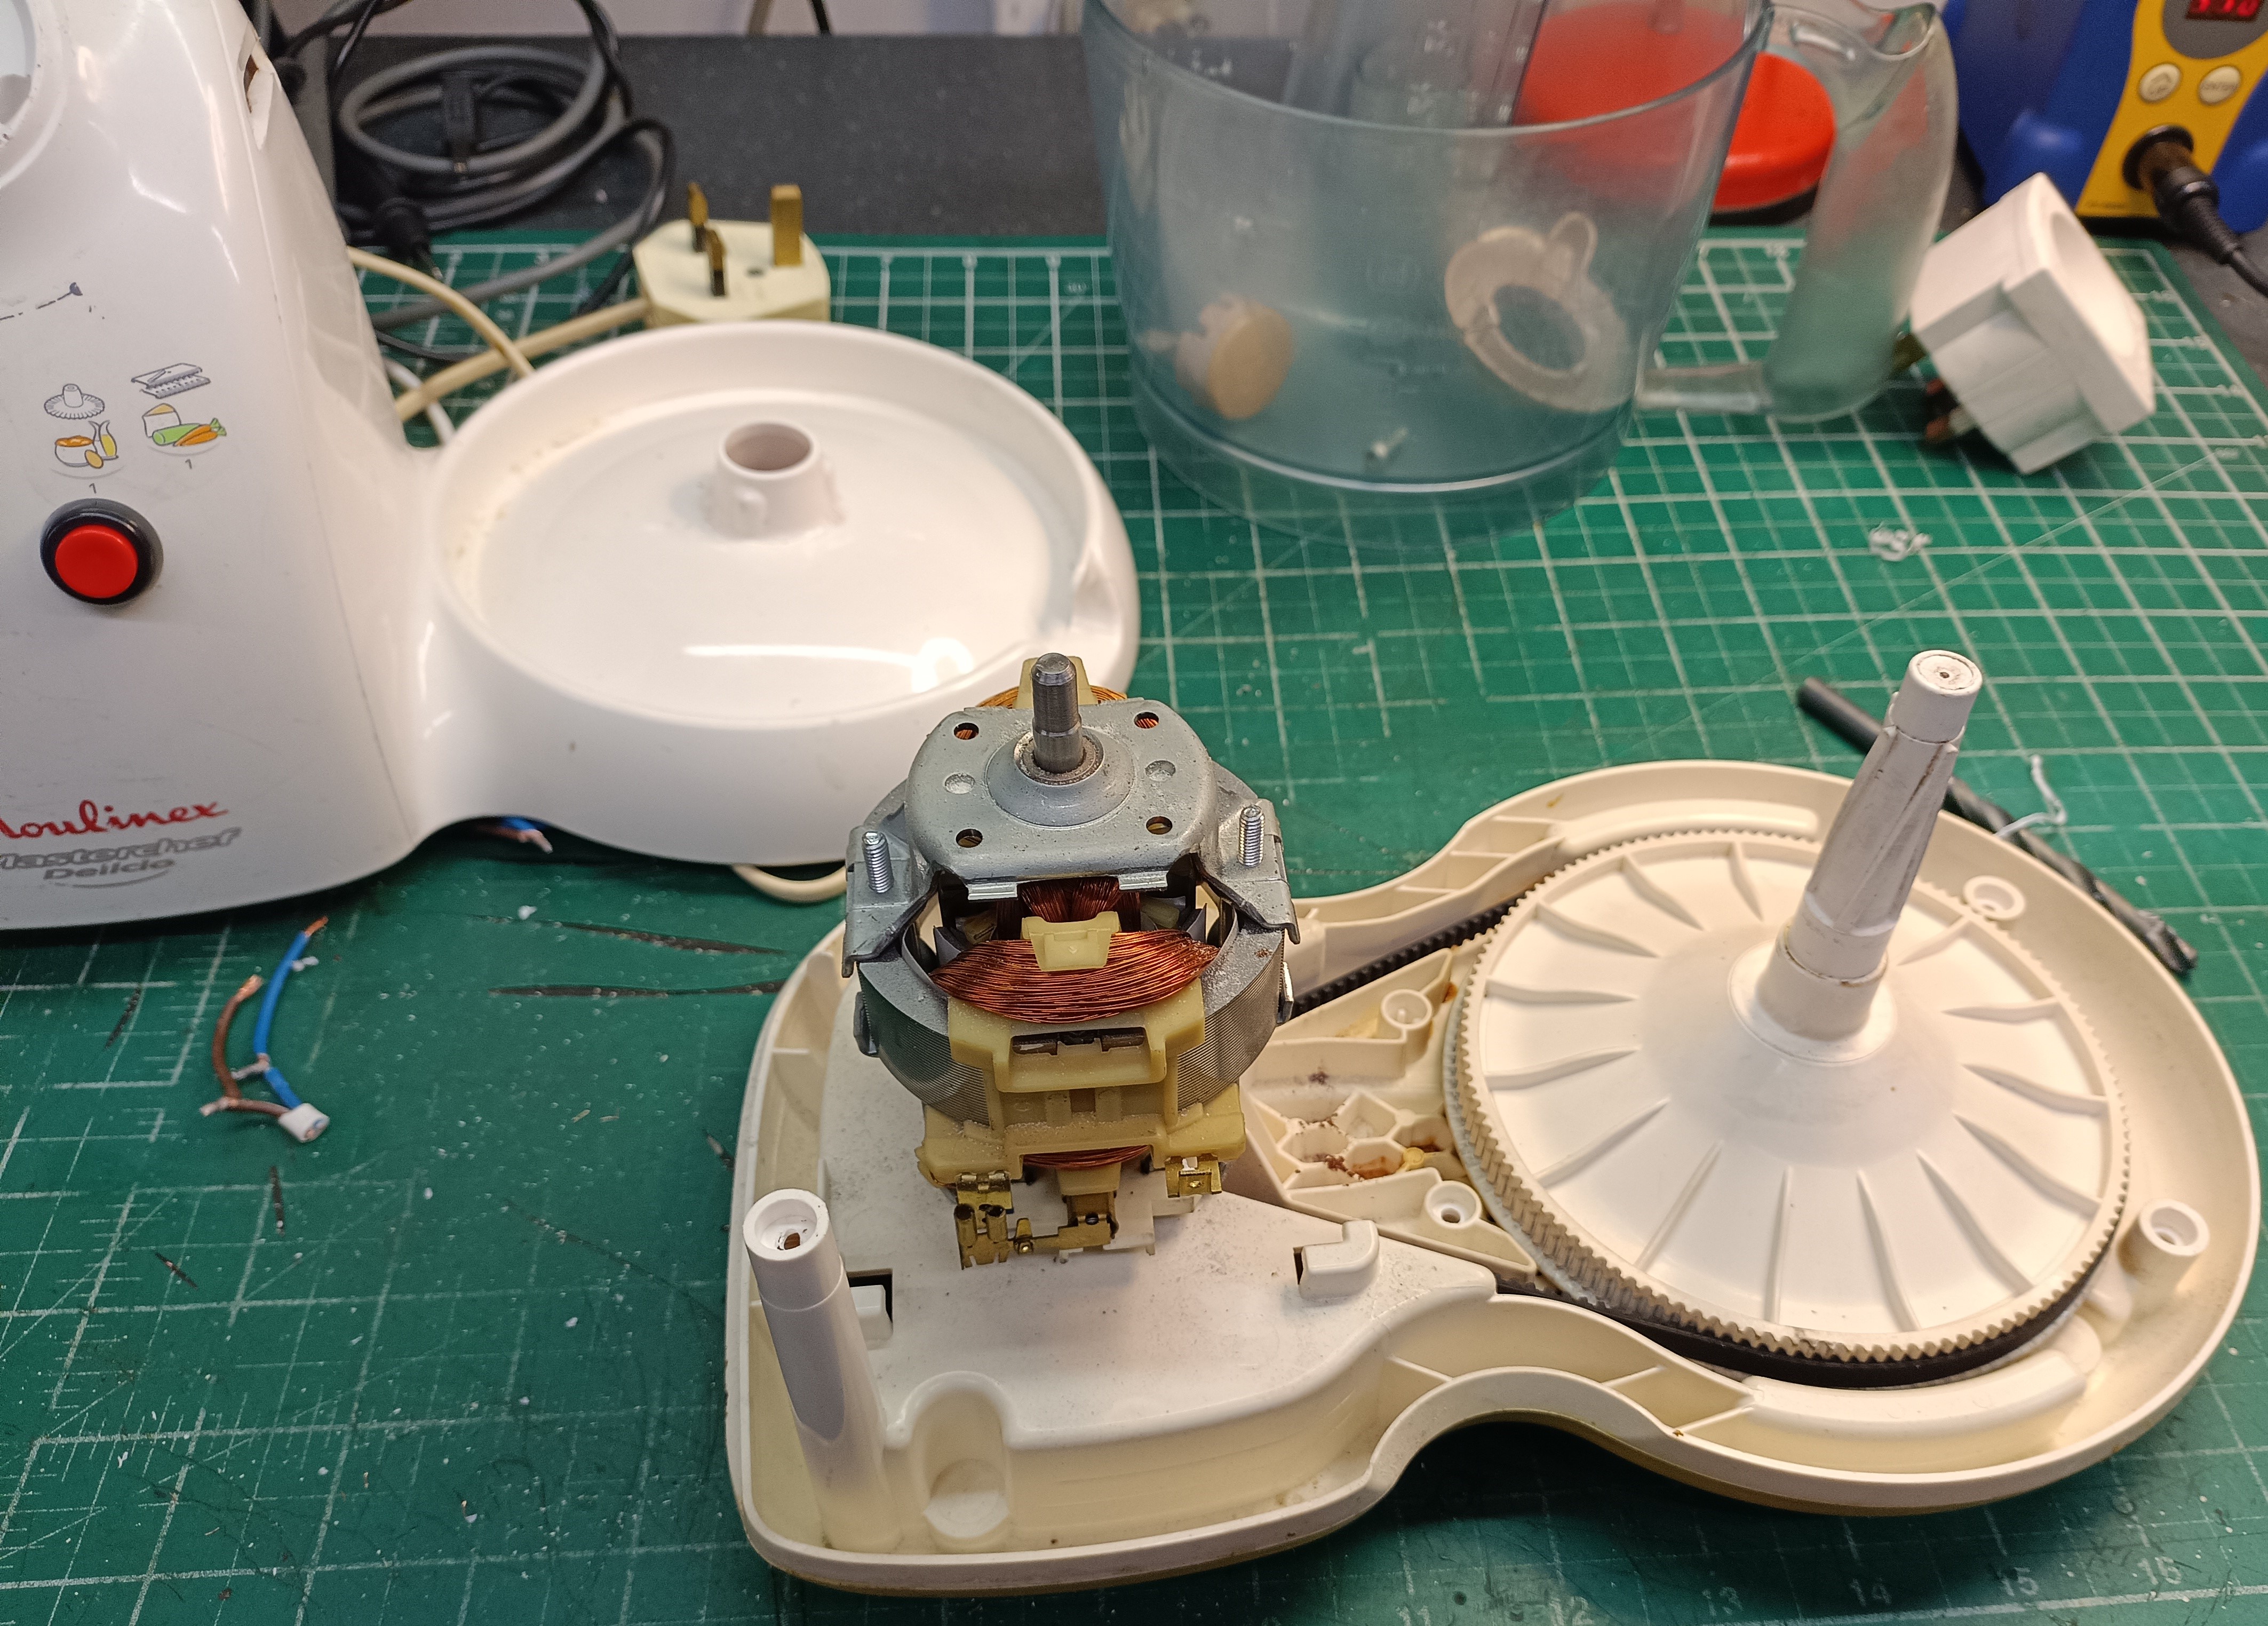
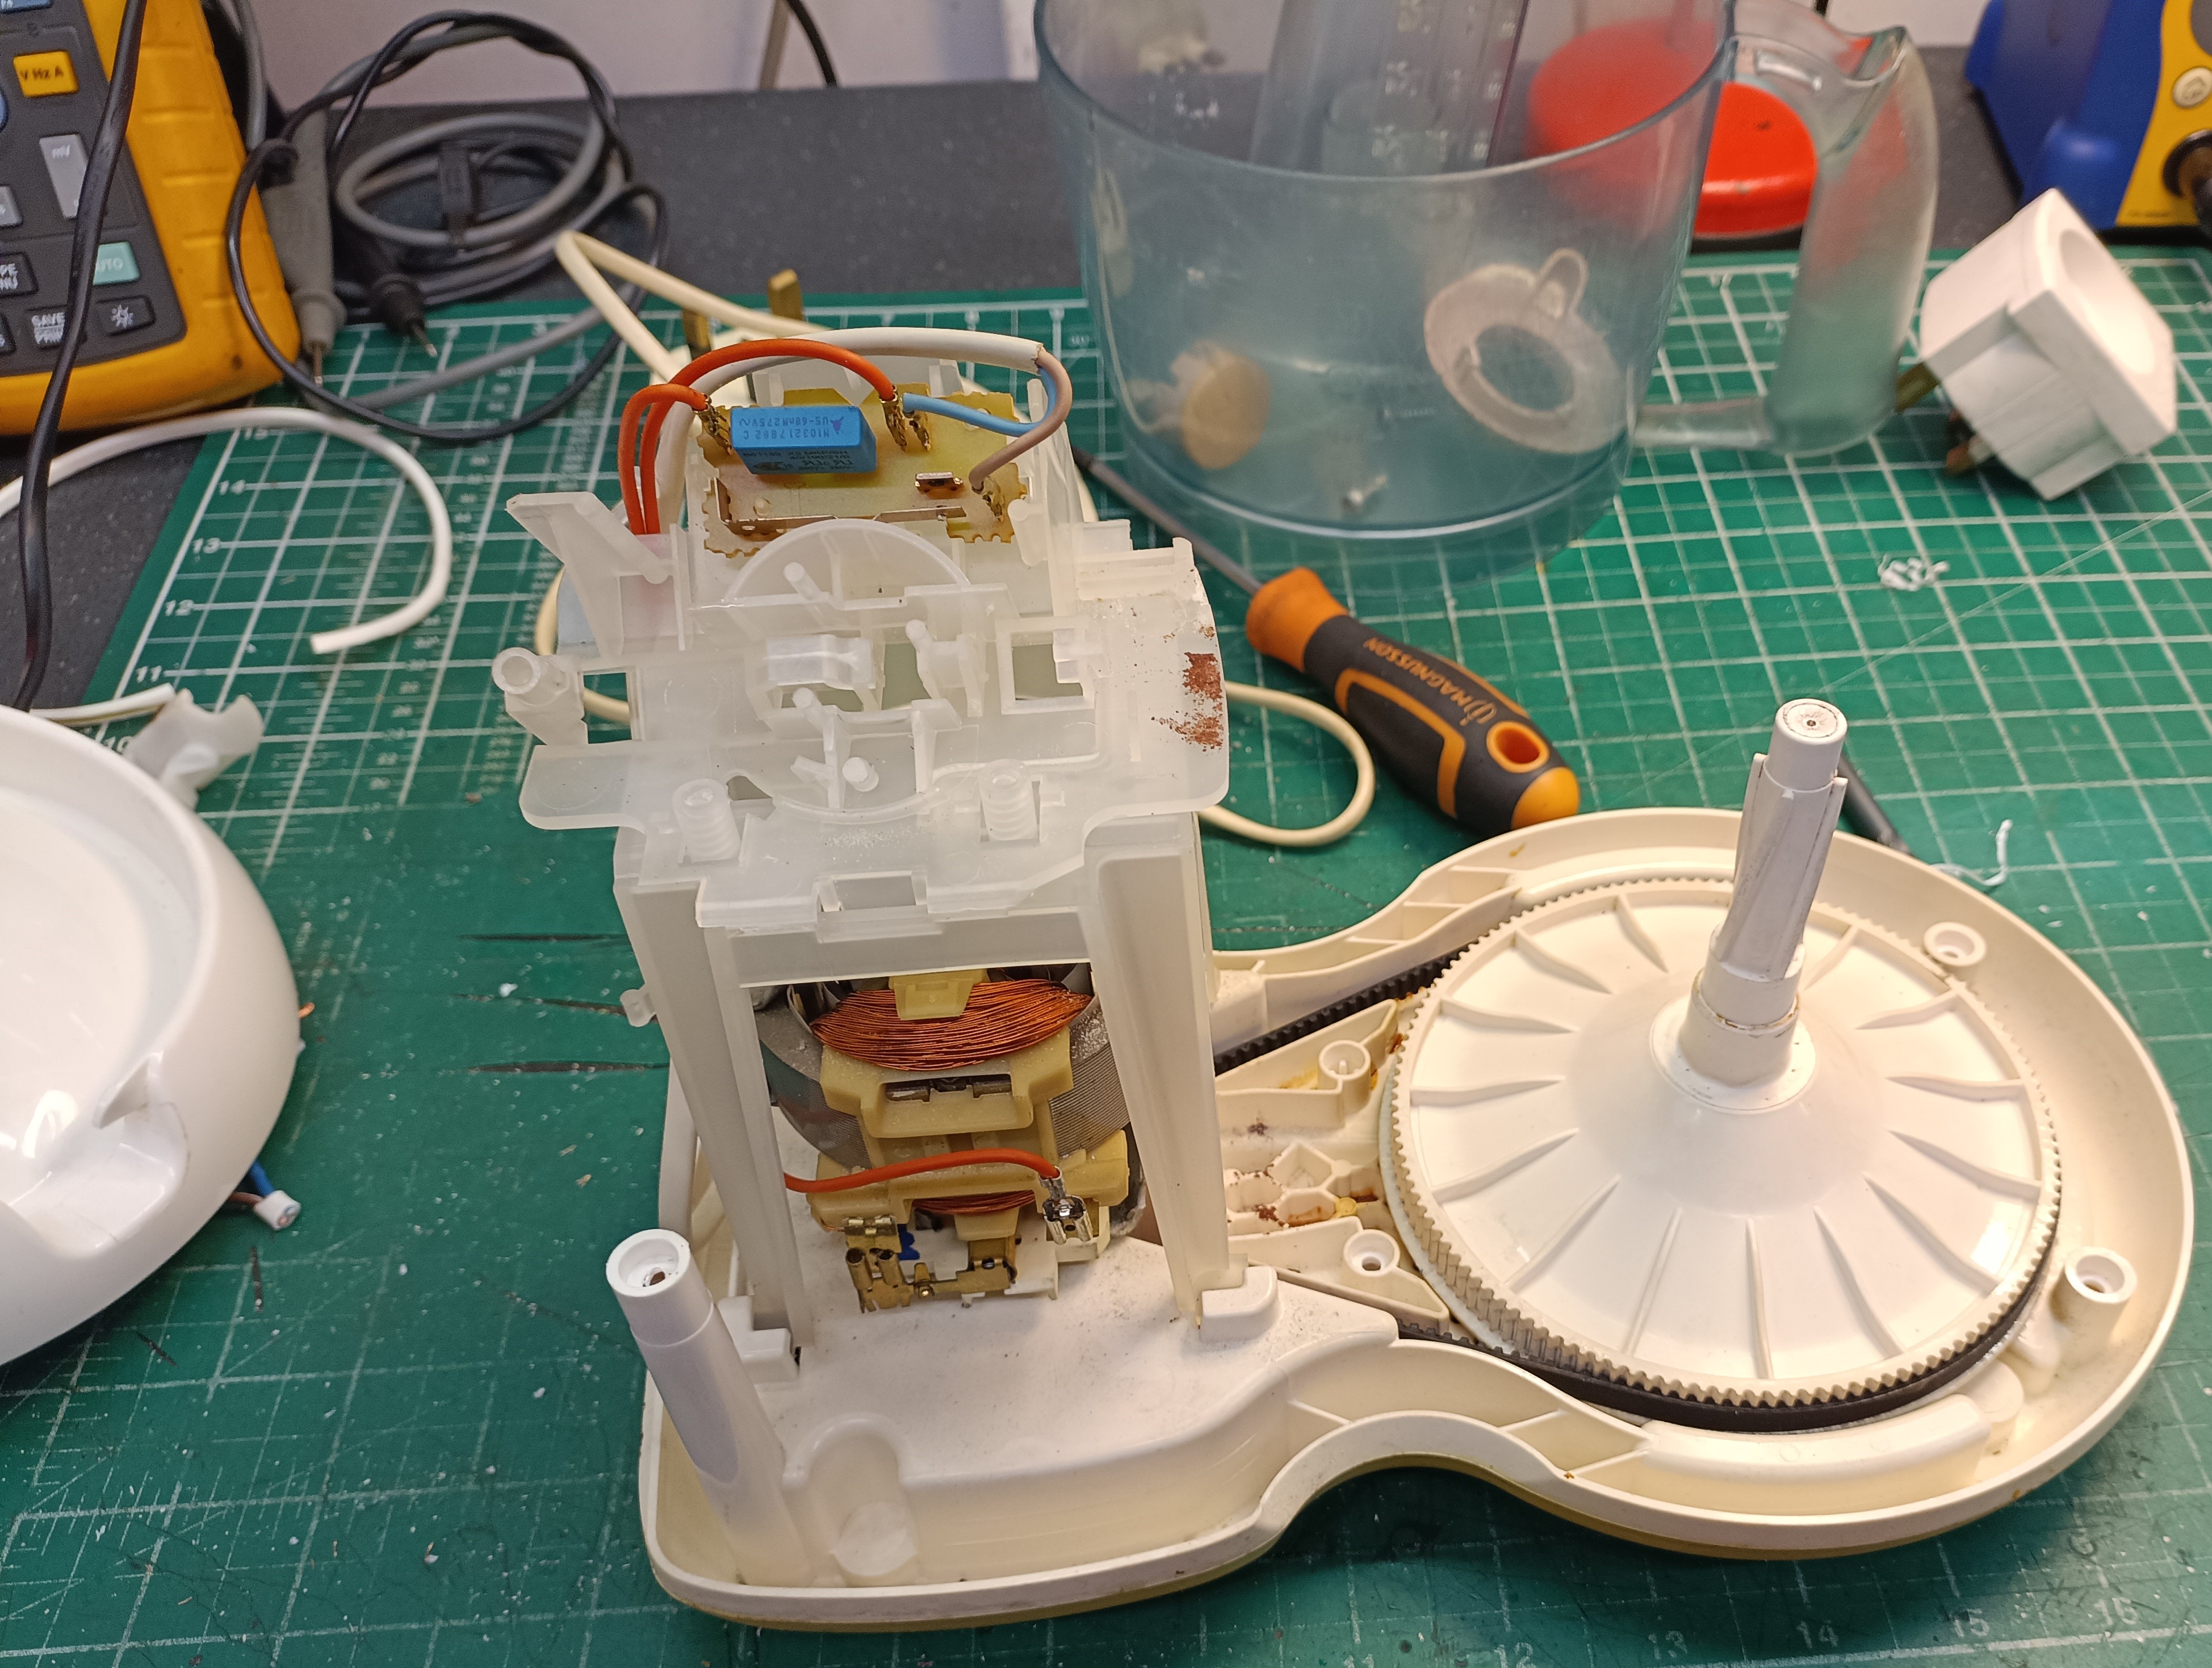
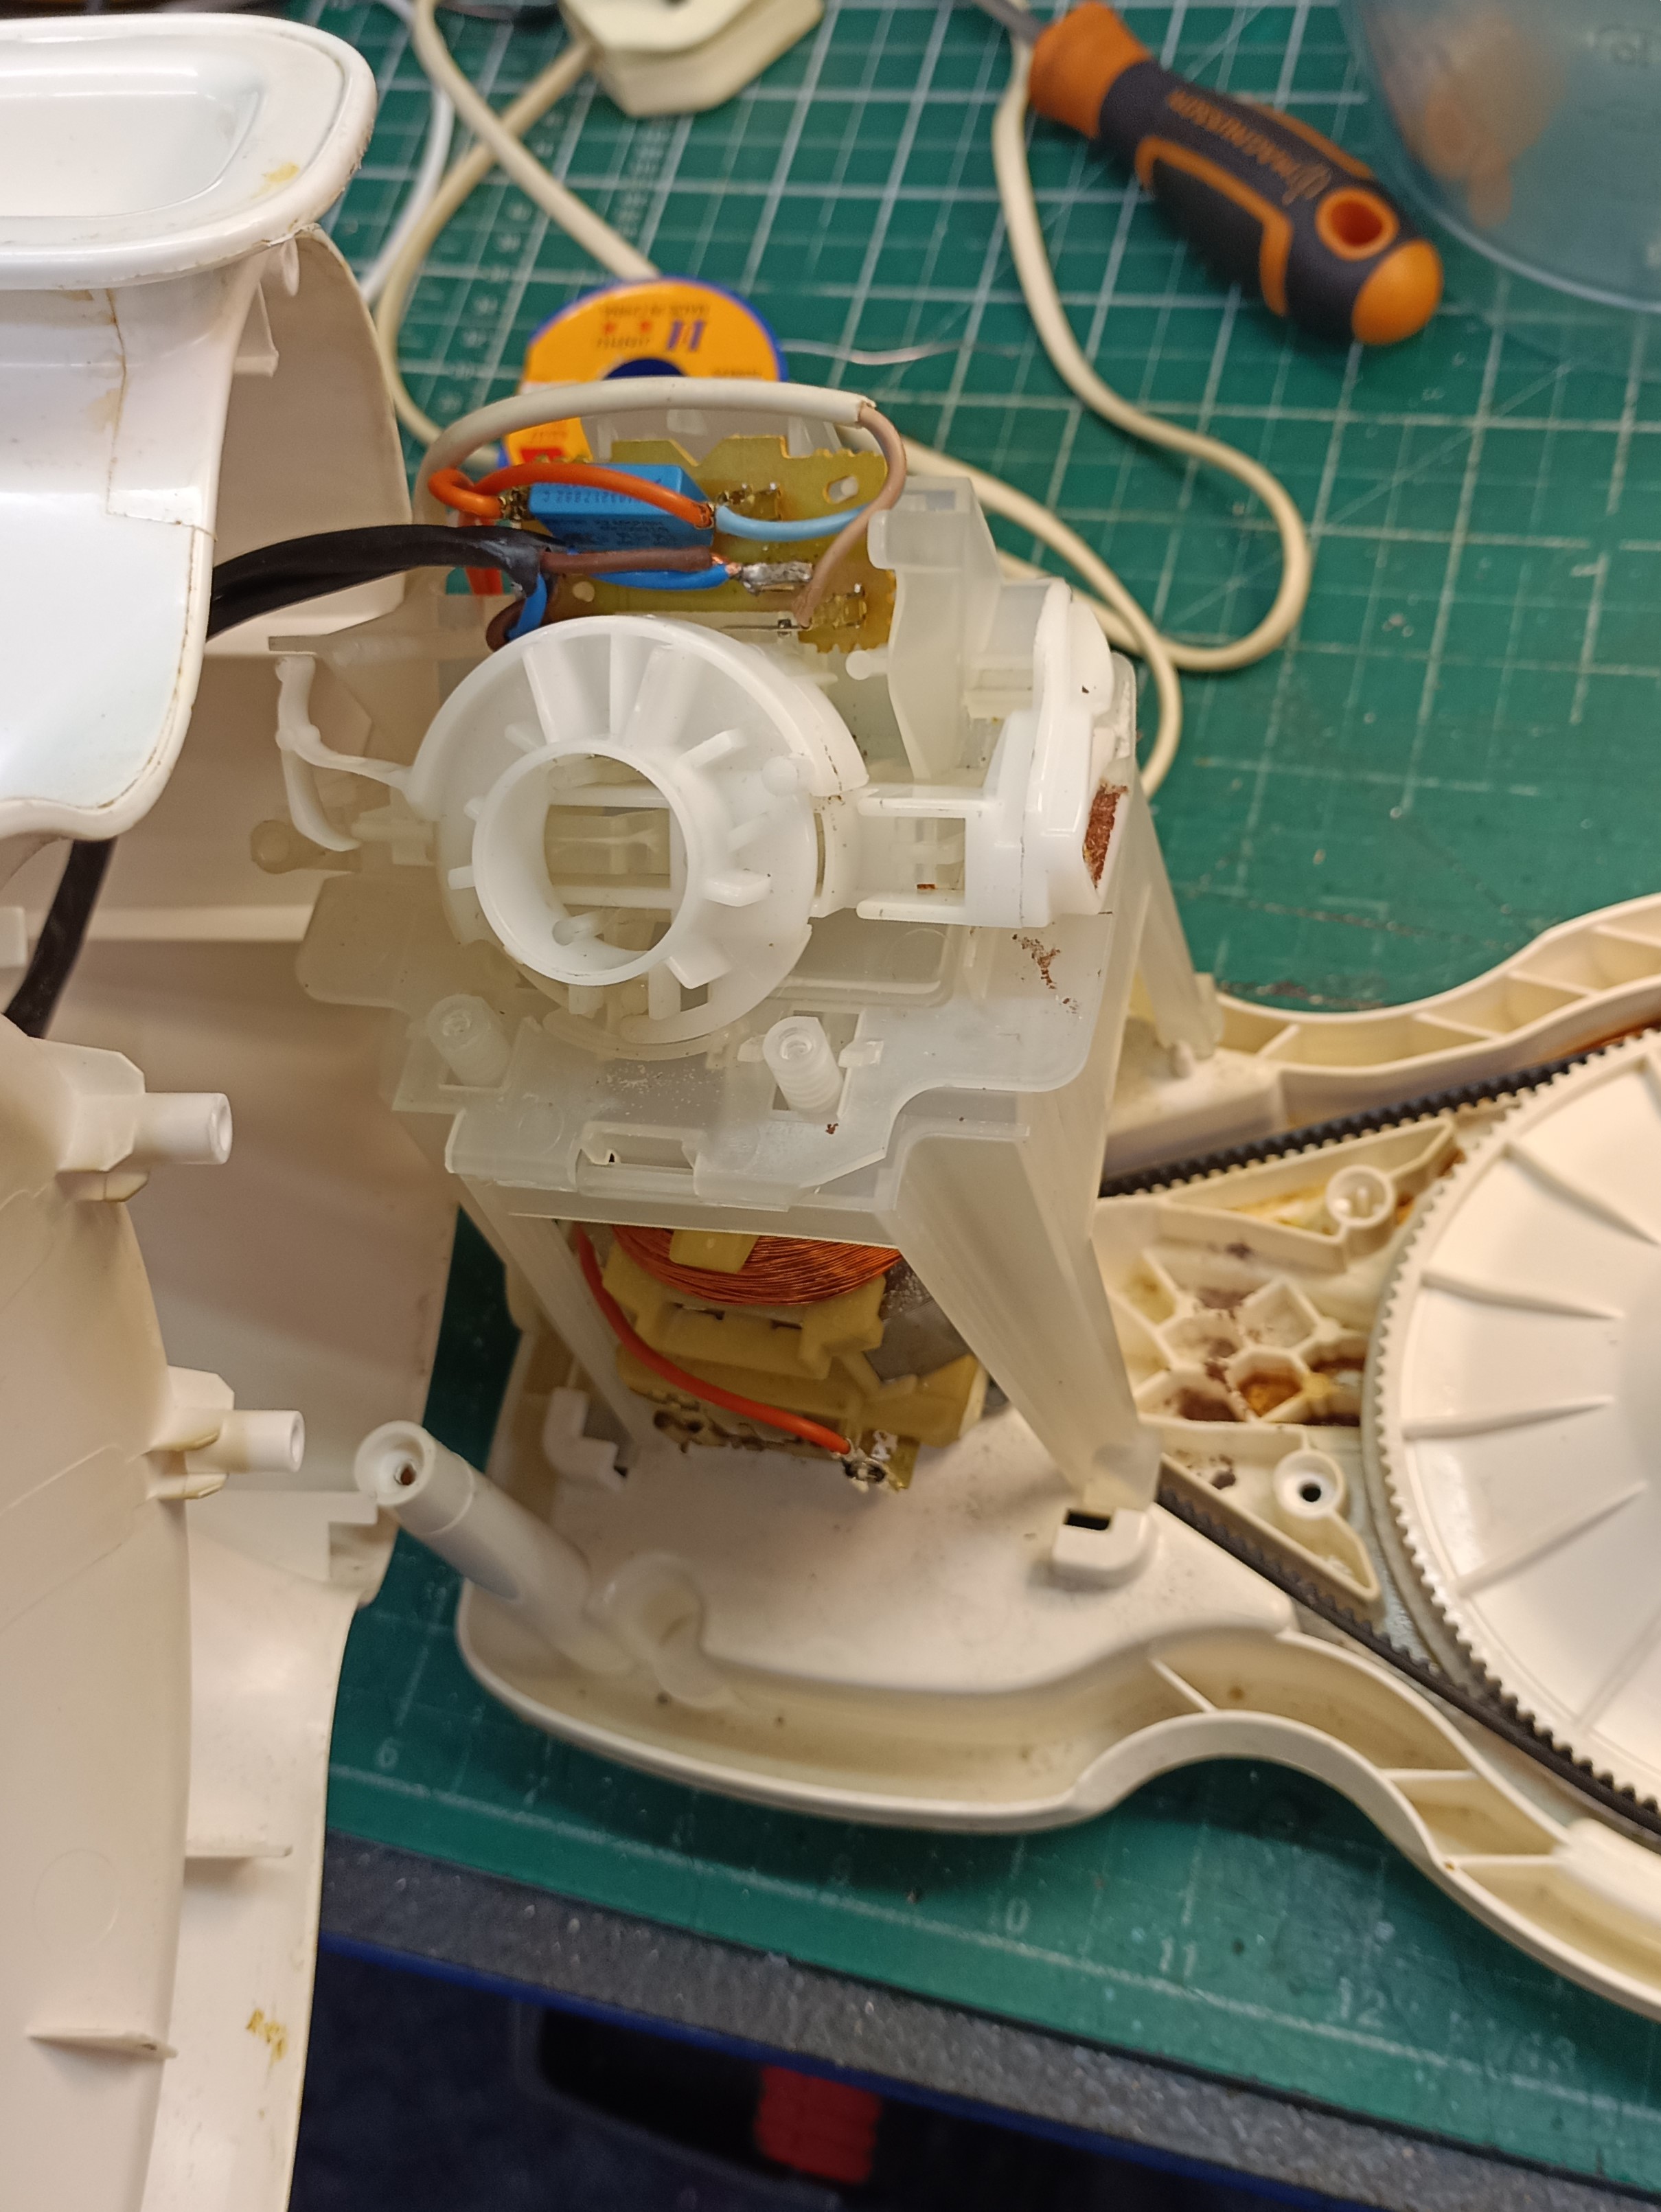

I won’t describe the repair in detail, suffice to say that I found a suitable location for the new switches in the machines’ chassis, drilled out the holes and then fitted them in place with the nuts supplied in the switches’ kit. No special tools required for this job really, just a selection of standard screwdrivers, some 0.75mm wire, heat shrink, cutters and a 12mm drill bit. I already had some cable, I connected the new switches to the existing wiring harness, by-passing the original.
I was able to retain the original switches’ interlock by keeping the original switch in situ with a little epoxy resin. This ensured both safety and the original aesthetic. See what you think in the photos. I was quite pleased with it.
I completed the repair within an hour, which I almost forgot to report, included a wipe over and polish. And I managed it on only one cup of tea with a couple of my favourite ginger nuts. Oh, and I didn’t go over budget. Any chance of a Vicky sponge, mum?!